Kyocera TASKalfa 6501i 3501i/4501i/5501i/6501i/8001i Printer Driver User Guide - Page 46
Editing Quick Print Options, Profiles
 |
View all Kyocera TASKalfa 6501i manuals
Add to My Manuals
Save this manual to your list of manuals |
Page 46 highlights
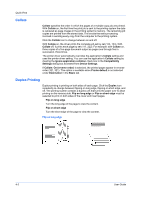
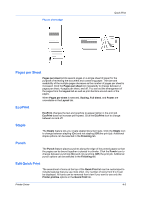
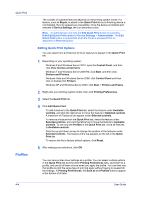
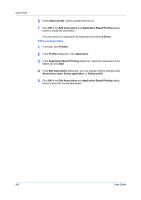
Quick Print Profiles 4-4 The number of available features depends on the printing system model. If a feature, such as Staple, is added to the Quick Print tab but a finishing device is not installed, the icon appears as unavailable. Once the device is installed and selected in Device Settings, the icon becomes active. Note: An administrator can hide the Edit Quick Print button by selecting Hide Edit Quick Print control in Device Settings > Administrator. The Edit Quick Print button is unavailable when the driver is accessed from an application's Print dialog box. Editing Quick Print Options You can select from a limited set of driver features to appear in the Quick Print tab. 1 Depending on your operating system: Windows 8 and Windows Server 2012: open the Control Panel, and then click View devices and printers. Windows 7 and Windows Server 2008 R2: click Start, and then click Devices and Printers. Windows Vista and Windows Server 2008: click Control Panel and then click or double-click Printers. Windows XP and Windows Server 2003: click Start > Printers and Faxes. 2 Right-click your printing system model, then click Printing Preferences. 3 Select the Quick Print tab. 4 Click Edit Quick Print. To add a feature to the Quick Print tab, select the feature under Available controls, and click the right arrow to move the feature to Selected controls. A maximum of 5 features can appear under Selected controls. To remove a feature from the Quick Print tab, select the feature under Selected controls, and click the left arrow to move the feature to Available controls. To use only the Profiles in the Quick Print tab, move all features to Available controls. Click the up and down arrows to change the position of the features under Selected controls. The feature at the top appears on the left in the Quick Print tab. To restore the list to factory default options, click Reset. 5 After making your selections, click OK. You can save printer driver settings as a profile. You can select multiple options in the Quick Print tab and the other Printing Preferences tabs, save them to a profile, and use all of them at once when you apply the profile. You can then use that profile to print the same type of print job again without having to reselect all the settings. In Printing Preferences, the Save as and Profiles buttons appear at the bottom of all tabs. User Guide
-
 1
1 -
2
-
3
-
4
-
5
-
6
-
7
-
8
-
9
-
10
-
11
-
12
-
13
-
14
-
15
-
16
-
17
-
18
-
19
-
20
-
21
-
22
-
23
-
24
-
25
-
26
-
27
-
28
-
29
-
30
-
31
-
32
-
33
-
34
-
35
-
36
-
37
-
38
-
39
-
40
-
 41
41 -
 42
42 -
 43
43 -
 44
44 -
 45
45 -
 46
46 -
 47
47 -
 48
48 -
 49
49 -
 50
50 -
 51
51 -
52
-
53
-
54
-
55
-
56
-
57
-
58
-
59
-
60
-
61
-
62
-
63
-
64
-
65
-
66
-
67
-
68
-
69
-
70
-
71
-
72
-
73
-
74
-
75
-
76
-
77
-
78
-
79
-
80
-
81
-
82
-
83
-
84
-
85
-
86
-
87
-
88
-
89
-
90
-
91
-
92
-
93
-
94
-
95
-
96
-
97
-
98
-
99
-
100
-
101
-
102
-
103
-
104
-
105
-
106
-
107
-
108
-
109
-
110
-
111
 |
 |