Lenovo 646001U Troubleshooting Guide - Page 49
both edges of the socket at the same time. Be sure to save the old
 |
UPC - 883609791858
View all Lenovo 646001U manuals
Add to My Manuals
Save this manual to your list of manuals |
Page 49 highlights
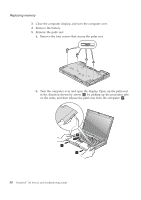
Replacing memory c. Detach the connector of the palm rest cable by pulling the tab with your fingers. Now the palm rest has been removed. 6. If two SO-DIMMs are already installed in the memory slot, remove one of them to make room for the new one by pressing out on the latches on both edges of the socket at the same time. Be sure to save the old SO-DIMM for future use. Chapter 5. Upgrading and replacing devices 39
-
 1
1 -
2
-
3
-
4
-
5
-
6
-
7
-
8
-
9
-
10
-
11
-
12
-
13
-
14
-
15
-
16
-
17
-
18
-
19
-
20
-
21
-
22
-
23
-
24
-
25
-
26
-
27
-
28
-
29
-
30
-
31
-
32
-
33
-
34
-
35
-
36
-
37
-
38
-
39
-
40
-
41
-
42
-
43
-
 44
44 -
 45
45 -
 46
46 -
 47
47 -
 48
48 -
 49
49 -
 50
50 -
 51
51 -
 52
52 -
 53
53 -
 54
54 -
55
-
56
-
57
-
58
-
59
-
60
-
61
-
62
-
63
-
64
-
65
-
66
-
67
-
68
-
69
-
70
-
71
-
72
-
73
-
74
-
75
-
76
-
77
-
78
-
79
-
80
-
81
-
82
-
83
-
84
 |
 |
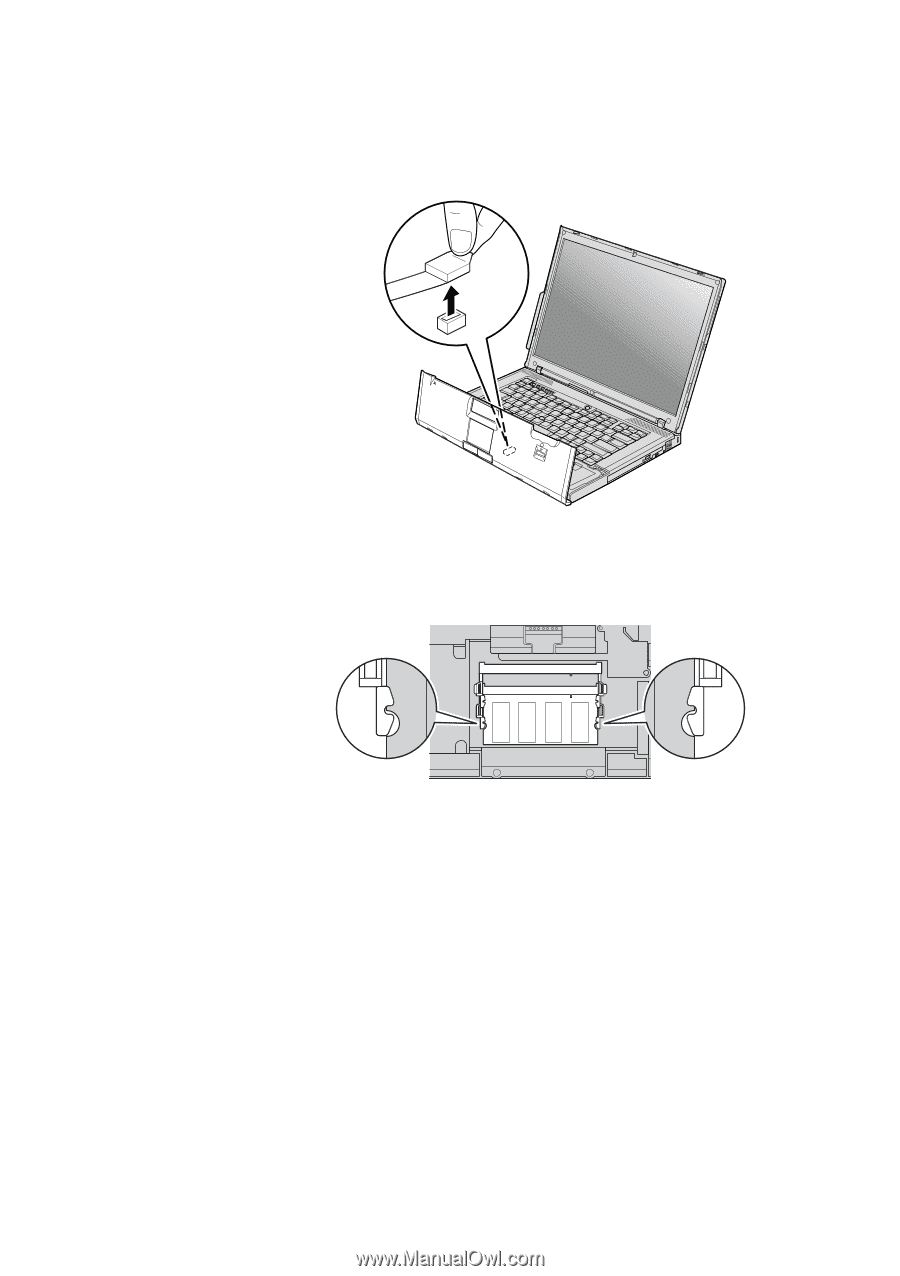
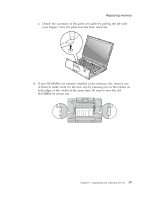
c.
Detach the connector of the palm rest cable by pulling the tab with
your fingers. Now the palm rest has been removed.
6.
If two SO-DIMMs are already installed in the memory slot, remove one
of them to make room for the new one by pressing out on the latches on
both edges of the socket at the same time. Be sure to save the old
SO-DIMM for future use.
Replacing memory
Chapter 5. Upgrading and replacing devices
39