Lexmark C748 Quick Reference - Page 14
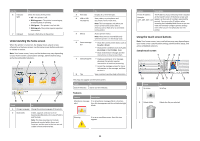
Portrait Width, Portrait Height, CAUTION-POTENTIAL INJURY, Notes
 |
View all Lexmark C748 manuals
Add to My Manuals
Save this manual to your list of manuals |
Page 14 highlights
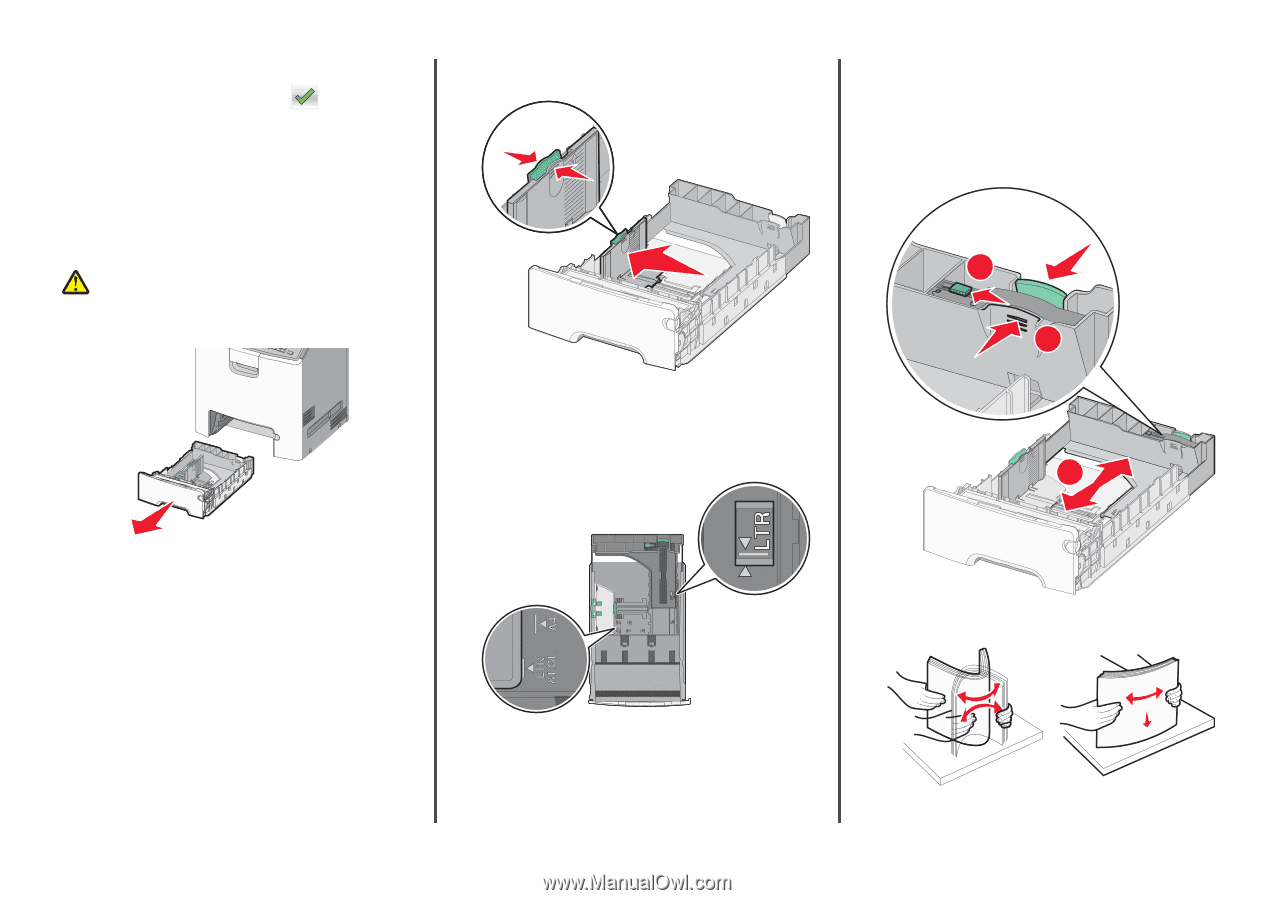
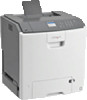
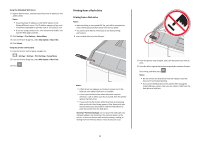
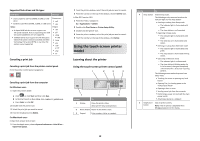
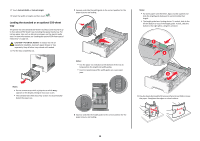
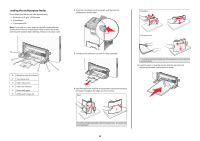
2 Touch Portrait Width or Portrait Height. 3 Select the width or height, and then touch . Loading the standard or an optional 550‑sheet tray The printer has one standard 550‑sheet tray (Tray 1) and may have up to four optional 550‑sheet trays including the special media tray. For narrow paper sizes such as A6 and envelopes, use the special media tray. For more information, see "Loading the optional 550‑sheet special media tray" on page 15. CAUTION-POTENTIAL INJURY: To reduce the risk of equipment instability, load each paper drawer or tray separately. Keep all other trays closed until needed. 1 Pull the tray completely out. 2 Squeeze and slide the width guide to the correct position for the paper size you are loading. Notes: • Use the paper size indicators at the bottom of the tray to help position the length and width guides. • Incorrect positioning of the width guide can cause paper jams. Notes: • For some paper sizes like letter, legal, and A4, squeeze and slide the length guide backward to accommodate their length. • The length guide has a locking device. To unlock, slide to the left the button on top of the length guide. To lock, slide the button to the right when a length is selected. 1 2 3 Notes: • Do not remove trays while a job prints or while Busy appears on the display. Doing so may cause a jam. • The standard 550‑sheet tray (Tray 1) does not automatically detect the paper size. 4 Flex the sheets back and forth to loosen them. Do not fold or crease the paper. Straighten the edges on a level surface. 3 Squeeze and slide the length guide to the correct position for the paper size you are loading. 14
-
 1
1 -
2
-
3
-
4
-
5
-
6
-
7
-
8
-
 9
9 -
 10
10 -
 11
11 -
 12
12 -
 13
13 -
 14
14 -
 15
15 -
 16
16 -
 17
17 -
 18
18 -
 19
19 -
20
-
21
-
22
-
23
-
24
-
25
-
26
-
27
 |
 |