Lexmark C748 Quick Reference - Page 27
x paper jam, paper jam
 |
View all Lexmark C748 manuals
Add to My Manuals
Save this manual to your list of manuals |
Page 27 highlights
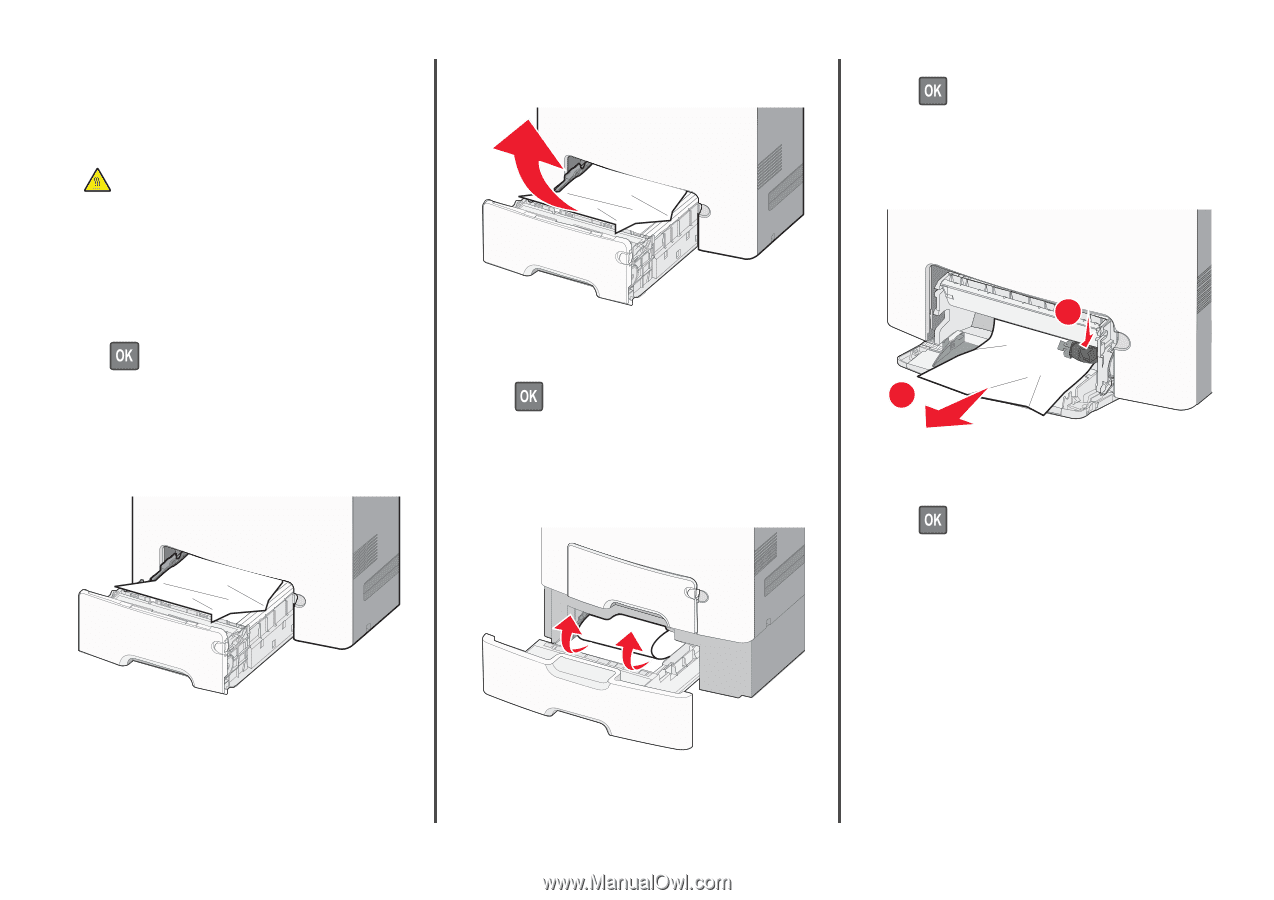
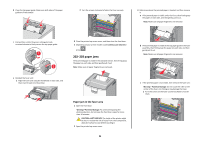
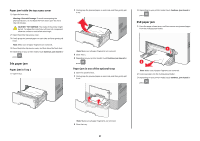
Paper jam inside the top access cover 1 Open the front door. Warning-Potential Damage: To avoid overexposing the photoconductors, do not leave the front doors open for more than 10 minutes. CAUTION-HOT SURFACE: The inside of the printer might be hot. To reduce the risk of injury from a hot component, allow the surface to cool before touching it. 2 Open the printer top access cover. 3 Firmly grasp the jammed paper on each side, and then gently pull it out. Note: Make sure all paper fragments are removed. 4 Close the printer top access cover, and then close the front door. 5 Depending on your printer model, touch Continue, jam cleared or press . 24x paper jam Paper jam in Tray 1 1 Open Tray 1. 2 Firmly grasp the jammed paper on each side, and then gently pull it out. Note: Make sure all paper fragments are removed. 3 Close Tray 1. 4 Depending on your printer model, touch Continue, jam cleared or press . Paper jam in one of the optional trays 1 Open the specified tray. 2 Firmly grasp the jammed paper on each side, and then gently pull it out. 4 Depending on your printer model, touch Continue, jam cleared or press . 250 paper jam 1 Press the paper release lever, and then remove any jammed pages from the multipurpose feeder. 1 2 Note: Make sure all paper fragments are removed. 2 Load new paper into the multipurpose feeder. 3 Depending on your printer model, touch Continue, jam cleared or press . Note: Make sure all paper fragments are removed. 3 Close the tray. 27
-
 1
1 -
2
-
3
-
4
-
5
-
6
-
7
-
8
-
9
-
10
-
11
-
12
-
13
-
14
-
15
-
16
-
17
-
18
-
19
-
20
-
21
-
 22
22 -
 23
23 -
 24
24 -
 25
25 -
 26
26 -
 27
27
 |
 |