Lexmark C748 Quick Reference - Page 6
Preprinted paper orientation for one, sided and, sided printing.
 |
View all Lexmark C748 manuals
Add to My Manuals
Save this manual to your list of manuals |
Page 6 highlights
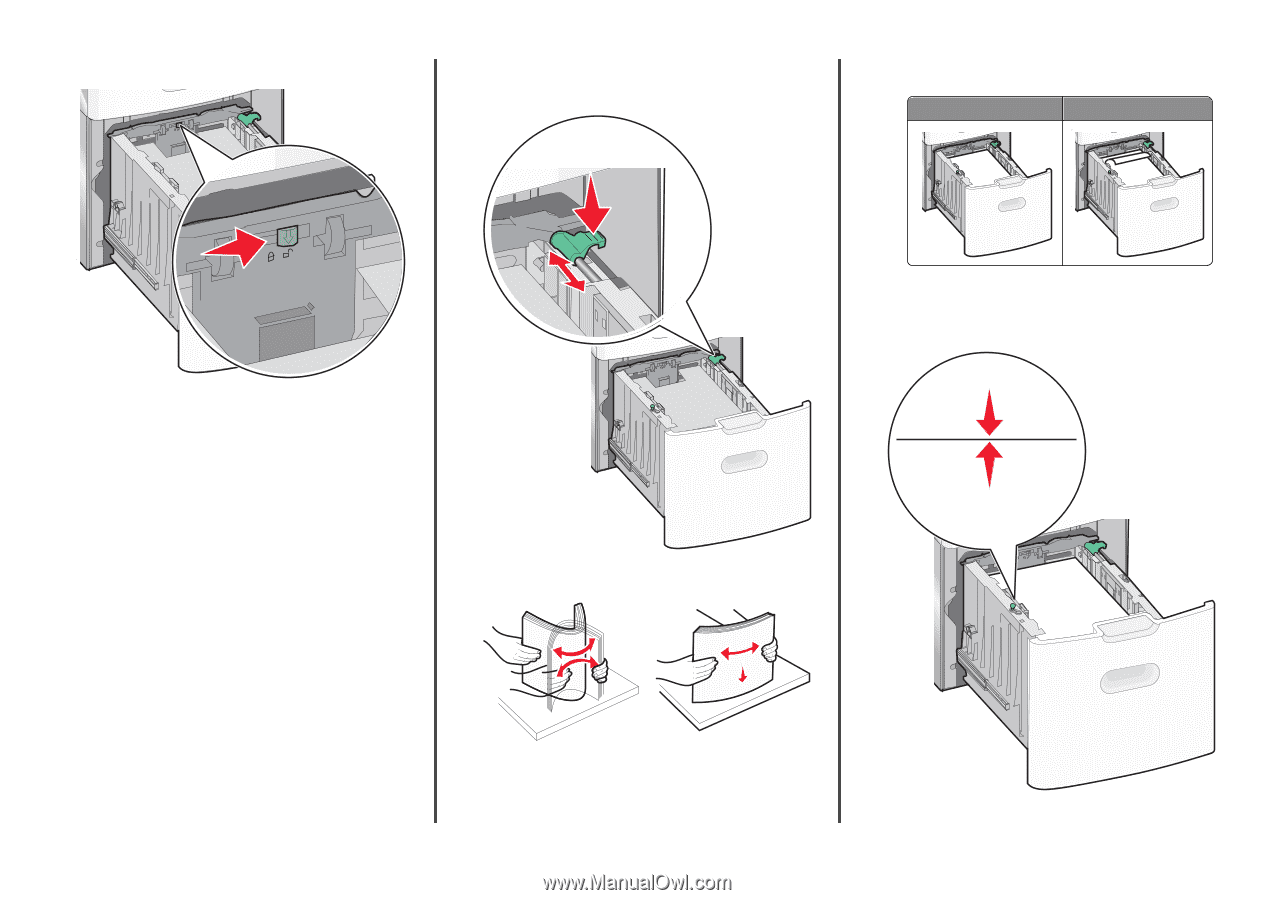
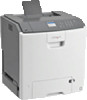
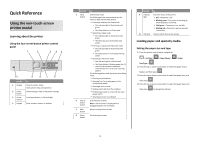
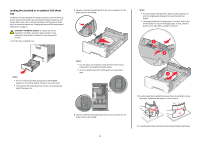
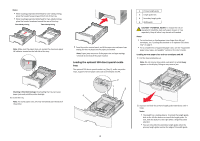
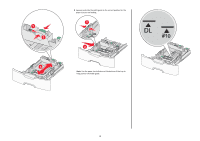
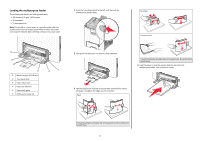
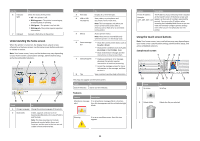
3 Push the length guide button to the right to unlock the length guide. 4 Push the length guide release latch to raise the length guide. Slide the guide to the correct position for the paper size you are loading, and then lock the guide. Preprinted paper orientation for one‑sided and two‑sided printing. One‑sided printing Two‑sided printing LETTERHEAD LETTERHEAD • Make sure paper does not exceed the maximum paper fill indicator located on the side of the tray. Warning-Potential Damage: Overloading the tray may cause paper jams and possible printer damage. 5 Flex the sheets back and forth to loosen them. Do not fold or crease the paper. Straighten the edges on a level surface. 6 Load the paper stack: • Printable side faceup for one‑sided printing • Printable side facedown for two‑sided printing 6 7 Insert the tray.
-
 1
1 -
 2
2 -
 3
3 -
 4
4 -
 5
5 -
 6
6 -
 7
7 -
 8
8 -
 9
9 -
 10
10 -
 11
11 -
 12
12 -
13
-
14
-
15
-
16
-
17
-
18
-
19
-
20
-
21
-
22
-
23
-
24
-
25
-
26
-
27
 |
 |