Lexmark C748 Quick Reference - Page 26
Continue, jam cleared
 |
View all Lexmark C748 manuals
Add to My Manuals
Save this manual to your list of manuals |
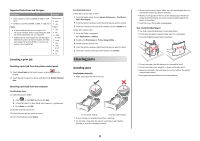
Page 26 highlights
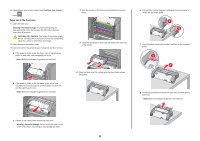
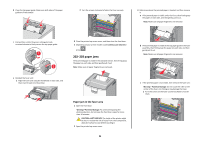
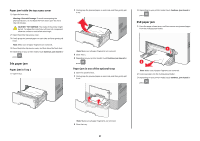
2 Using the handholds on each side, lift and pull the fuser out of the printer. d Place the fuser on a flat surface with the blue thumb screws facing you. e Pull and then rotate the green rectangular knob clockwise to unlock the top paper guide. 1 2 f Press the green arrow tab to the left, and then lift the top paper guide. 1 2 g Firmly grasp the jammed paper on each side, and then gently pull it out. Note: Make sure all paper fragments are removed. i Pull and then rotate the green rectangular knob counterclockwise to firmly secure the top paper guide. 1 2 j Reinstall the fuser unit: 1 Align the fuser unit using the handholds on each side, and then insert it back into the printer. 2 Turn the screws clockwise to fasten the fuser securely. h Close the top paper guide. Make sure both sides of the paper guide are firmly seated. 4 Close the printer top access cover, and then close the front door. 5 Depending on your printer model, touch Continue, jam cleared or press . 26
-
 1
1 -
2
-
3
-
4
-
5
-
6
-
7
-
8
-
9
-
10
-
11
-
12
-
13
-
14
-
15
-
16
-
17
-
18
-
19
-
20
-
 21
21 -
 22
22 -
 23
23 -
 24
24 -
 25
25 -
 26
26 -
 27
27
 |
 |
