Lexmark C748 User's Guide - Page 78
Configuring printer hard disk encryption
 |
View all Lexmark C748 manuals
Add to My Manuals
Save this manual to your list of manuals |
Page 78 highlights
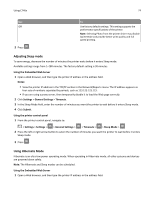
Using C746x 78 3 Press the up or down arrow button until Wipe Disk appears, and then select one of the following: • Wipe disk (fast)-This lets you overwrite the disk with all zeroes in a single pass. • Wipe disk (secure)-This lets you overwrite the disk with random bit patterns several times, followed by a verification pass. A secure overwrite is compliant with the DoD 5220.22‑M standard for securely erasing data from a hard disk. Highly confidential information should be wiped using this method. 4 Press the up or down arrow button until Yes appears, and then proceed with disk wiping. A status bar will indicate the progress of the disk wiping task. Notes: • A status bar will indicate the progress of the disk wiping task. • Disk wiping can take from several minutes to more than an hour, during which the printer will be unavailable for other user tasks. 5 Navigate to: Back > Exit Config Menu The printer will perform a power‑on reset, and then return to normal operating mode. Configuring printer hard disk encryption Enable the hard disk encryption to prevent loss of sensitive data in the event the printer or its hard disk is stolen. Note: Some printer models may not have a printer hard disk installed. Using the Embedded Web Server 1 Open a Web browser, and then type the printer IP address in the address field. Notes: • View the printer IP address in the TCP/IP section in the Network/Reports menu. The IP address appears as four sets of numbers separated by periods, such as 123.123.123.123. • If you are using a proxy server, then temporarily disable it to load the Web page correctly. 2 Click Settings > Security > Disk Encryption. Note: Disk Encryption appears in the Security Menu only when a formatted, non‑defective printer hard disk is installed. 3 From the Disk encryption menu, select Enable. Notes: • Enabling disk encryption will erase the content of the printer hard disk. • Disk encryption can take from several minutes to more than an hour, during which the printer will be unavailable for other user tasks. Using the printer control panel 1 Turn off the printer. 2 Hold down 2 and 6 while turning the printer on. Release the buttons only when the screen with the progress bar appears. The printer performs a power-on sequence, and then the Configuration menu appears. When the printer is fully powered up, the printer displays a list of functions.
-
 1
1 -
2
-
3
-
4
-
5
-
6
-
7
-
8
-
9
-
10
-
11
-
12
-
13
-
14
-
15
-
16
-
17
-
18
-
19
-
20
-
21
-
22
-
23
-
24
-
25
-
26
-
27
-
28
-
29
-
30
-
31
-
32
-
33
-
34
-
35
-
36
-
37
-
38
-
39
-
40
-
41
-
42
-
43
-
44
-
45
-
46
-
47
-
48
-
49
-
50
-
51
-
52
-
53
-
54
-
55
-
56
-
57
-
58
-
59
-
60
-
61
-
62
-
63
-
64
-
65
-
66
-
67
-
68
-
69
-
70
-
71
-
72
-
 73
73 -
 74
74 -
 75
75 -
 76
76 -
 77
77 -
 78
78 -
 79
79 -
 80
80 -
 81
81 -
 82
82 -
 83
83 -
84
-
85
-
86
-
87
-
88
-
89
-
90
-
91
-
92
-
93
-
94
-
95
-
96
-
97
-
98
-
99
-
100
-
101
-
102
-
103
-
104
-
105
-
106
-
107
-
108
-
109
-
110
-
111
-
112
-
113
-
114
-
115
-
116
-
117
-
118
-
119
-
120
-
121
-
122
-
123
-
124
-
125
-
126
-
127
-
128
-
129
-
130
-
131
-
132
-
133
-
134
-
135
-
136
-
137
-
138
-
139
-
140
-
141
-
142
-
143
-
144
-
145
-
146
-
147
-
148
-
149
-
150
-
151
-
152
-
153
-
154
-
155
-
156
-
157
-
158
-
159
-
160
-
161
-
162
-
163
-
164
-
165
-
166
-
167
-
168
-
169
-
170
-
171
-
172
-
173
-
174
-
175
-
176
-
177
-
178
-
179
-
180
-
181
-
182
-
183
-
184
-
185
-
186
-
187
-
188
-
189
-
190
-
191
-
192
-
193
-
194
-
195
-
196
-
197
-
198
-
199
-
200
-
201
-
202
-
203
-
204
-
205
-
206
-
207
-
208
-
209
-
210
-
211
-
212
-
213
-
214
-
215
-
216
-
217
-
218
-
219
-
220
-
221
-
222
-
223
-
224
-
225
-
226
-
227
-
228
-
229
-
230
-
231
-
232
-
233
-
234
-
235
-
236
-
237
-
238
-
239
-
240
-
241
-
242
-
243
-
244
-
245
-
246
-
247
-
248
-
249
-
250
-
251
-
252
-
253
-
254
-
255
-
256
-
257
-
258
-
259
-
260
-
261
-
262
-
263
-
264
-
265
-
266
-
267
-
268
-
269
-
270
-
271
-
272
-
273
-
274
 |
 |
