Lexmark E238 User's Guide - Page 26
How to load the manual feeder, How to use the rear exit
 |
View all Lexmark E238 manuals
Add to My Manuals
Save this manual to your list of manuals |
Page 26 highlights
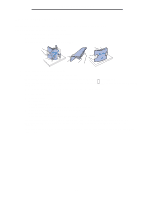
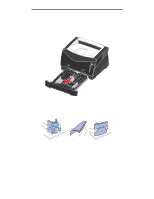
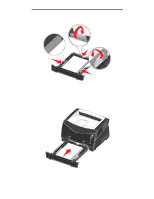
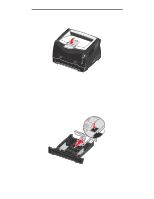
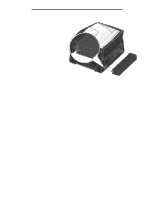
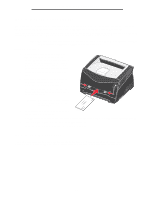
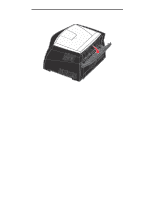
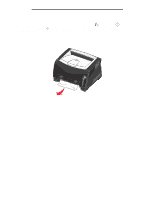
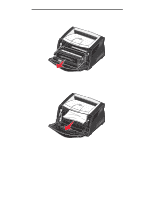
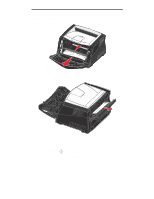
How to load the manual feeder How to load the manual feeder The manual feeder is located at the front of your printer and can only feed one sheet of print media at a time. You can use the manual feeder to make quick runs of paper types or sizes that are not currently loaded in the paper tray. For information on acceptable print media to use in the manual feeder, see What types of print media can be loaded? on page 16. Using only the specified print media helps prevent paper jams and print quality problems. Note: We recommend that you send your print job to the printer prior to loading the manual feeder. See How to manually feed a print job on page 31 for more information. To load the manual feeder: 1 Place a sheet of the selected print media, print side facing up, at the center of the manual feeder, but only to the point where its leading edge can contact the paper guides. Otherwise, the printer will engage the print media too soon and likely skew the print job. 2 Adjust the paper guides to the print media width. 3 Hold both sides of the print media close to the manual feeder, and push it into the printer until it automatically engages. There is a brief pause between the time the printer engages the print media and when it feeds into the printer. Warning: Do not force the print media into the feeder. Forcing the media causes jams. • Insert envelopes with the flap side down and with the stamp area as shown. • Hold transparencies by the edges, and avoid touching the print side. Oil from your fingers can affect print quality. • Load letterhead face-up, with the top of the sheet entering first. • If you experience problems with paper feed, turn the paper over. How to use the rear exit The single-sheet rear exit provides a straight-through paper path to help reduce curling and potential jams. This is especially useful for specialty media, such as transparencies, envelopes, labels, card stock, or index cards. 26
-
 1
1 -
2
-
3
-
4
-
5
-
6
-
7
-
8
-
9
-
10
-
11
-
12
-
13
-
14
-
15
-
16
-
17
-
18
-
19
-
20
-
 21
21 -
 22
22 -
 23
23 -
 24
24 -
 25
25 -
 26
26 -
 27
27 -
 28
28 -
 29
29 -
 30
30 -
 31
31 -
32
-
33
-
34
-
35
-
36
-
37
-
38
-
39
-
40
-
41
-
42
-
43
-
44
-
45
-
46
-
47
-
48
-
49
-
50
-
51
-
52
-
53
-
54
-
55
-
56
-
57
-
58
-
59
-
60
-
61
-
62
-
63
-
64
-
65
-
66
-
67
-
68
-
69
-
70
-
71
-
72
-
73
-
74
-
75
-
76
-
77
-
78
-
79
-
80
-
81
-
82
-
83
-
84
-
85
-
86
-
87
-
88
-
89
-
90
-
91
-
92
-
93
-
94
-
95
-
96
 |
 |
