Lexmark X5150 X5150 All-In-One Series User's Guide - Page 7
Understanding the operator panel, Stop/Clear - will not feed paper
 |
UPC - 734646570039
View all Lexmark X5150 manuals
Add to My Manuals
Save this manual to your list of manuals |
Page 7 highlights
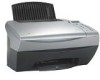
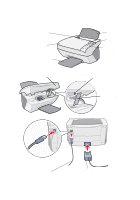
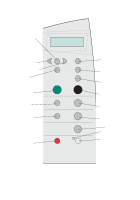
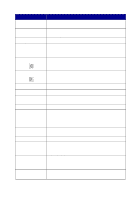
Use the: Display Operator panel Paper exit tray Paper guide Paper support Power supply Scanner lock Scanner support Scanner unit Top cover USB cable When you want to: Check the status of the All-In-One. Operate your All-In-One (attached to a computer or unattached). For more information, see page 4. Stack paper as it exits the All-In-One. Make sure paper feeds correctly into the All-In-One. Load paper in the All-In-One. Supply power to the All-In-One. Lock or unlock the scanner. Note: Unlock the scanner before use. Lock the scanner if you are moving your All-In-One. Keep the scanner unit open to change cartridges, unlock the scanner, or lock the scanner. • Change cartridges. • Unlock the scanner. • Lock the scanner. Note: Lift the scanner unit to do these things. Place an item on or remove an item from the scanner glass. Connect your All-In-One to a computer. Understanding the operator panel The operator panel buttons help you scan, copy, fax, and customize documents. A light indicates whether or not the All-In-One is on, and a display features the All-In-One status, messages, and menus. You can press and hold any button to scroll through a list of options on the display. The table on page 5 shows what each button does. Note: Button functions (except Stop/Clear) are disabled during printing, copying, and scanning. 3
-
 1
1 -
 2
2 -
 3
3 -
 4
4 -
 5
5 -
 6
6 -
 7
7 -
 8
8 -
 9
9 -
 10
10 -
 11
11 -
 12
12 -
13
-
14
-
15
-
16
-
17
-
18
-
19
-
20
-
21
-
22
-
23
-
24
-
25
-
26
-
27
-
28
-
29
-
30
-
31
-
32
-
33
-
34
-
35
-
36
-
37
-
38
-
39
-
40
-
41
-
42
-
43
-
44
-
45
-
46
-
47
-
48
-
49
-
50
-
51
-
52
-
53
-
54
-
55
-
56
-
57
-
58
-
59
-
60
-
61
-
62
-
63
-
64
-
65
-
66
-
67
-
68
-
69
-
70
-
71
-
72
-
73
-
74
-
75
-
76
-
77
 |
 |
