Lexmark X748 Quick Reference - Page 14
Printing from a flash drive - pdf
 |
View all Lexmark X748 manuals
Add to My Manuals
Save this manual to your list of manuals |
Page 14 highlights
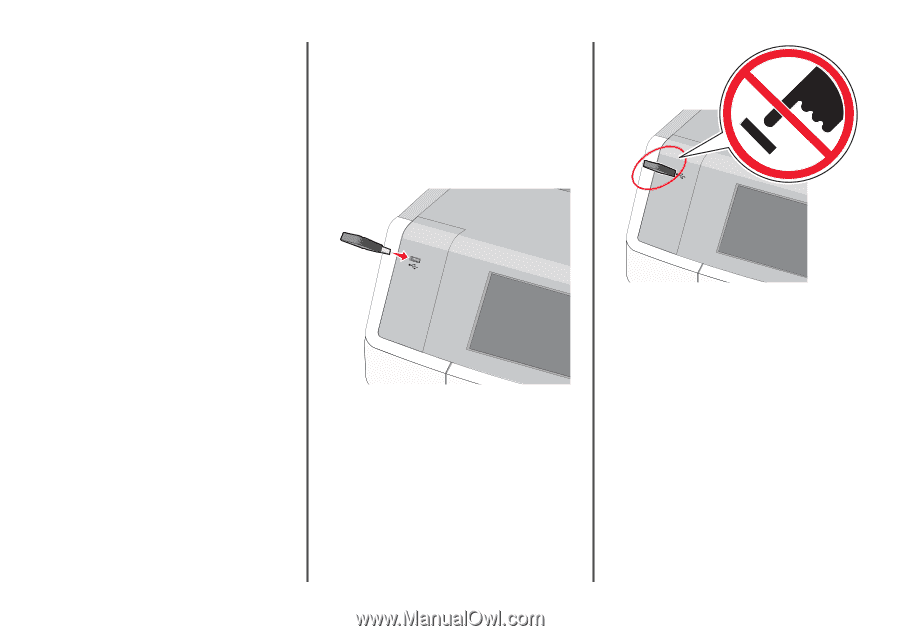
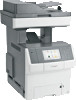
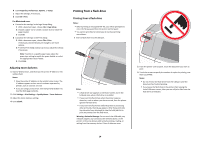
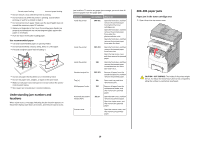
b Click Properties, Preferences, Options, or Setup. c Adjust the settings, if necessary. d Click OK > Print. For Macintosh users a Customize the settings in the Page Setup dialog: 1 With a document open, choose File > Page Setup. 2 Choose a paper size or create a custom size to match the paper loaded. 3 Click OK. b Customize the settings in the Print dialog: 1 With a document open, choose File > Print. If necessary, click the disclosure triangle to see more options. 2 From the Print dialog and pop‑up menus, adjust the settings if necessary. Note: To print on a specific paper type, adjust the paper type setting to match the paper loaded, or select the appropriate tray or feeder. 3 Click Print. Adjusting toner darkness 1 Open a Web browser, and then type the printer IP address in the address field. Notes: • View the printer IP address on the printer home screen. The IP address appears as four sets of numbers separated by periods, such as 123.123.123.123. • If you are using a proxy server, then temporarily disable it to load the Web page correctly. 2 Click Settings > Print Settings > Quality Menu > Toner Darkness. 3 Adjust the toner darkness setting. 4 Click Submit. Printing from a flash drive Printing from a flash drive Notes: • Before printing an encrypted PDF file, you will be prompted to enter the file password from the printer control panel. • You cannot print files for which you do not have printing permissions. 1 Insert a flash drive into the USB port. Notes: • A flash drive icon appears on the home screen and in the held jobs icon when a flash drive is installed. • If you insert the flash drive when the printer requires attention, such as when a jam has occurred, then the printer ignores the flash drive. • If you insert the flash drive while the printer is processing other print jobs, then Busy appears. After these print jobs are processed, you may need to view the held jobs list to print documents from the flash drive. Warning-Potential Damage: Do not touch the USB cable, any network adapter, any connector, the memory device, or the printer in the areas shown while actively printing, reading, or writing from the memory device. A loss of data can occur. 2 From the printer control panel, touch the document you want to print. 3 Touch the arrows to specify the number of copies for printing, and then touch Print. Notes: • Do not remove the flash drive from the USB port until the document has finished printing. • If you leave the flash drive in the printer after leaving the initial USB menu screen, then you can still print files from the flash drive as held jobs. 14
-
 1
1 -
2
-
3
-
4
-
5
-
6
-
7
-
8
-
 9
9 -
 10
10 -
 11
11 -
 12
12 -
 13
13 -
 14
14 -
 15
15 -
 16
16 -
 17
17 -
 18
18 -
 19
19 -
20
-
21
-
22
-
23
-
24
-
25
-
26
 |
 |