Lexmark X748 Quick Reference - Page 16
E-mailing, Faxing - fax driver
 |
View all Lexmark X748 manuals
Add to My Manuals
Save this manual to your list of manuals |
Page 16 highlights
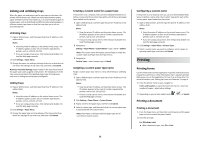
Canceling a copy job while pages are being printed 1 From the home screen, touch Cancel Job, or press keypad. 2 Touch the job you want to cancel. 3 Touch Delete Selected Jobs. on the E-mailing Getting ready to e-mail Setting up the e-mail function 1 Type the printer IP address into the address field of your Web browser. If you do not know the IP address of the printer, you can: • View the IP address on the printer control panel in the TCP/IP section under the Networks/Ports menu. • Print a network setup page or the menu settings pages and locate the IP address in the TCP/IP section. 2 Click Settings. 3 Under Default Settings, click E-mail/FTP Settings. 4 Click E-mail Settings > Setup E-mail Server. 5 Fill in the fields with the appropriate information. 6 Click Submit. Configuring e‑mail settings 1 Type the printer IP address into the address field of your Web browser. If you do not know the IP address of the printer, you can: • View the IP address on the printer control panel in the TCP/IP section under the Networks/Ports menu. • Print a network setup page or the menu settings pages and locate the IP address in the TCP/IP section. 2 Click Settings > E-mail/FTP Settings > E-mail Settings. 3 Fill in the fields with the appropriate information. 4 Click Submit. Creating an e-mail shortcut Creating an e-mail shortcut using the Embedded Web Server 1 Type the printer IP address into the address field of your Web browser. If you do not know the IP address of the printer, you can: • View the IP address on the printer control panel in the TCP/IP section under the Networks/Ports menu. • Print a network setup page or the menu settings pages and locate the IP address in the TCP/IP section. 2 Click Settings. 3 Under Other Settings, click Manage Shortcuts > E-mail Shortcut Setup. 4 Type a unique name for the recipient, and then enter the e-mail address. Note: If you are entering multiple addresses, then separate each address with a comma (,). 5 Select the scan settings (Format, Content, Color, and Resolution). 6 Enter a shortcut number, and then click Add. If you enter a number that is already in use, then you are prompted to select another number. Creating an e-mail shortcut using the printer control panel 1 From the home screen, navigate to: E-mail > Recipient > type an e‑mail address To create a group of recipients, touch Next address, and then type the next recipient's e-mail address. 2 Touch . 3 Type a unique name for the shortcut, and then touch Done. 4 Verify that the shortcut name is correct, and then touch OK. If the shortcut name is incorrect, then touch Cancel, and then reenter the information. Canceling an e-mail • When using the ADF, touch Cancel Job while Scanning appears. 16 • When using the scanner glass, touch Cancel Job while Scanning appears, or while Scan the Next Page / Finish the Job appears. Faxing Sending a fax Sending a fax using the printer control panel 1 Load an original document faceup, short edge first into the ADF or facedown on the scanner glass. Note: Do not load postcards, photos, small items, transparencies, photo paper, or thin media (such as magazine clippings) into the ADF. Place these items on the scanner glass. 2 If you are loading a document into the ADF, then adjust the paper guides. 3 From the home screen, touch Fax. 4 Enter the fax number or a shortcut using the touch screen or keypad. To add recipients, touch Next Number and then enter the recipient's telephone number or shortcut number, or search the address book. Note: To place a dial pause within a fax number, press . The dial pause appears as a comma in the "Fax to" field. Use this feature if you need to dial an outside line first. 5 Touch Fax It. Sending a fax using the computer The printer driver fax option allows you to "print to fax," where the printer will send a queued document as a fax rather than print it. The fax option functions as a normal fax machine, but is controlled through the printer driver instead of the printer control panel. 1 With a document open, click File > Print. 2 Select the printer, and then navigate to: Properties > Fax tab > Enable fax 3 Enter the recipient fax number(s) in the "Fax number(s)" field.
-
 1
1 -
2
-
3
-
4
-
5
-
6
-
7
-
8
-
9
-
10
-
 11
11 -
 12
12 -
 13
13 -
 14
14 -
 15
15 -
 16
16 -
 17
17 -
 18
18 -
 19
19 -
 20
20 -
 21
21 -
22
-
23
-
24
-
25
-
26
 |
 |
