Lexmark X782e User's Guide - Page 86
Printer access doors and trays, yy Paper Jam, 24<x>.yy Paper Jam
 |
View all Lexmark X782e manuals
Add to My Manuals
Save this manual to your list of manuals |
Page 86 highlights
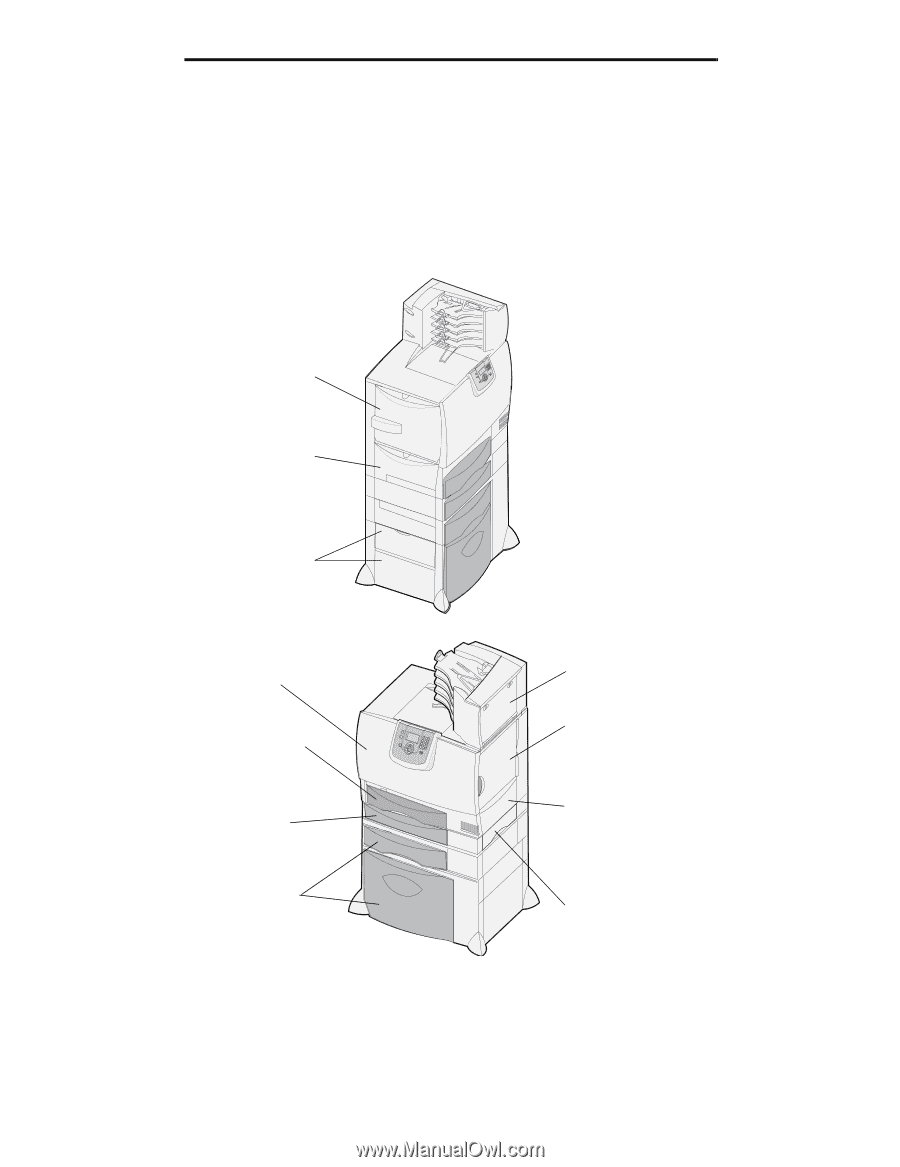
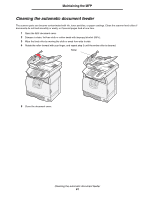
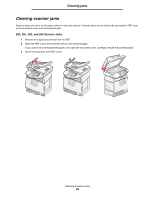
Clearing jams Printer access doors and trays The following illustration shows the path that print media travels through the printer. The path varies depending on the input source (trays, multipurpose feeder, envelope feeder) and output bins (finisher, stacker, expander, mailbox) you are using. The numbers in following illustration indicate the numbers that can appear on the operator panel and designate the general area of a paper jam. Note: The following illustrations are for illustrative purposes and may not reflect your MFP configuration. For scanner jams, see "Clearing scanner jams" on page 88. Area A Multipurpose feeder 250.yy Paper Jam Area B Left access door (beside tray 1) 200.yy Paper Jam 24.yy Paper Jam Area C Paper input options: 500-sheet drawer or 2000-sheet drawer 24.yy Paper Jam Area D Front access door 201.yy Paper Jam Area T1 Standard tray (Tray 1) 200.yy Paper Jam 241.yy Paper Jam Area E Duplex mechanism 230.yy Paper Jam Area T Paper input options: 500-sheet trays or 2000-sheet tray 24.yy Paper Jam Area M Mailbox 27.yy Paper Jam Area L Upper right access door (redrive area) 201.yy Paper Jam 202.yy Paper Jam Area K Lower right access door (fuser area) 201.yy Paper Jam 202.yy Paper Jam Area J Duplex tray 230.yy Paper Jam Printer access doors and trays 86
-
 1
1 -
2
-
3
-
4
-
5
-
6
-
7
-
8
-
9
-
10
-
11
-
12
-
13
-
14
-
15
-
16
-
17
-
18
-
19
-
20
-
21
-
22
-
23
-
24
-
25
-
26
-
27
-
28
-
29
-
30
-
31
-
32
-
33
-
34
-
35
-
36
-
37
-
38
-
39
-
40
-
41
-
42
-
43
-
44
-
45
-
46
-
47
-
48
-
49
-
50
-
51
-
52
-
53
-
54
-
55
-
56
-
57
-
58
-
59
-
60
-
61
-
62
-
63
-
64
-
65
-
66
-
67
-
68
-
69
-
70
-
71
-
72
-
73
-
74
-
75
-
76
-
77
-
78
-
79
-
80
-
 81
81 -
 82
82 -
 83
83 -
 84
84 -
 85
85 -
 86
86 -
 87
87 -
 88
88 -
 89
89 -
 90
90 -
 91
91 -
92
-
93
-
94
-
95
-
96
-
97
-
98
-
99
-
100
-
101
-
102
-
103
-
104
-
105
-
106
-
107
-
108
-
109
-
110
-
111
-
112
-
113
-
114
 |
 |