Lexmark X782e User's Guide - Page 98
Hard disk wiping, Using the Restricted Server List function, down arrow, right arrow, Exit Config Menu
 |
View all Lexmark X782e manuals
Add to My Manuals
Save this manual to your list of manuals |
Page 98 highlights
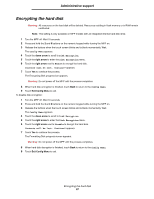
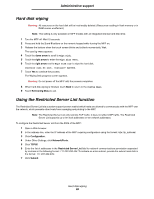
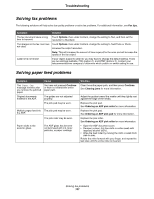
Administrative support Hard disk wiping Warning: All resources on the hard disk will be irretrievably deleted. (Resources residing in flash memory or in RAM remain unaffected.) Note: This setting is only available on MFP models with an integrated internal hard disk drive. 1 Turn the MFP off. Wait 10 seconds. 2 Press and hold the 2 and 6 buttons on the numeric keypad while turning the MFP on. 3 Release the buttons when the touch screen blinks and is blank momentarily. Wait. The Config Menu appears. 4 Touch the down arrow to scroll to Wipe Disk. 5 Touch the right arrow to enter the Wipe Disk menu. 6 Touch the right arrow next to Wipe Disk now to wipe the hard disk. Contents will be lost. Continue? appears. 7 Touch Yes to continue the process. The Wiping Disk progress screen appears. Warning: Do not power off the MFP until the process completes. 8 When hard disk wiping is finished, touch Back to return to the Config Menu. 9 Touch Exit Config Menu to exit. Using the Restricted Server List function The Restricted Server List lets a system support person restrict which hosts are allowed to communicate with the MFP over the network, which prevents other hosts from managing and printing to the MFP. Note: The Restricted Server List only restricts TCP traffic; it does not affect UDP traffic. The Restricted Server List supports up to ten host addresses or ten network addresses. To configure the Restricted Server List from the EWS of the MFP: 1 Open a Web browser. 2 In the address line, enter the IP address of the MFP requiring configuration using the format: http://ip_address/. 3 Click Configuration. 4 Under Other Settings, click Network/Ports. 5 Click TCP/IP. 6 Enter the list of addresses in the Restricted Server List field for network communications permission separated by commas in the following format: 111.222.333.444. To indicate an entire subnet, provide the subnet mask bits in the format: 111.222.333.0/24. 7 Click Submit. Hard disk wiping 98
-
 1
1 -
2
-
3
-
4
-
5
-
6
-
7
-
8
-
9
-
10
-
11
-
12
-
13
-
14
-
15
-
16
-
17
-
18
-
19
-
20
-
21
-
22
-
23
-
24
-
25
-
26
-
27
-
28
-
29
-
30
-
31
-
32
-
33
-
34
-
35
-
36
-
37
-
38
-
39
-
40
-
41
-
42
-
43
-
44
-
45
-
46
-
47
-
48
-
49
-
50
-
51
-
52
-
53
-
54
-
55
-
56
-
57
-
58
-
59
-
60
-
61
-
62
-
63
-
64
-
65
-
66
-
67
-
68
-
69
-
70
-
71
-
72
-
73
-
74
-
75
-
76
-
77
-
78
-
79
-
80
-
81
-
82
-
83
-
84
-
85
-
86
-
87
-
88
-
89
-
90
-
91
-
92
-
 93
93 -
 94
94 -
 95
95 -
 96
96 -
 97
97 -
 98
98 -
 99
99 -
 100
100 -
 101
101 -
 102
102 -
 103
103 -
104
-
105
-
106
-
107
-
108
-
109
-
110
-
111
-
112
-
113
-
114
 |
 |
