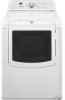
Maytag MGDB700VQ Use and Care Guide
Maytag MGDB700VQ - MaytagR BravosR Gas Dryer Manual
 |
UPC - 883049140582
View all Maytag MGDB700VQ manuals
Add to My Manuals
Save this manual to your list of manuals |
Maytag MGDB700VQ manual content summary:
- Maytag MGDB700VQ | Use and Care Guide - Page 1
DRYER USE & CARE GUIDE p 'K SECHEUSE A GAZ BRAVOS ® AVEC SYSTEME DE SOIN DES TISSUS GUIDE D'UTILISATION ET D'ENTRETIEN FOR QUESTIONS ABOUT FE,a(IURES, OPERATION/PERFORMANCE, CAll: 1.800.688.9900 IN CANADA, CAll: 1.800.807.6777 PARTS, ACCESSORIES OR SERVICE VISIT OUR WEBSITE AT WWW.MAYTAG - Maytag MGDB700VQ | Use and Care Guide - Page 2
Moving Care Changing the Drum Light ...TROUBLESHOOTING ...L-)ryer Operation ...Dryer Results ...ASSISTANCE OR SERVICE ...In the U.S.A ...In Canada ...ACCESSORIES ...WARRANTY ... 3 SI_CURITI_ DE LA SI_CHEUSE 28 5 INSTRUCTIONS D'INSTALLATION 31 5 Outillage et pi_ces ... 31 5 Exigences - Maytag MGDB700VQ | Use and Care Guide - Page 3
, building, or area of all occupants. • Immediately call your gas supplier from a neighbor's phone. Follow the gas supplier's instructions. • If you cannot reach your gas supplier, call the fire department. - Installation and service must be performed by a qualified installer, service agency, or the - Maytag MGDB700VQ | Use and Care Guide - Page 4
. [] Do not install or store the dryer where it will be exposed to the weather. [] Do not tamper with controls. [] Do not repair or replace any part of the dryer or attempt any servicing unless specifically recommended in this Use and Care Guide or in published user-repair instructions that you - Maytag MGDB700VQ | Use and Care Guide - Page 5
from the dealer from whom you purchased your dryer. For information on ordering, please refer to the "Assistance or Service" section. You may also contact the dealer from whom you purchased your dryer. • Mobile home installation kit. Ask for Part Number 346764. • Metal exhaust system hardware. You - Maytag MGDB700VQ | Use and Care Guide - Page 6
is available for purchase from your dealer. • Mobile Home Installation Kit Part Number 346764. See "Tools and Parts" section for information on ordering. • Special provisions must be made in mobile homes to introduce outside air into the dryer. The opening (such as a nearby window) should be at - Maytag MGDB700VQ | Use and Care Guide - Page 7
the plug provided with the dryer: if it will not fit the outlet, have a proper outlet installed by a qualified electrician. SAVE THESE INSTRUCTIONS Explosion Hazard Use a new CSA International approved gas supply line. Install a shut-off valve. Securely tighten all gas connections. If connected to - Maytag MGDB700VQ | Use and Care Guide - Page 8
, ANSI Z223.1. In Canada: An individual manual shutoff valve must be installed in accordance with the B149.1, Natural Gas and Propane Installation Code. It is recommended that an individual manual shutoff valve be installed within six (6) feet (1.8 m) of the dryer. The location should be easy to - Maytag MGDB700VQ | Use and Care Guide - Page 9
vent. Review Vent system Maytag Services. For more information, see the "Assistance or Service supported when the dryer is in its final location. • Remove excess flexible metal vent to avoid sagging and kinking that may result in reduced airflow and poor performance. • Do not install problems and health - Maytag MGDB700VQ | Use and Care Guide - Page 10
kits for close clearance alternate installations Please see the "Assistance or Service" section to order. • Over-the-Top Installation: Part Number 4396028 are available for purchase. • Periscope Installation (For use with dryer vent to wall vent mismatch): Part Number 4396037 - 0" (0 cm) to 18 - Maytag MGDB700VQ | Use and Care Guide - Page 11
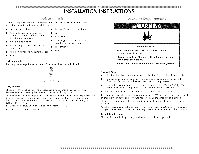
that will provide the straightest and most direct path outdoors. • Plan the installation to use the fewest number of elbows and turns. • When using elbows Excessive Weight Hazard Use two or more people to move and install dryer. Failure to do so can result in back or other injury. 1. To - Maytag MGDB700VQ | Use and Care Guide - Page 12
the handle is parallel to the gas pipe. Mobile home installations require a Mobile Home Installation Kit. See "Tools and Parts" section for information on ordering. 1. Remove the red cap from the gas pipe. 2. Using a wrench to tighten, connect the gas supply to the dryer. Use pipe-joint compound on - Maytag MGDB700VQ | Use and Care Guide - Page 13
work space to protect the surface. Remove the door assembly 1. Open the dryer door. 2. Remove the bottom screw from each of the 2 hinges that attach the dryer door to the front panel of the dryer. 6, Install 4 plastic plugs into screw holes in the dryer left where the hinges were removed in Step 4. - Maytag MGDB700VQ | Use and Care Guide - Page 14
and plugs must be on the same side of the dryer door opening. Reinstall the door 1. Remove the 4 screws and 2 hinges from the dryer door. 2. Replace the 4 screws in the same holes. I 4o Install the 2 hinges to the front panel of the dryer using 4 screws. Use the non-slotted side to attach the - Maytag MGDB700VQ | Use and Care Guide - Page 15
. Excessive scale buildup may lead to the need for certain part replacement or repair. 11. Test dryer operation by selecting a Timed Dry heated cycle and starting the dryer. For this test, do not select the Air Fluff modifier. If the dryer will not start, check the following: • Controls are set in - Maytag MGDB700VQ | Use and Care Guide - Page 16
SAFETY INSTRUCTIONS before operating this appliance. This manual covers several different models. Your dryer may dryer. Please refer to specific sections of this manual for more detailed information. 1. Clean lint screen before each load. See "Cleaning the I.int Screen." NOTE: Your Maytag _;dryer - Maytag MGDB700VQ | Use and Care Guide - Page 17
a fabric softener sheet. Follow package instructions. To reduce wrinkling, remove the load from the dryer as soon as tumbling stops. This or Timed Preset Cycle Settings chart (in the "Cycles" section) for a guide to drying various loads. Drying temperature and dryness level are preset when you - Maytag MGDB700VQ | Use and Care Guide - Page 18
, if selected. • In a Timed Cycle, wet items are not detected. The dryer will continue to run for the length of time selected, and the Wet light will The Coo[ Down light illuminates ease in handling. during the Coo[ Down part of the cycle. I.aundry cools for Dry The Dry light illuminates Wrinkle - Maytag MGDB700VQ | Use and Care Guide - Page 19
clothes packed in suitcases or items wrinkled from being [eft in the dryer to long. Timed Preset Cycle Settings Timed Cycles Load Type Default Light On some models, select I)rum I.ight to turn on the light inside the dryer drum. During a cycle, if Drum I.ight is selected, the drum light turns - Maytag MGDB700VQ | Use and Care Guide - Page 20
installations, environmental conditions, or personal preference. There are 3 drying settings: 1 (factory preset dryness [eve[), 2 (slightly dryer clothes, approximately 15% more drying time) and 3 (much dryer page of the manual or contact the dealer from whom you purchased your dryer. NOTE: The - Maytag MGDB700VQ | Use and Care Guide - Page 21
fiber filled Timed Dry I_ow 60 Explosion Hazard Keep flammable materials and vapors, such as gasoline, away from dryer. Place dryer at least 18 inches (46 cm) above the floor for a garage installation. Failure to do so can result in death, explosion, or fire. Clean the lint screen before each - Maytag MGDB700VQ | Use and Care Guide - Page 22
supply line. 3. Disconnect gas supply line pipe and remove fittings attached to dryer pipe. 4. Cap the open fuel supply line. 5. Make sure leveling legs are secure in dryer base. 6. Use masking tape to secure dryer door. Reinstalling the dryer Follow the "Installation Instructions" to locate, level - Maytag MGDB700VQ | Use and Care Guide - Page 23
. If the problem continues, ca[[ an electrician. Is it a gas dryer? The gas valve clicking is a normal operating sound. Are the four legs installed, and is the dryer level front to back and side to side? The dryer may vibrate if not properly installed. See the Installation Instructions. Is the - Maytag MGDB700VQ | Use and Care Guide - Page 24
ventilation openings at the top and bottom of the door. The rear of the dryer requires 5" (12.7 cm) of airspace, and the sides and front of the dryer require a minimum of 1" (2.5 cm). See the Installation Instructions. Has the Air Fluff modifier been selected? Select the right temperature for the - Maytag MGDB700VQ | Use and Care Guide - Page 25
Excessive Weight Hazard Use two or more people to move and install dryer. Failure to do so can result in back or other injury. Is the automatic cycle ending early? The load may not be contacting the sensor strips. I.evel the dryer. Change the dryness [eve[ setting on Sensor Cycles. Increasing or - Maytag MGDB700VQ | Use and Care Guide - Page 26
Services, I.I.C Customer Assistance to[[ free: 1-800-688-9900, at www.maytag.com Our consultants provide assistance with: • Features and specifications on our full line of appliances. • Installation information. or vist our website • Use and maintenance procedures. • Accessory and repair parts - Maytag MGDB700VQ | Use and Care Guide - Page 27
to correct the installation of your major appliance, to instruct you on how to use your major appliance, to replace or repair house fuses, or to correct house wiring or plumbing. 2. Service calls to repair or replace appliance light bulbs, air filters or water filters. Consumable parts are excluded - Maytag MGDB700VQ | Use and Care Guide - Page 28
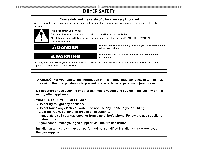
signifient • Risque possible de d_cbs ou de blessure grave si vous ne suivez pas imm_diatement les instructions. Risque possible de d_cbs ou de blessure grave si vous ne suivez pas les instructions. Tous les messages de s_curit_ vous diront quel est le danger potentiel et vous disent comment r_duire - Maytag MGDB700VQ | Use and Care Guide - Page 29
fournisseur de gaz d'un t_ldphone voisin. Suivre ses instructions. • A ddfaut de joindre votre fournisseur de gaz, appeler les pompiers. - L'installation et I'entretien doivent _tre effectuds par un installateur qualifid, une agence de service ou le fournisseur de gaz. AVERTISSEMENT : L'odorat ne - Maytag MGDB700VQ | Use and Care Guide - Page 30
d'une recommandation specifique dans le guide d'utlilisation et d'entretien, ou publiee dans les instructions de reparation par I'utilisateur que les instructions d'installation pour les exigences de liaison de I'appareil & la terre. CONSERVEZ CES INSTRUCTIONS IMPORTANT • L'installation du gaz - Maytag MGDB700VQ | Use and Care Guide - Page 31
£ [a section "Assistance ou service". Vous pouvez 6ga[ement contacter piancher pour une installation darts un garage. Le non-respect de ces instructions peut causer s6cheuse. Voir "Sp6cifications 6lectriques". Un plancher robuste capable de supporter un poids total (s6cheuse et charge) de 200 Ib - Maytag MGDB700VQ | Use and Care Guide - Page 32
6tre consid6r6 pour [es raisons suivantes : • On pr6voira un peu plus d'espace pour faci[iter ['installation et ['entretien. • Un espace supp[6mentaire peut 6tre requis pour [es mou[ures de porte et rallonge. Le non-respect de ces instructions peut causer un d_c_s, un incendie ou un choc _lectrique. - Maytag MGDB700VQ | Use and Care Guide - Page 33
demander & un 61ectricien qualifi6 d'installer une prise de courant appropri6e. CONSERVEZ CES INSTRUCTIONS Risque d'explosion Utiliser une canalisation plaque signal6tique renseignements sur la commande la section "Assistance ou service". I'appareil pour I'utilisation d'un gaz diff6rent de celui - Maytag MGDB700VQ | Use and Care Guide - Page 34
k_*. • Doit comporter un robinet d'arr6t du gaz : Un robinet d'arr6t manuel individuel doit 6tre install6 conform6ment _ la norme B149.1 du Code des installations au gaz naturel ou propane. II est recommand6 qu'un robinet d'arr6t manuel individuel soit install6 en deq_ de 6 pi (1,8 m) de la s6cheuse - Maytag MGDB700VQ | Use and Care Guide - Page 35
de m_tal. Le non-respect de ces instructions peut causer un d_c_s ou un incendie. t616phonant Maytag Services. Pour plus de renseignements, voir [a section "Assistance ou service". Conduit capacit6 d'6vacuation et [e rendement. • Ne pas installer [e conduit m6ta[[ique flexible dans [es cavit6s - Maytag MGDB700VQ | Use and Care Guide - Page 36
, meubles, peinture, papier-peint, tapis, etc. [] Problemes de nettoyage dans la maison et problemes de sante. (_u sv> installations typiques consistent b_acheminer s6cheuse. le conduit d'6vacuation - Maytag MGDB700VQ | Use and Care Guide - Page 37
: On peut acheter [es trousses suivantes pour [es installations o_J [e d6gagement est r6duit. Veui[[ez consulter [a section "Assistance ou service" de ce guide pour commander. • Installation au-dessus de [a s6cheuse : Pi6ce num6ro 4396028 • Installation de p6riscope (pour ['uti[isation en cas de - Maytag MGDB700VQ | Use and Care Guide - Page 38
pi6ces" pour les renseignements de commande. Risque du poids excessif UtiHser deux ou plus de personnes pour d_placer et installer la s_cheuse. Le non=respect de cette instruction peut causer une blessure au dos ou d'autre blessure. 1. Retirer le capuchon rouge de la conduite de gaz. 2. _, ['aide - Maytag MGDB700VQ | Use and Care Guide - Page 39
REMARQUE : Pour les raccordements compos6 d'6tanch6it6 des tuyauteries pas uti[iser de ruban TEFI.ON - Maytag MGDB700VQ | Use and Care Guide - Page 40
de [a porte de [a sdcheuse. 2. Replacer [es quatre vis dans [es m6mes trous. Emplacement de._ cheville._ de plasdque Vis et emp/acements des chami_res 6° Installer 4 chevilles de plastique dans les trous des vis sur la gauche de la s6cheuse apr6s avoir retir6 les charni6res (Etape 4). 40 - Maytag MGDB700VQ | Use and Care Guide - Page 41
sur le panneau avant de la s6cheuse b_I'aide de quatre (4) vis. Utiliser le c6t6 sans fente pour fixer la charni6re sur le panneau avant. A. Instal/er d'abord ces vis. 6° Suspendre la porte : ins6rer les t&tes de vis dans les trous de fente supdrieurs des charni6res et glisser la porte vers - Maytag MGDB700VQ | Use and Care Guide - Page 42
pas enlever la broche de liaison & la terre. Ne pas utiliser un adaptateur. Ne pas utiliser un c&ble de rallonge. Le non-respect de ces instructions peut causer un d4c_s, un incendie ou un choc 41ectrique. 6o Brancher la s6cheuse sur une prise _ 3 broches reli6e _ la terre. Mettre I'appareil sous - Maytag MGDB700VQ | Use and Care Guide - Page 43
de s_chage & I'air. ou & lingo Le non-respect de ces instructions un d_c_s ou un incendie. pout causer 1o Nettoyer le filtre b_charpie avant chaque charge. Voir "Nettoyage du fi[tre b_charpie". REMARQUE : Votre s6cheuse Maytag _ est 6quipde d' une fonction "Auto Wake-Up" (r6vei[ automatique). - Maytag MGDB700VQ | Use and Care Guide - Page 44
4, Tourner le bouton au programme s61ectionn6. I_es pr6r6g[ages des programmes Sensor (d6tection), ou Timed (minut6) s'a[[umeront. I_a dur6e du programme estim6e en minutes (programme de d6tection) ou r6e[[e (programme minut6) s'affichera. REMARQUE : Une dur6e par d6faut est affich6e [orsqu'un - Maytag MGDB700VQ | Use and Care Guide - Page 45
Suivre [es directives figurant sur ['dtiquette [orsqu'e[[es sont disponib[es. • Si ddsir6, ajouter une feuille d'assouplissant de tissu. Suiwe les instructions figurant sur ['emba[[age. • Pour rdduire le froissement, enlever la charge de la sdcheuse aussit6t que le culbutage cesse. Cette action est - Maytag MGDB700VQ | Use and Care Guide - Page 46
tous[es programmes _ I'exception des programmes Delicate (articles d6[icats)en appuyant sur [e bouton TEMP I.EVEI. (niveau de temp6ratu re). Heavy Duty (service Utiliser ce programme cotons et des jeans. intense) pour un s6chage _ chaleur ordinaire des charges mixtes Iourdes, des Normal (normal - Maytag MGDB700VQ | Use and Care Guide - Page 47
Modificateurdsesprogrammedses_chagpeard_tection Utiliser le bouton DRYNESS LEVEl_ (niveau de s6chage) pour s6lectionner les degr6s de s6chage des programmes de s6chage par d6tection. Appuyer sur DRYNESS I.EVEI. jusqu'_ ce que [e r6g[age de degr6 de s6chage d6sir6 s'a[[ume. I.e r6g[age de s6chage par - Maytag MGDB700VQ | Use and Care Guide - Page 48
pour tous[es programmes de s6chage par ddtection. Vos r6g[ages de niveau de s6chage peuvent 6tre modifi6s pour s'adapter _ diffdrentes installations, conditions environnementa[es ou prdf6rences personne[[es. I[ existe 3 r6g[ages de s6chage : 1 (niveau de s6chage pr6r6g[6 en usine), 2 (v6tements - Maytag MGDB700VQ | Use and Care Guide - Page 49
I'essence, loin de la s_cheuse. Placer [a s_cheuse au moins 46 cm (18 po) au-dessus du piancher pour une installation darts un garage. Le non-respect de ces instructions peut causer un d_c_s, une explosion ou un incendie. Nettoyer le filtre t6moin [umineux Un fi[tre obstru6 IMPORTANT : _ charpie - Maytag MGDB700VQ | Use and Care Guide - Page 50
• Side[acharpiteombedans[as6cheuasuemomendturetraidtufiltre,v6rifie[reconduit d'6vacuatieotnretire[racharpie. Nettoyage avant chaque charge 1. I_e filtre _ charpie est situ6 au sommet de la s6cheuse. Tirer le filtre _ charpie vers soi. En[ever [a charpie du fi[tre en [a rou[ant avec [es doigts. Ne - Maytag MGDB700VQ | Use and Care Guide - Page 51
R_installer la s_cheuse Suiwe les "Instructions d'installation" s6cheuse et la raccorder. pour choisir I'emplacement, et consulter la FAQ (Foire aux questions) pour 6viter le coot d'un appel de service... www.maytag.ca Sons inhabituels Le s6cheuse ne fonctionne pas • Un fusible est-il grill6 ou - Maytag MGDB700VQ | Use and Care Guide - Page 52
nouveau programme de s6chage Code de service "F" et variantes (F1, F2, F20, etc.) : Faire un appel de service. Le s6chage des v_tements n'est cm (18 po) au-dessus du piancher pour une installation darts un garage. Le non-respect de ces instructions peut causer un d_c_s, une explosion ou un incendie - Maytag MGDB700VQ | Use and Care Guide - Page 53
Temps de programme trop court Risque du poids excessif Utiliser deu× ou plus de personnes pour d_placer et installer la s_cheuse. Le non=respect de cette instruction peut causer une blessure au dos ou d'autre blessure. Le programme automatique se termine-t-il trop t6t? I.a charge n'est peut-6tre - Maytag MGDB700VQ | Use and Care Guide - Page 54
ousfaire6conomiser [e co_t d'une visite de service. Si vous avez encore besoin d'aide, suivre [es instructions ci-dessous. I.ors d'un pr6cision que ce[[es uti[is6es dans [a fabrication de chaque nouve[ apparei[ MAYTAG - Maytag MGDB700VQ | Use and Care Guide - Page 55
I.es visites de service pour rectifier ['installation du gros apparei[ service d'entretien Maytag autoris6 n'est pas disponib[e. 10. I.a d6pose et [a r6insta[[ation de votre gros apparei[ si ce[ui-ci est install6 dans un endroit inaccessible ou n'est pas install6 conform6ment aux instructions - Maytag MGDB700VQ | Use and Care Guide - Page 56
-
 1
1 -
 2
2 -
 3
3 -
 4
4 -
 5
5 -
 6
6 -
 7
7 -
8
-
9
-
10
-
11
-
12
-
13
-
14
-
15
-
16
-
17
-
18
-
19
-
20
-
21
-
22
-
23
-
24
-
25
-
26
-
27
-
28
-
29
-
30
-
31
-
32
-
33
-
34
-
35
-
36
-
37
-
38
-
39
-
40
-
41
-
42
-
43
-
44
-
45
-
46
-
47
-
48
-
49
-
50
-
51
-
52
-
53
-
54
-
55
-
56
 |
 |
BRAVOS ® FABRIC CARE
GAS DRYER
USE & CARE
GUIDE
p
'K
SECHEUSE A GAZ BRAVOS ® AVEC
SYSTEME DE SOIN
DES TISSUS
GUIDE
D'UTILISATION
ET D'ENTRETIEN
FOR
QUESTIONS
ABOUT
FE,a(IURES,
OPERATION/PERFORMANCE,
PARTS, ACCESSORIES
OR SERVICE
CAll:
1.800.688.9900
IN CANADA,
CAll:
1.800.807.6777
VISIT
OUR
WEBSITE
AT WWW.MAYTAG.COM
IN CANADA,
WWW.MAYTAG.CA
AU
CANADA,
POUR
ASSISTANCE,
INSTAllATION
OU
SERVICE,
COMPOSEZ
IE
: 1.800.807.6777
OU
VISITEZ
NOTRE
SITE INTERNET
,_
WWW.
M AYTAG.
CA
W10201175A