Miele H 4886 BP BRWS Operating and Installation manual - Page 73
Electrical connection 73, 208 V, 60 Hz, 30 A fuse rating
 |
View all Miele H 4886 BP BRWS manuals
Add to My Manuals
Save this manual to your list of manuals |
Page 73 highlights
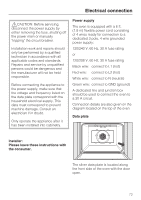
Electrical connection ,CAUTION: Before servicing, disconnect the power supply by either removing the fuse, shutting off the power main or manually "tripping" the circuit breaker. Installation work and repairs should only be performed by a qualified technician in accordance with all applicable codes and standards. Repairs and service by unqualified persons could be dangerous and the manufacturer will not be held responsible. Before connecting the appliance to the power supply, make sure that the voltage and frequency listed on the data plate correspond with the household electrical supply. This data must correspond to prevent machine damage. Consult an electrician if in doubt. Only operate the appliance after it has been installed into cabinetry. Power supply The oven is equipped with a 6 ft. (1.8 m) flexible power cord consisting of 4 wires ready for connection to a dedicated 3 pole, 4 wire grounded power supply: 120/240 V, 60 Hz, 30 A fuse rating or 120/208 V, 60 Hz, 30 A fuse rating Black wire: connect to L1 (hot) Red wire: connect to L2 (hot) White wire: connect to N (neutral) Green wire: connect to GND (ground) A dedicated line and junction box should be used to connect the oven to a 30 A circuit. Connection details are also given on the diagram located on the top of the oven. Data plate Installer: Please leave these instructions with the consumer. The silver data plate is located along the front side of the oven with the door open. 73
-
 1
1 -
2
-
3
-
4
-
5
-
6
-
7
-
8
-
9
-
10
-
11
-
12
-
13
-
14
-
15
-
16
-
17
-
18
-
19
-
20
-
21
-
22
-
23
-
24
-
25
-
26
-
27
-
28
-
29
-
30
-
31
-
32
-
33
-
34
-
35
-
36
-
37
-
38
-
39
-
40
-
41
-
42
-
43
-
44
-
45
-
46
-
47
-
48
-
49
-
50
-
51
-
52
-
53
-
54
-
55
-
56
-
57
-
58
-
59
-
60
-
61
-
62
-
63
-
64
-
65
-
66
-
67
-
 68
68 -
 69
69 -
 70
70 -
 71
71 -
 72
72 -
 73
73 -
 74
74 -
 75
75 -
 76
76 -
 77
77 -
 78
78 -
79
-
80
 |
 |