Netgear WFS709TP WFS709TP Setup Manual - Page 210
will upload the file to the WFS709TP and set the captive portal system to use this
 |
UPC - 606449052336
View all Netgear WFS709TP manuals
Add to My Manuals
Save this manual to your list of manuals |
Page 210 highlights
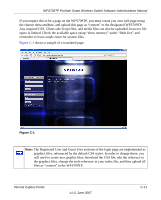
WFS709TP ProSafe Smart Wireless Switch Software Administration Manual } errmsg = "\n" + localised_msg + "\n\n"; document.write(errmsg); }; } d. Translate the web page text. Once you have made the changes as above, you only need to translate the rest of the text that appears on the page. The exact text that appears will depend on the WFS709TP settings when you originally viewed the captive portal. You will need to translate all relevant text such as REGISTERED USER, USERNAME, PASSWORD, the value="" part of the INPUT type="submit" button, and all other text. Ensure that the character set you use to translate into is the same as you have selected in step 5a. Feel free to edit the HTML as you go if you are familiar with HTML. 6. After saving your changes, upload the file to the WFS709TP using the Maintenance > Upload Custom Login Pages section of the browser interface. a. Choose Captive Portal Login (top level) and browse your local computer for the file you saved. b. Ensure that the Revert to factory default settings box is not checked and click Apply. This will upload the file to the WFS709TP and set the captive portal system to use this page as the redirection page. c. To check that your site is operating correctly, go back to the Customize Login page and click View Captive Portal to view the page you have uploaded. Check that your browser has automatically detected the character set and that your text is not garbled. 7. To make any adjustments to your page, edit your file locally and simply re-upload to the WFS709TP in order to view the page again. 8. While it is possible to customize the welcome page on the WFS709TP, for language localization it is recommended that you use an external welcome page instead. This can be a web site on an external server, or it can be a static page that is uploaded to a WFS709TP. You set the welcome page location in the Configuration > Security > Authentication Methods > Captive Portal page. This is the page that the user will be redirected to after a success authentication. C-10 v1.0, June 2007 Internal Captive Portal
-
 1
1 -
2
-
3
-
4
-
5
-
6
-
7
-
8
-
9
-
10
-
11
-
12
-
13
-
14
-
15
-
16
-
17
-
18
-
19
-
20
-
21
-
22
-
23
-
24
-
25
-
26
-
27
-
28
-
29
-
30
-
31
-
32
-
33
-
34
-
35
-
36
-
37
-
38
-
39
-
40
-
41
-
42
-
43
-
44
-
45
-
46
-
47
-
48
-
49
-
50
-
51
-
52
-
53
-
54
-
55
-
56
-
57
-
58
-
59
-
60
-
61
-
62
-
63
-
64
-
65
-
66
-
67
-
68
-
69
-
70
-
71
-
72
-
73
-
74
-
75
-
76
-
77
-
78
-
79
-
80
-
81
-
82
-
83
-
84
-
85
-
86
-
87
-
88
-
89
-
90
-
91
-
92
-
93
-
94
-
95
-
96
-
97
-
98
-
99
-
100
-
101
-
102
-
103
-
104
-
105
-
106
-
107
-
108
-
109
-
110
-
111
-
112
-
113
-
114
-
115
-
116
-
117
-
118
-
119
-
120
-
121
-
122
-
123
-
124
-
125
-
126
-
127
-
128
-
129
-
130
-
131
-
132
-
133
-
134
-
135
-
136
-
137
-
138
-
139
-
140
-
141
-
142
-
143
-
144
-
145
-
146
-
147
-
148
-
149
-
150
-
151
-
152
-
153
-
154
-
155
-
156
-
157
-
158
-
159
-
160
-
161
-
162
-
163
-
164
-
165
-
166
-
167
-
168
-
169
-
170
-
171
-
172
-
173
-
174
-
175
-
176
-
177
-
178
-
179
-
180
-
181
-
182
-
183
-
184
-
185
-
186
-
187
-
188
-
189
-
190
-
191
-
192
-
193
-
194
-
195
-
196
-
197
-
198
-
199
-
200
-
201
-
202
-
203
-
204
-
 205
205 -
 206
206 -
 207
207 -
 208
208 -
 209
209 -
 210
210 -
 211
211 -
 212
212 -
 213
213 -
 214
214 -
 215
215 -
216
-
217
-
218
-
219
-
220
-
221
-
222
 |
 |
