Nikon COOLPIX L22 L22 / L21 User's Manual - Page 27
Notes for EN-MH1 Rechargeable Batteries, MH-70/71 Battery Charger - front cover
 |
View all Nikon COOLPIX L22 manuals
Add to My Manuals
Save this manual to your list of manuals |
Page 27 highlights
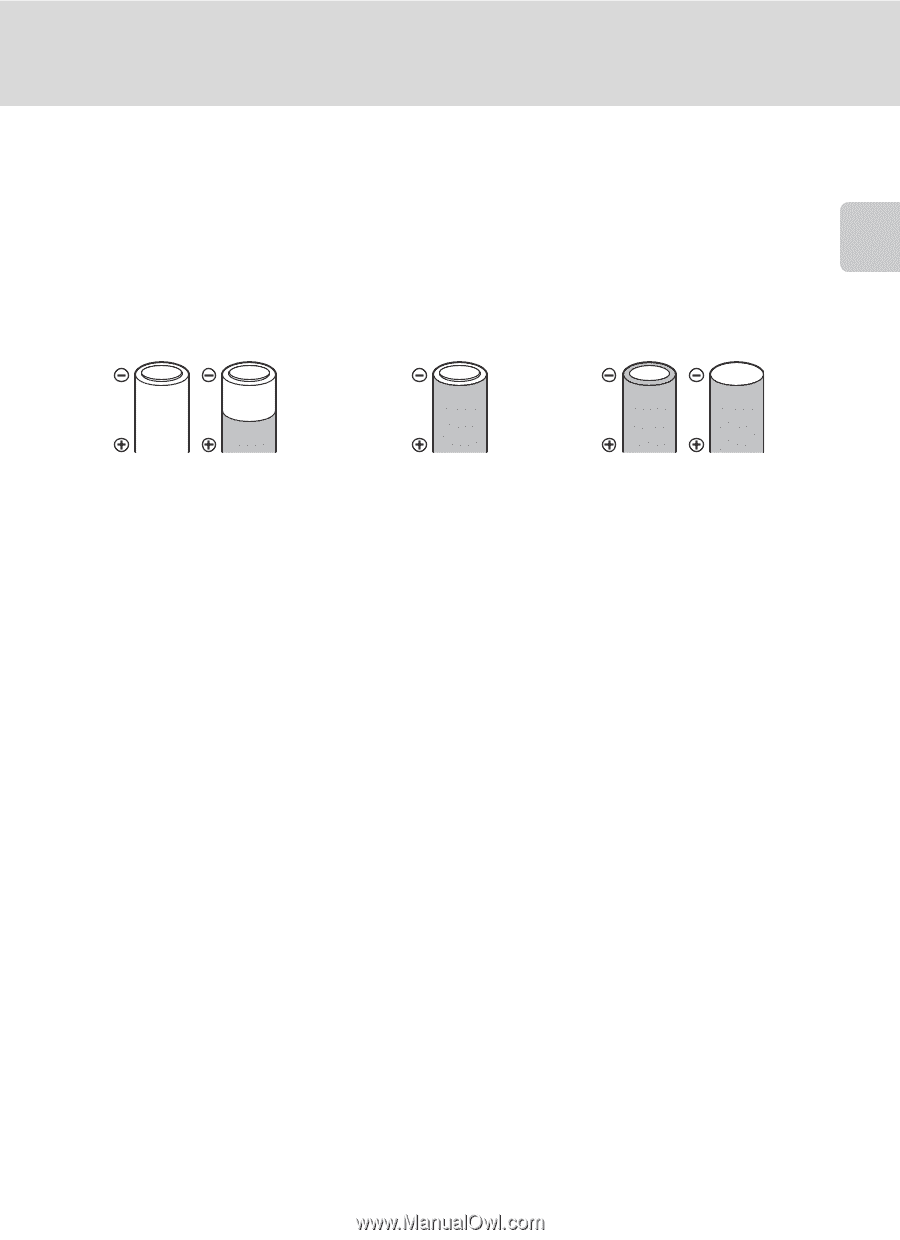
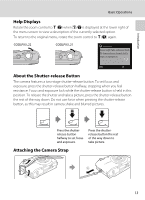
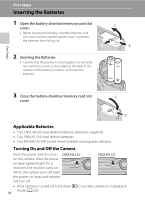
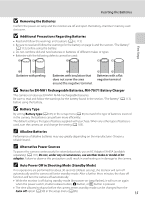
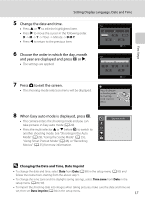
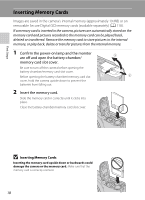
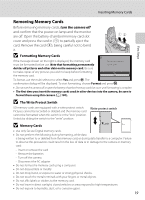
Inserting the Batteries B Removing the Batteries Confirm the power-on lamp and the monitor are off and open the battery-chamber/ memory card slot cover. B Additional Precautions Regarding Batteries • Read and follow the warnings and cautions (A iii, 113). • Be sure to read and follow the warnings for the battery on page iii and the section, "The Battery" (A 113), before using the battery. • Do not combine old and new batteries or batteries of different makes or types. • Batteries with the following defects cannot be used: First Steps Batteries with peeling Batteries with insulation that does not cover the area around the negative terminal. Batteries with a flat negative terminal B Notes for EN-MH1 Rechargeable Batteries, MH-70/71 Battery Charger This camera can also use EN-MH1 Ni-MH rechargeable batteries. Be sure to read and follow the warnings for the battery found in the section, "The Battery" (A 113), before using the battery. B Battery Type By setting Battery type (A 105) in the setup menu (A 85) to match the type of batteries inserted in the camera, the batteries can perform more efficiently. The default setting is the type of battery supplied with purchase. When any other type of battery is used, turn the camera on and change the setting (A 105). C Alkaline Batteries Performance of alkaline batteries may vary greatly depending on the manufacturer. Choose a reliable brand. C Alternative Power Sources To power the camera continuously for extended periods, use an AC Adapter EH-65A (available separately) (A 110). Do not, under any circumstances, use another make or model of AC adapter. Failure to observe this precaution could result in overheating or in damage to the camera. C Auto Power Off in Shooting Mode (Standby Mode) If no operations are performed for about 30 seconds (default setting), the monitor will turn off automatically and the camera will enter standby mode. After a further three minutes, the Auto off function will turn the camera off automatically. • While the monitor is off during standby mode (the power-on lamp flashes), it will turn on again when the power switch, shutter-release button, A button, or c button is pressed. • The time allowed to elapse before the camera enters standby mode can be changed from the Auto off option (A 99) in the setup menu (A 85). 15
-
 1
1 -
2
-
3
-
4
-
5
-
6
-
7
-
8
-
9
-
10
-
11
-
12
-
13
-
14
-
15
-
16
-
17
-
18
-
19
-
20
-
21
-
 22
22 -
 23
23 -
 24
24 -
 25
25 -
 26
26 -
 27
27 -
 28
28 -
 29
29 -
 30
30 -
 31
31 -
 32
32 -
33
-
34
-
35
-
36
-
37
-
38
-
39
-
40
-
41
-
42
-
43
-
44
-
45
-
46
-
47
-
48
-
49
-
50
-
51
-
52
-
53
-
54
-
55
-
56
-
57
-
58
-
59
-
60
-
61
-
62
-
63
-
64
-
65
-
66
-
67
-
68
-
69
-
70
-
71
-
72
-
73
-
74
-
75
-
76
-
77
-
78
-
79
-
80
-
81
-
82
-
83
-
84
-
85
-
86
-
87
-
88
-
89
-
90
-
91
-
92
-
93
-
94
-
95
-
96
-
97
-
98
-
99
-
100
-
101
-
102
-
103
-
104
-
105
-
106
-
107
-
108
-
109
-
110
-
111
-
112
-
113
-
114
-
115
-
116
-
117
-
118
-
119
-
120
-
121
-
122
-
123
-
124
-
125
-
126
-
127
-
128
-
129
-
130
-
131
-
132
-
133
-
134
-
135
-
136
-
137
-
138
-
139
-
140
-
141
-
142
-
143
-
144
-
145
-
146
-
147
-
148
 |
 |