Nikon COOLPIX S3500 User Manual - Page 33
Taking Pictures, Step 1-Ready the Camera - best setting
 |
View all Nikon COOLPIX S3500 manuals
Add to My Manuals
Save this manual to your list of manuals |
Page 33 highlights
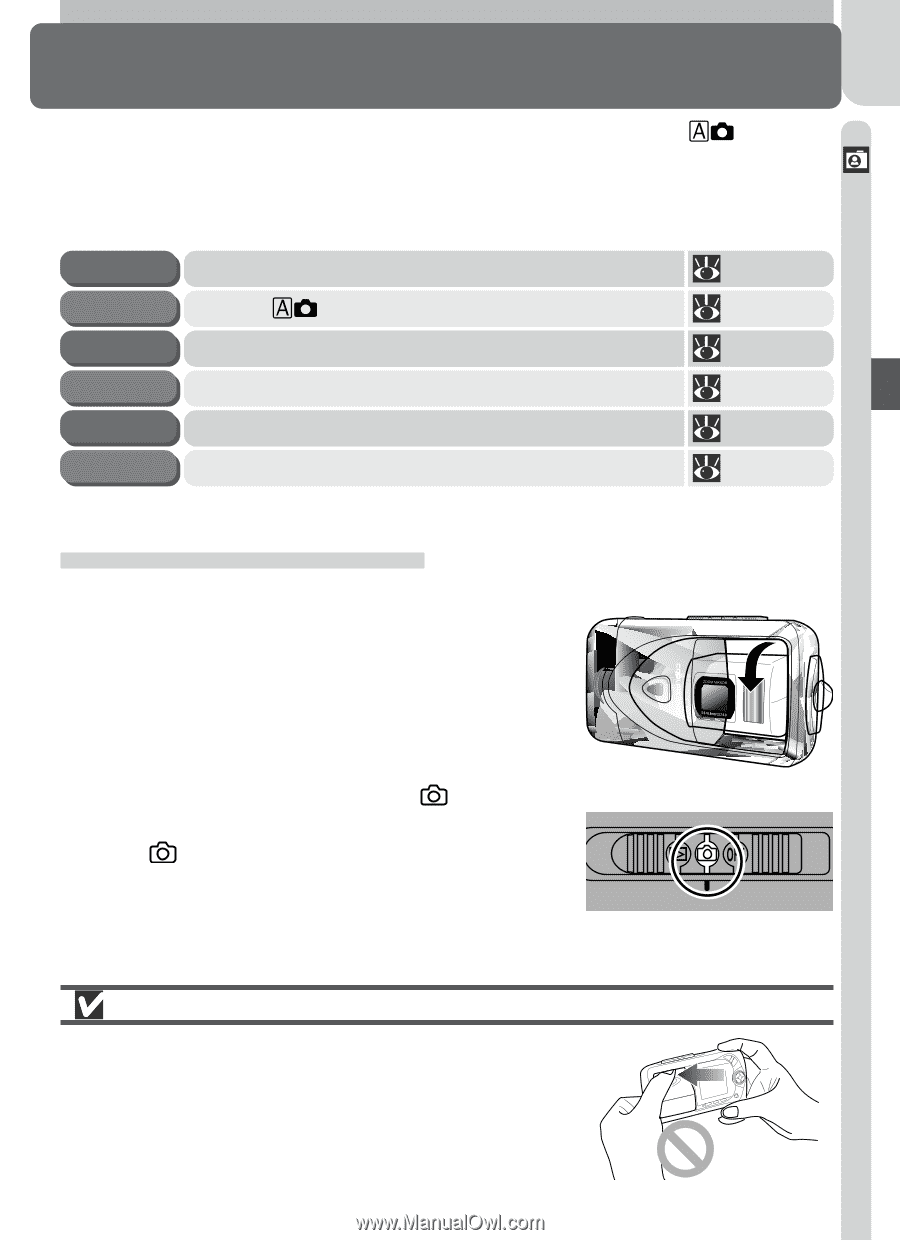
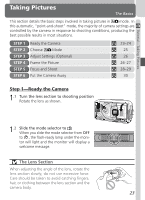
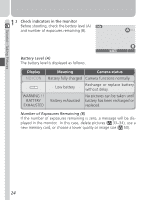
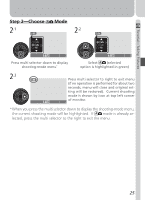
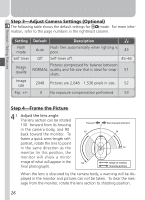
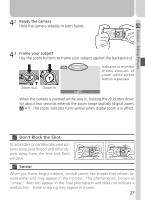
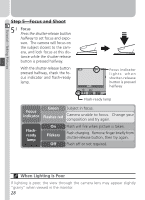
Tutorial-Taking Pictures Taking Pictures The Basics This section details the basic steps involved in taking pictures in mode. In this automatic, "point-and-shoot" mode, the majority of camera settings are controlled by the camera in response to shooting conditions, producing the best possible results in most situations. STEP 1 STEP 2 STEP 3 STEP 4 STEP 5 STEP 6 Ready the Camera Choose Mode Adjust Settings (Optional) Frame the Picture Focus and Shoot Put the Camera Away 23-24 25 26 26-27 28-29 30 Step 1-Ready the Camera 1.1 Turn the lens section to shooting position Rotate the lens as shown. 1.2 Slide the mode selector to When you slide the mode selector from OFF to , the flash-ready lamp under the monitor will light and the monitor will display a welcome message. The Lens Section When adjusting the angle of the lens, rotate the lens section slowly; do not use excessive force. Care should be taken to avoid catching fingers, hair, or clothing between the lens section and the camera body. 23
-
 1
1 -
2
-
3
-
4
-
5
-
6
-
7
-
8
-
9
-
10
-
11
-
12
-
13
-
14
-
15
-
16
-
17
-
18
-
19
-
20
-
21
-
22
-
23
-
24
-
25
-
26
-
27
-
 28
28 -
 29
29 -
 30
30 -
 31
31 -
 32
32 -
 33
33 -
 34
34 -
 35
35 -
 36
36 -
 37
37 -
 38
38 -
39
-
40
-
41
-
42
-
43
-
44
-
45
-
46
-
47
-
48
-
49
-
50
-
51
-
52
-
53
-
54
-
55
-
56
-
57
-
58
-
59
-
60
-
61
-
62
-
63
-
64
-
65
-
66
-
67
-
68
-
69
-
70
-
71
-
72
-
73
-
74
-
75
-
76
-
77
-
78
-
79
-
80
-
81
-
82
-
83
-
84
-
85
-
86
-
87
-
88
-
89
-
90
-
91
-
92
-
93
-
94
-
95
-
96
-
97
-
98
-
99
-
100
-
101
-
102
-
103
-
104
-
105
-
106
-
107
-
108
-
109
-
110
-
111
 |
 |