Nikon Coolpix L11 L10 / L11 User's Manual - Page 74
Connecting the Camera and Printer
 |
UPC - 018208255726
View all Nikon Coolpix L11 manuals
Add to My Manuals
Save this manual to your list of manuals |
Page 74 highlights
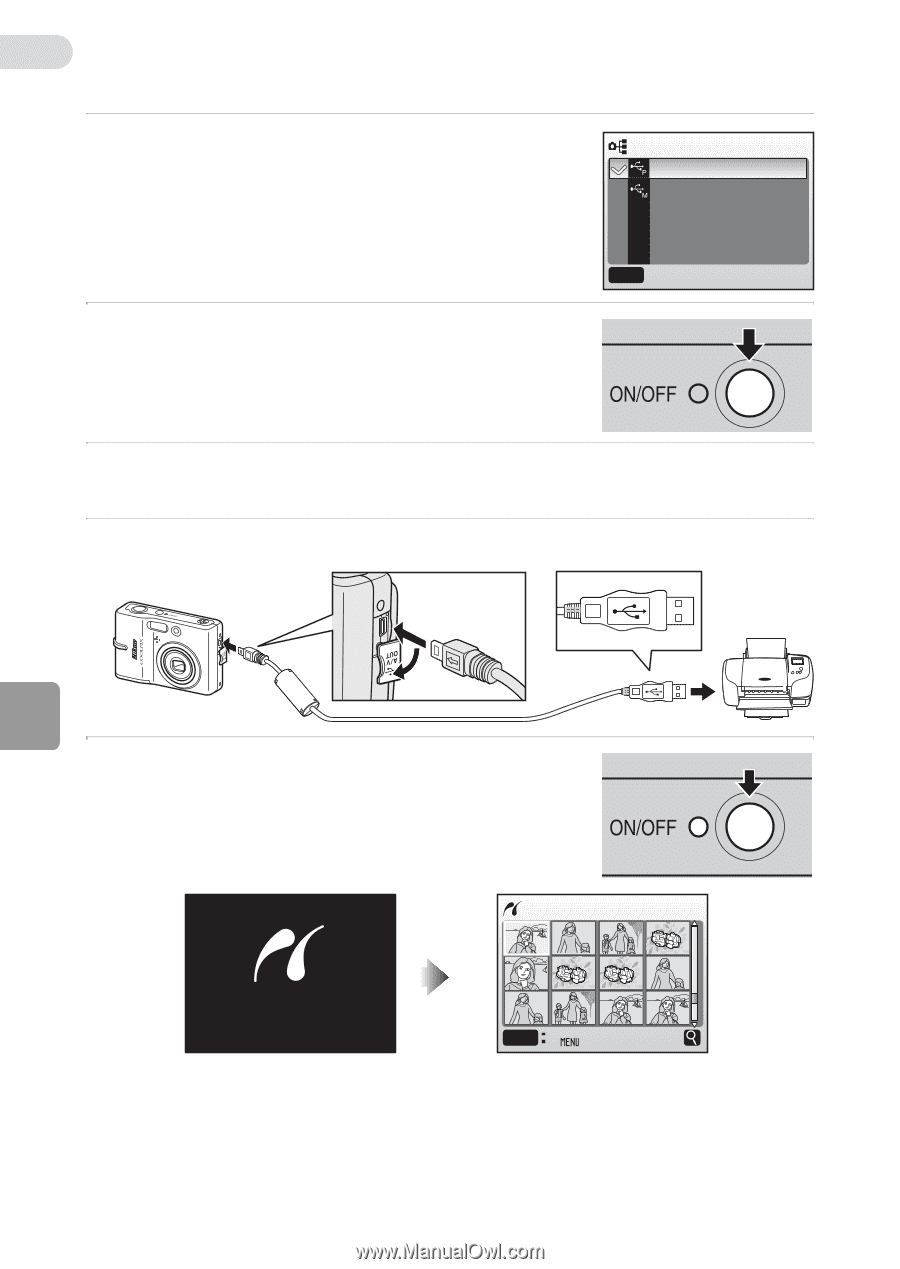
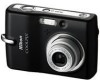
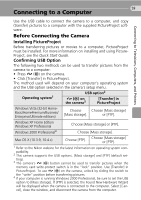
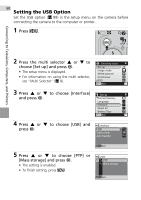
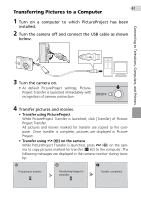
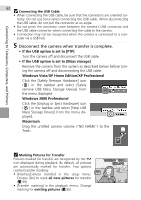
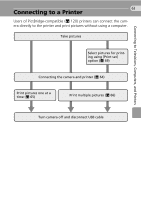
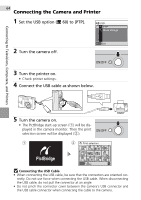
Connecting to Televisions, Computers, and Printers 64 Connecting the Camera and Printer 1 Set the USB option (c 60) to [PTP]. USB PTP Mass storage 2 Turn the camera off. MENU Exit 3 Turn the printer on. • Check printer settings. 4 Connect the USB cable as shown below. 5 Turn the camera on. • The PictBridge start-up screen (1) will be displayed in the camera monitor. Then the print selection screen will be displayed (2). 1 2 Print selection PictBridge MENU w j Connecting the USB Cable • When connecting the USB cable, be sure that the connectors are oriented correctly. Do not use force when connecting the USB cable. When disconnecting the USB cable, do not pull the connector at an angle. • Do not pinch the connector cover between the camera's USB connector and the USB cable connector when connecting the cable to the camera.
-
 1
1 -
2
-
3
-
4
-
5
-
6
-
7
-
8
-
9
-
10
-
11
-
12
-
13
-
14
-
15
-
16
-
17
-
18
-
19
-
20
-
21
-
22
-
23
-
24
-
25
-
26
-
27
-
28
-
29
-
30
-
31
-
32
-
33
-
34
-
35
-
36
-
37
-
38
-
39
-
40
-
41
-
42
-
43
-
44
-
45
-
46
-
47
-
48
-
49
-
50
-
51
-
52
-
53
-
54
-
55
-
56
-
57
-
58
-
59
-
60
-
61
-
62
-
63
-
64
-
65
-
66
-
67
-
68
-
 69
69 -
 70
70 -
 71
71 -
 72
72 -
 73
73 -
 74
74 -
 75
75 -
 76
76 -
 77
77 -
 78
78 -
 79
79 -
80
-
81
-
82
-
83
-
84
-
85
-
86
-
87
-
88
-
89
-
90
-
91
-
92
-
93
-
94
-
95
-
96
-
97
-
98
-
99
-
100
-
101
-
102
-
103
-
104
-
105
-
106
-
107
-
108
-
109
-
110
-
111
-
112
-
113
-
114
-
115
-
116
-
117
-
118
-
119
-
120
-
121
-
122
-
123
-
124
-
125
-
126
-
127
-
128
-
129
-
130
-
131
-
132
-
133
-
134
-
135
 |
 |