Nikon F75D Instruction Manual - Page 42
Dioptre Adjustment/Viewfinder Accessories, Depth-of-Field Preview
 |
UPC - 018208803163
View all Nikon F75D manuals
Add to My Manuals
Save this manual to your list of manuals |
Page 42 highlights
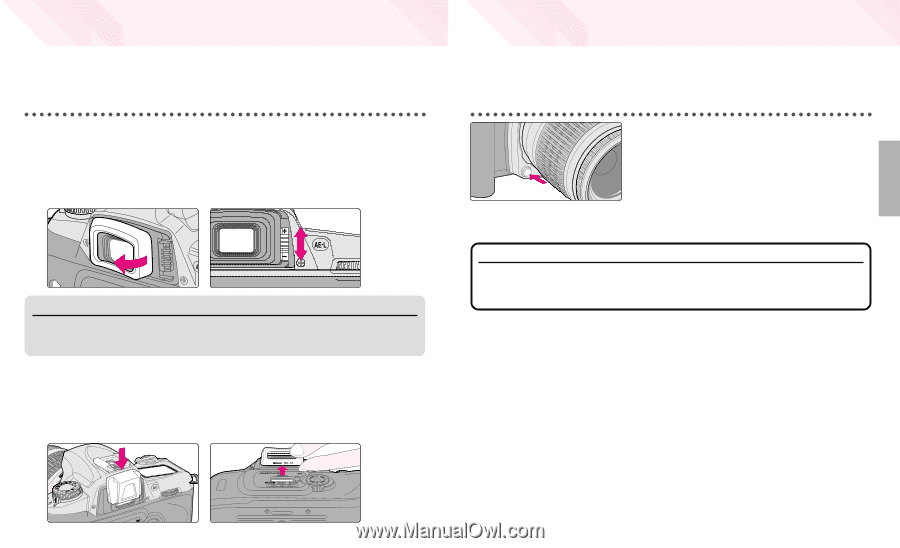
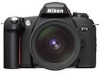
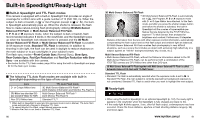
OTHER FUNCTIONS Dioptre Adjustment/Viewfinder Accessories The F75/F75D enables near- or far-sighted photographers to adjust the eyepiece dioptre to suit their vision. Viewfinder accessories such as an eyepiece cap or eyepiece correction lens can also be attached. Dioptre adjustment • Remove the rubber eyecup and slide the dioptre adjustment lever while looking through the viewfinder until the focus brackets or other displays in the viewfinder appear sharp. Attach the rubber eyecup again after adjustment. • The adjustable range of the finder dioptre is -1.5m-1 to +0.8m-1. Nine optional eyepiece correction lenses provide a viewfinder dioptre range of -5m-1 to +3m-1 (page 112). NOTE: Using the dioptre adjustment lever Since the dioptre adjustment lever is located next to the viewfinder, be careful not to poke yourself in the eye with your finger or fingernail while sliding the lever. Attaching viewfinder accessories • To attach the eyepiece cap DK-5 or eyepiece correction lens, remove the rubber eyecup and slide down the eyepiece cap or eyepiece correction lens. • To reattach the rubber eyecup after removing the DK-5 or eyepiece correction lens, make sure the "K DK-16" stamp is at the bottom. Depth-of-Field Preview Electronic preview function is available with this camera. Depress the depthof-field preview button to confirm the depth of field through the viewfinder (see page 102). • Pressing the depth-of-field preview button stops the lens down to the aperture controlled in a (AUTO mode), Vari-Program, Auto-Multi Program or Shutter-Priority Auto exposure mode, and down to the aperture selected in Aperture-Priority Auto or Manual exposure mode. By looking through the viewfinder, the approximate depth of field with the given aperture can be confirmed. Check point Electronic preview function is executed when CPU Nikkor lens is attached. It cannot be performed with non-CPU lenses (p. 106). 82 www.mynikon.com.pl 83
-
 1
1 -
2
-
3
-
4
-
5
-
6
-
7
-
8
-
9
-
10
-
11
-
12
-
13
-
14
-
15
-
16
-
17
-
18
-
19
-
20
-
21
-
22
-
23
-
24
-
25
-
26
-
27
-
28
-
29
-
30
-
31
-
32
-
33
-
34
-
35
-
36
-
 37
37 -
 38
38 -
 39
39 -
 40
40 -
 41
41 -
 42
42 -
 43
43 -
 44
44 -
 45
45 -
 46
46 -
 47
47 -
48
-
49
-
50
-
51
-
52
-
53
-
54
-
55
-
56
-
57
-
58
-
59
-
60
-
61
-
62
-
63
-
64
-
65
-
66
-
67
 |
 |