Onkyo TX SR501 Owner Manual - Page 26
Configuring Speaker Set
 |
UPC - 751398005213
View all Onkyo TX SR501 manuals
Add to My Manuals
Save this manual to your list of manuals |
Page 26 highlights
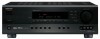
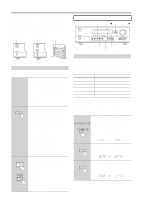
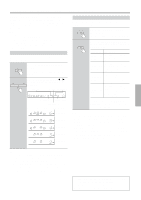
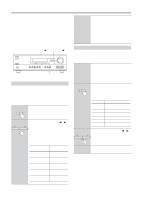
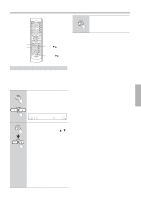
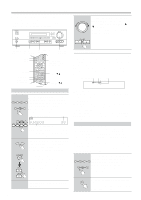
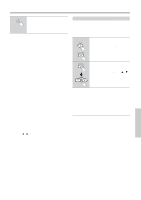
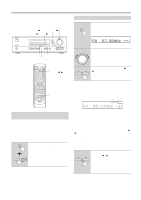
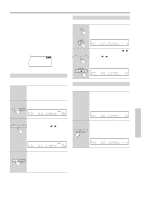
Configuring Speaker Set A This chapter describes how to configure speaker set A to achieve the best results from your surround sound system. There is no speaker configuration for speaker set B. • Before configuring, you must: -Disconnect any headphones (see page 33) -Turn off speaker set B (see page 32) -Make sure that Multich is off (see page 29) • The TX-SR501/TX-SR501E stores each setting, so you only need to configure your speakers once. PRESET/ADJUST STANDBY/ON A SPEAKERS B PHONES STANDBY DISPLAY SUBWOOFER DIMMER DIGITAL INPUT MODE MEMORY FM MODE CLEAR AUDIO SELECTOR DVD VIDEO 1 VIDEO 2 VIDEO 3 VCR DIRECT STEREO SURROUND DSP PRESET/ADJUST TUNING SPEAKER ADJUST AUDIO ADJUST MASTER VOLUME TAPE TUNER C D VIDEO 3 INPUT S VIDEO VIDEO L AUDIO R SPEAKER ADJUST Setting the Crossover Frequency To achieve the best bass performance from your speaker system, you need to set the crossover frequency according to the size and frequency response of your subwoofer and other speakers (front, center, and surround). If you're not using a subwoofer, bass sounds are output by the other speakers and this setting has no effect. 1 SPEAKER ADJUST Press the [SPEAKER ADJUST] button twice. The current crossover frequency is displayed. 2 PRESET/ADJUST Use the PRESET/ADJUST [ ] [ ] buttons to select a crossover frequency. You can select: 60 Hz, 80 Hz, 100 Hz, 120 Hz, or 150 Hz. The following table lists the crossover frequency you should choose depending on the diameter of your front speakers. Front speaker diameter Crossover frequency Larger than 8 inch (20 cm) 60 Hz 6-1/2-8 inch (16-20 cm) 80 Hz 5-1/4-6-1/2 inch (13-16 cm) 100 Hz (default) 3-1/2-5-1/4 inch (9-13 cm) 120 Hz Less than 3-1/2 inch (9 cm) 150 Hz For a more accurate setting, look up the frequency response in the manuals supplied with your speakers and set accordingly. In addition, listen to some music that you know well and choose a higher crossover frequency if you think there's not enough sound coming from the subwoofer; a lower setting if you think there's too much. Specifying Speaker Distances To get the best from surround sound, it's important that the sound from each speaker reaches the listener at the same time. To achieve this, you need to specify the distance from the listening position to each speaker. 1 Measure and make a note of the distance from the listening position to each speaker. You can specify speaker distances of between 1 and 30 ft. in 1 ft. steps (0.3 and 9 meters in 0.3 meter steps). 2 SPEAKER ADJUST Press the [SPEAKER ADJUST] button three times. "Distance Setup" appears on the display. Press the button again to select one of the following parameters. Parameter Description Front Front-left and front-right speakers Center Center speaker SurrRight Surround-right speaker Surr Back Surround-back speaker Surr Left Surround-left speaker Subwoofer Subwoofer 3 PRESET/ADJUST 4 Use the PRESET/ADJUST [ ] [ ] buttons to specify the speaker distance. Use the [DISPLAY] button to select meters or feet. Repeat steps 2 and 3 for all six parameters. Notes: • The Center and Subwoofer distances should be up to 5 ft. (1.5 m) more or less than the Front distance. For example, if the Front distance is set to 20 ft. (6 m), you should set the Center and Subwoofer distances between 15 and 25 ft. (4.5 and 7.5 m). • The SurrRight, Surr Left, and Surr Back distances should be up to 5 ft. (1.5 m) more or 15 ft. (4.5 m) less than the Front distance. For example, if the Front distance is set to 20 ft. (6 m), you should set the SurrRight, Surr Left, and Surr Back distances between 5 and 25 ft. (1.5 and 7.5 m). 26
-
 1
1 -
2
-
3
-
4
-
5
-
6
-
7
-
8
-
9
-
10
-
11
-
12
-
13
-
14
-
15
-
16
-
17
-
18
-
19
-
20
-
 21
21 -
 22
22 -
 23
23 -
 24
24 -
 25
25 -
 26
26 -
 27
27 -
 28
28 -
 29
29 -
 30
30 -
 31
31 -
32
-
33
-
34
-
35
-
36
-
37
-
38
-
39
-
40
-
41
-
42
-
43
-
44
-
45
-
46
-
47
-
48
 |
 |