Onkyo TX SR501 Owner Manual - Page 30
Using the Tuner
 |
UPC - 751398005213
View all Onkyo TX SR501 manuals
Add to My Manuals
Save this manual to your list of manuals |
Page 30 highlights
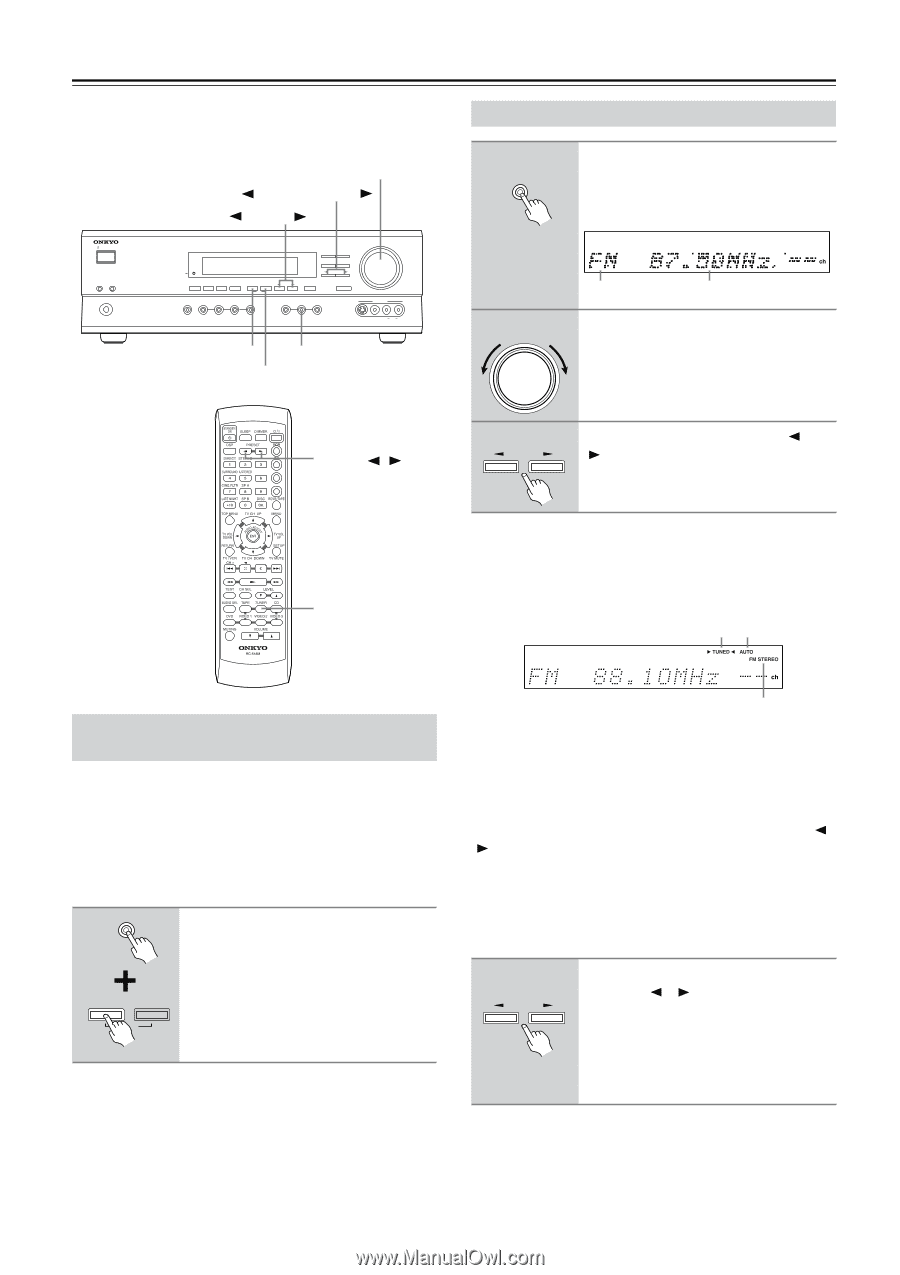
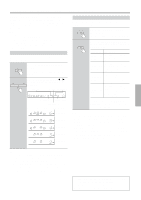
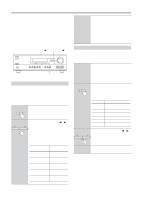
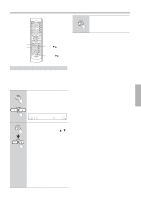
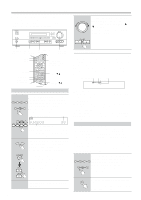
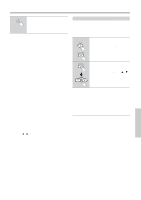
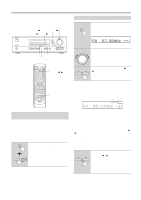
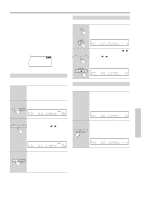
Using the Tuner This chapter explains how to use the built-in tuner. You can store your favorite radio stations as presets for convenient selection. MASTER VOLUME PRESET/ADJUST TUNING STANDBY/ON A SPEAKERS B PHONES STANDBY DISPLAY SUBWOOFER DIMMER DIGITAL INPUT MODE MEMORY FM MODE CLEAR AUDIO SELECTOR DVD VIDEO 1 VIDEO 2 VIDEO 3 VCR DIRECT STEREO SURROUND DSP PRESET/ADJUST TUNING SPEAKER ADJUST AUDIO ADJUST MASTER VOLUME TAPE TUNER C D VIDEO 3 INPUT S VIDEO VIDEO L AUDIO R MEMORY TUNER FM MODE Tuning into Radio Stations 1 TUNER Use the [TUNER] input selector button to select either AM or FM. In this example, the FM band has been selected. 2 MASTER VOLUME Band Frequency To adjust the volume, use the MASTER VOLUME control. The volume can typically be set to MIN, 1 though 79, or MAX. CABLE/SAT CD/DVD PRESET / CH + TUNER 3 TUNING Press and hold the TUNING [ ] or [ ] button for more than half a second and then release it. If you selected the FM band: The AUTO indicator appears on the display and the TX-SR501/TX-SR501E searches for the next station automatically. Searching stops when a station is found, and the TUNED and FM STEREO indicators appear, as shown. TUNED AUTO Setting the AM Tuning Interval (Worldwide model only) If you're using the Worldwide model (i.e., your TX-SR501/ TX-SR501E has a VOLTAGE SELECTOR on the rear panel), you need to set the AM tuning interval for compatibility with AM broadcasts in your particular country. The initial setting is 9 kHz. North America: 10 kHz Other countries: 9 kHz TUNER To set the AM tuning interval, while holding down the [TUNER] button, press the [MEMORY] button. MEMORY FM MODE CLEAR Note: All presets are deleted when you change this setting. FM STEREO The North American model searches the FM band in 0.1 MHz intervals. For other models it's 0.05 MHz. If you selected the AM band: The frequency stops changing when you release the TUNING button. The TX-SR501/TX-SR501E doesn't automatically search for AM stations. You must use the TUNING [ ] [ ] buttons. Press repeatedly to change the frequency one interval at a time, or press and hold to quickly change the frequency. When you're tuned into a station, the TUNED indicator appears. The North American model steps through the AM band in 10 kHz intervals. For other models it's 9 kHz. 4 TUNING To fine-tune the frequency, use the TUNING [ ] [ ] buttons. If you've selected the FM band, be careful that you don't press either button for more than half a second, otherwise the TX-SR501/TX-SR501E will start searching for the next station. 30
-
 1
1 -
2
-
3
-
4
-
5
-
6
-
7
-
8
-
9
-
10
-
11
-
12
-
13
-
14
-
15
-
16
-
17
-
18
-
19
-
20
-
21
-
22
-
23
-
24
-
 25
25 -
 26
26 -
 27
27 -
 28
28 -
 29
29 -
 30
30 -
 31
31 -
 32
32 -
 33
33 -
 34
34 -
 35
35 -
36
-
37
-
38
-
39
-
40
-
41
-
42
-
43
-
44
-
45
-
46
-
47
-
48
 |
 |