Panasonic Handheld P2 HD Camcorder with AVC-ULTRA Recording Operating Instruct - Page 24
Description of Parts - Top side, <MENU> button
 |
View all Panasonic Handheld P2 HD Camcorder with AVC-ULTRA Recording manuals
Add to My Manuals
Save this manual to your list of manuals |
Page 24 highlights
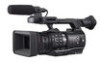
Chapter 2 Description of Parts - Top side 14 button This works when the thumbnail screen is displayed. Press this button to stop playback. Press this button when you stop interval recording or one-shot recording, or when you end combining to the clip of one-clip recording. 15 button This works when the thumbnail screen is displayed. Press this button during a pause to perform fast playback. Press this button during playback to perform 4x speed playback. If it is pressed with playback paused, the clip being played back is paused at the start point of the next clip (cued state). 16 button This works when the thumbnail screen is displayed. Press this button to view playback image. Press it during playback to pause playback. 17 button (page 100) Press the button to display the thumbnail screen on the LCD monitor and viewfinder. Press it again to return to the regular display. 18 / buttons (page 102) Restore the display to the previous state while the setting menu or property screen is displayed. Press this button while holding down the button to act as the cancel button. This is convenient, for example, for batch-canceling clip selections. 19 Control stick (page 102) Use this button to select a thumbnail or to perform operations of menus and area mode function. 20 button (page 116) Press this button to display [USER MENU]. Press this button for 3 seconds or more to display the main menu. Press it while the thumbnail is displayed to display the operation screen of the thumbnail menu, and clips can be deleted. 21 button (page 102) Use this button together with the control stick or other buttons. ffPress the control stick upward/downward while holding down the button. This moves the cursor to the thumbnail of the clip at the start or the end on the thumbnail screen. ffPress the control stick while holding down the button. This selects all clips from the previously selected clip up to the clip at the cursor position. ffPress the / buttons while holding down the button. This works as the cancelation function. (page 24) Operations with the button held down are displayed in orange at each operation section. 22 button (page 99) : When pressing during playback, the audio volume of the monitor is increased. When pressing during pause, frame-by-frame play is performed. : When pressing during playback, the audio volume of the monitor is decreased. When pressing during pause, frame-by-frame rewind is performed. 23 button (page 72) Switch on/off the color bar. The color bar is interlocked with the test tone (1 kHz). 24 button (page 40) Select the brightness of the backlight of the LCD monitor. - 24 -
-
 1
1 -
2
-
3
-
4
-
5
-
6
-
7
-
8
-
9
-
10
-
11
-
12
-
13
-
14
-
15
-
16
-
17
-
18
-
 19
19 -
 20
20 -
 21
21 -
 22
22 -
 23
23 -
 24
24 -
 25
25 -
 26
26 -
 27
27 -
 28
28 -
 29
29 -
30
-
31
-
32
-
33
-
34
-
35
-
36
-
37
-
38
-
39
-
40
-
41
-
42
-
43
-
44
-
45
-
46
-
47
-
48
-
49
-
50
-
51
-
52
-
53
-
54
-
55
-
56
-
57
-
58
-
59
-
60
-
61
-
62
-
63
-
64
-
65
-
66
-
67
-
68
-
69
-
70
-
71
-
72
-
73
-
74
-
75
-
76
-
77
-
78
-
79
-
80
-
81
-
82
-
83
-
84
-
85
-
86
-
87
-
88
-
89
-
90
-
91
-
92
-
93
-
94
-
95
-
96
-
97
-
98
-
99
-
100
-
101
-
102
-
103
-
104
-
105
-
106
-
107
-
108
-
109
-
110
-
111
-
112
-
113
-
114
-
115
-
116
-
117
-
118
-
119
-
120
-
121
-
122
-
123
-
124
-
125
-
126
-
127
-
128
-
129
-
130
-
131
-
132
-
133
-
134
-
135
-
136
-
137
-
138
-
139
-
140
-
141
-
142
-
143
-
144
-
145
-
146
-
147
-
148
-
149
-
150
-
151
-
152
-
153
-
154
-
155
-
156
-
157
-
158
-
159
-
160
-
161
-
162
-
163
-
164
-
165
-
166
-
167
-
168
-
169
-
170
-
171
-
172
-
173
-
174
-
175
-
176
-
177
-
178
-
179
-
180
-
181
-
182
-
183
-
184
-
185
-
186
-
187
-
188
-
189
-
190
-
191
-
192
 |
 |
