Pfaff creative 2124 Owner's Manual - Page 4
Table of content - embroidery unit
 |
View all Pfaff creative 2124 manuals
Add to My Manuals
Save this manual to your list of manuals |
Page 4 highlights
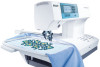
Table of content 1 Introduction Stitch Chart 1:8 Parts of the sewing machine 1:13 Parts of the embroidery unit 1:14 Parts of the embroidery hoop 1:14 Carrying case 1:15 Lid 1:15 Accessories 1:15 2 Preparations Operating Instructions 2:2 Volt switch 2:2 Electrical connection 2:2 Connecting the foot control 2:2 Main switch 2:3 Thread cutter 2:3 Changing the presser foot 2:4 The IDT (Integrated Dual Feed) 2:5 The feed dog 2:6 Changing the needle 2:7 Bobbin winding 2:8 Inserting the bobbin and bobbin case 2:12 Threading your creative 2124 2:13 Window indications 2:16 Getting started 2:17 Thread tension 2:17 3 Embroidery Control Panel overview 3:2 Embroidery box overview 3:3 Attaching the embroidery foot 3:3 Attach the embroidery unit 3:4 Removing the embroidery unit 3:4 Attach the hoop on the embroidery unit 3:5 Remove the hoop 3:5 Hooping the fabric 3:6 Function buttons for embroidery 3:7 Messages while embroidering 3:13 Get started to embroider 3:15 How to embroider words 3:16 Stabilizers 3:17 Needles 3:18 Threads 3:19 4 Sewing Control Panel buttons 4:2 Function buttons for sewing 4:3 Messages while sewing 4:7 How to select a stitch 4:8 Straight stitch 4:8 Three-step Zigzag stitch - No 4 4:8 Overlock stitches 4:9 Basting stitch - No 10 4:10 Top stitching - No 1 4:10 Blind stitch- No 5 4:11 Elastic blind stitch - No 6 4:11 Buttonholes 4:12 1:4
-
 1
1 -
 2
2 -
 3
3 -
 4
4 -
 5
5 -
 6
6 -
 7
7 -
 8
8 -
 9
9 -
 10
10 -
11
-
12
-
13
-
14
-
15
-
16
-
17
-
18
-
19
-
20
-
21
-
22
-
23
-
24
-
25
-
26
-
27
-
28
-
29
-
30
-
31
-
32
-
33
-
34
-
35
-
36
-
37
-
38
-
39
-
40
-
41
-
42
-
43
-
44
-
45
-
46
-
47
-
48
-
49
-
50
-
51
-
52
-
53
-
54
-
55
-
56
-
57
-
58
-
59
-
60
-
61
-
62
-
63
-
64
-
65
-
66
-
67
-
68
-
69
-
70
-
71
-
72
-
73
-
74
-
75
-
76
-
77
-
78
-
79
-
80
-
81
-
82
-
83
-
84
-
85
-
86
-
87
-
88
-
89
-
90
-
91
-
92
-
93
-
94
-
95
-
96
-
97
 |
 |
