Pfaff creative 2124 Owner's Manual - Page 83
Sewing in zippers - stitch no 1, Stretch triple straight stitch - stitch no 2, Darning with
 |
View all Pfaff creative 2124 manuals
Add to My Manuals
Save this manual to your list of manuals |
Page 83 highlights
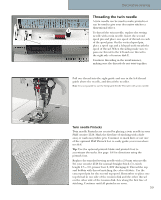
Decorative sewing Sewing in zippers - stitch no 1 There are different ways to sew in zippers. Follow the directions included with your pattern for best results. For all types of zippers it is important to sew close to the teeth of the zipper. The zipper foot can be snapped to the presser foot ankle on the left or right, depending on how you will insert your zipper. Then set the needle position so that it enters close to the edge of the zipper teeth by using one of the 13 needle positions available. If the presser foot is attached on the right side, the needle must only be moved to the right. If the foot is attached on the left, the needle must only be moved to the left. Stretch triple straight stitch - stitch no 2 This stitch is used for sewing seams where strength is needed, such as under arm and crotch seams. The heavier the fabric, the longer the stitch length required. Your Pfaff creative 2124 has 13 needle positions that can be adjusted with the stitch width button. Darning with the elastic stitch - stitch no 4 Use the elastic stitch to repair holes, tears and damaged areas. • If the area is only slightly damaged, sew over it with several rows of stitching until it is well covered. • For tears, frayed edges or small holes, place a piece of fabric, slightly larger than the damaged area and of the same color, on the wrong side of the fabric. Stitch over the damaged area, then cut away the excess fabric close to the stitching on the back side of your repair. 5:11
-
 1
1 -
2
-
3
-
4
-
5
-
6
-
7
-
8
-
9
-
10
-
11
-
12
-
13
-
14
-
15
-
16
-
17
-
18
-
19
-
20
-
21
-
22
-
23
-
24
-
25
-
26
-
27
-
28
-
29
-
30
-
31
-
32
-
33
-
34
-
35
-
36
-
37
-
38
-
39
-
40
-
41
-
42
-
43
-
44
-
45
-
46
-
47
-
48
-
49
-
50
-
51
-
52
-
53
-
54
-
55
-
56
-
57
-
58
-
59
-
60
-
61
-
62
-
63
-
64
-
65
-
66
-
67
-
68
-
69
-
70
-
71
-
72
-
73
-
74
-
75
-
76
-
77
-
 78
78 -
 79
79 -
 80
80 -
 81
81 -
 82
82 -
 83
83 -
 84
84 -
 85
85 -
 86
86 -
 87
87 -
 88
88 -
89
-
90
-
91
-
92
-
93
-
94
-
95
-
96
-
97
 |
 |
