Pfaff creative 7510 Owner's Manual - Page 34
on/off switch
 |
View all Pfaff creative 7510 manuals
Add to My Manuals
Save this manual to your list of manuals |
Page 34 highlights
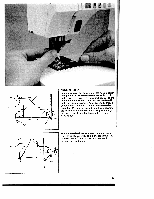
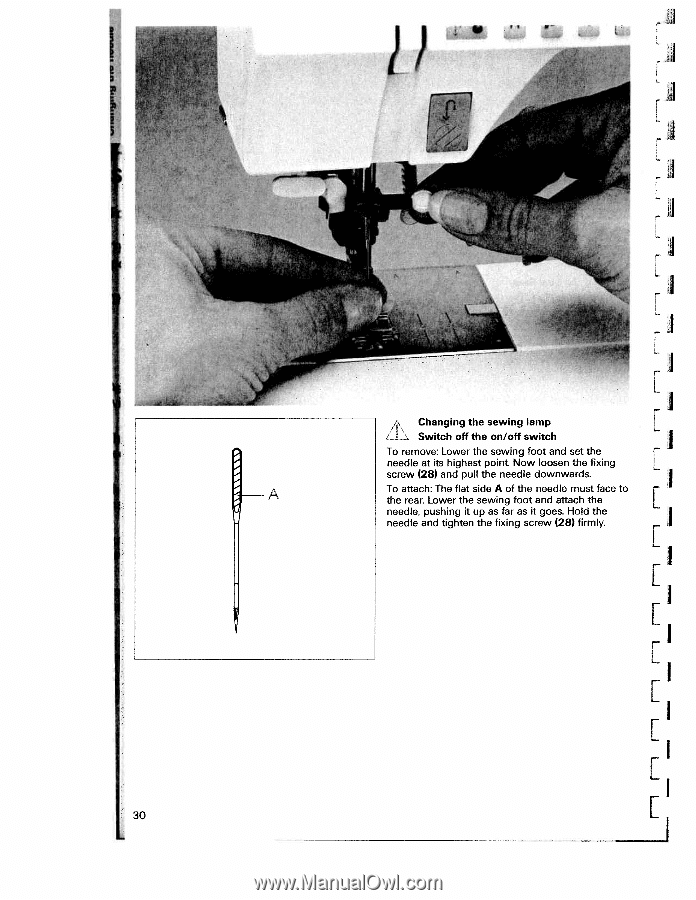
-jI iLl [ [ LAL. Changing the sewing lamp Switch off the on/off switch L To remove: Lower the sewing toot and set the needle at its highest point Now loosen the fixing L screw (28) and pull the needle downwards. To attach: The flat side A of the needle must face to the rear. Lower the sewing foot and attach the [ needle, pushing it up as far as it goes. Hold the needle and tighten the fixing screw (28) firmly. [ [ [ [ [ [ [ 30 [
-
 1
1 -
2
-
3
-
4
-
5
-
6
-
7
-
8
-
9
-
10
-
11
-
12
-
13
-
14
-
15
-
16
-
17
-
18
-
19
-
20
-
21
-
22
-
23
-
24
-
25
-
26
-
27
-
28
-
 29
29 -
 30
30 -
 31
31 -
 32
32 -
 33
33 -
 34
34 -
 35
35 -
 36
36 -
 37
37 -
 38
38 -
 39
39 -
40
-
41
-
42
-
43
-
44
-
45
-
46
-
47
-
48
-
49
-
50
-
51
-
52
-
53
-
54
-
55
-
56
-
57
-
58
-
59
-
60
-
61
-
62
-
63
-
64
-
65
-
66
-
67
-
68
-
69
-
70
-
71
-
72
-
73
-
74
-
75
-
76
-
77
-
78
-
79
-
80
-
81
-
82
-
83
-
84
-
85
-
86
-
87
-
88
-
89
-
90
-
91
-
92
-
93
-
94
-
95
-
96
-
97
-
98
-
99
-
100
-
101
-
102
-
103
-
104
-
105
-
106
-
107
-
108
-
109
-
110
-
111
-
112
-
113
-
114
-
115
-
116
-
117
-
118
-
119
-
120
-
121
-
122
-
123
-
124
-
125
-
126
-
127
-
128
-
129
-
130
-
131
-
132
-
133
-
134
-
135
-
136
-
137
-
138
-
139
-
140
-
141
-
142
 |
 |
-jI
[
L
L
[
[
[
[
[
[
[
[
iLl
[
A
Changing
the
sewing
lamp
LL.
Switch
off
the
on/off switch
To
remove:
Lower
the
sewing
toot
and
set
the
needle
at
its
highest
point
Now
loosen
the
fixing
screw
(28)
and
pull
the
needle
downwards.
To
attach:
The
flat
side
A
of
the
needle
must
face
to
the
rear. Lower
the
sewing
foot
and
attach
the
needle,
pushing
it
up
as
far
as
it
goes.
Hold
the
needle
and
tighten
the
fixing
screw
(28)
firmly.
[
30