Pfaff creative 7510 Owner's Manual - Page 82
lunlun
 |
View all Pfaff creative 7510 manuals
Add to My Manuals
Save this manual to your list of manuals |
Page 82 highlights
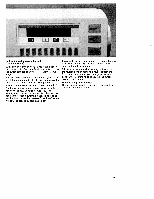
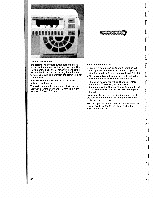
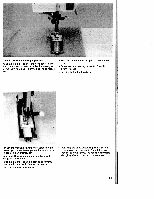
_ lunlun iir ound buttonhole mportant! The round buttonhole should be placed vith the round end facing the edge. The sewing of he buttonhole, however, begins at the bartack Jways sew the buttonholes from the inside utwards towards the edge. Aark the length of the buttonhole on the fabric irst making sure to measure from the starting oint inwards be round buttonhole is automatically sewn etween a length of 7 and 40 mm. The width is )etween 4 and 7 mm. • Select buttonhole No. 33. • The pre-programmed buttonhole length of 22 mm appears in the display. If you wish, you can alter this length with the numbered keys 7 and 8. • The second bartack can also be self defined for this buttonhole (see standard buttonhole). The stitch density cannot be changed for this buttonhole. Therefore you should sew this button hole with a stronger thread or gimp thread if required (see section "Buttonhles with gimp thread"). The stitch density of the second bead can be adjusted with the balance. Important! Before you start the buttonhole, push the runner of buttonhole foot No. 5A forwards up to the second red mark. 4 I HI 79
-
 1
1 -
2
-
3
-
4
-
5
-
6
-
7
-
8
-
9
-
10
-
11
-
12
-
13
-
14
-
15
-
16
-
17
-
18
-
19
-
20
-
21
-
22
-
23
-
24
-
25
-
26
-
27
-
28
-
29
-
30
-
31
-
32
-
33
-
34
-
35
-
36
-
37
-
38
-
39
-
40
-
41
-
42
-
43
-
44
-
45
-
46
-
47
-
48
-
49
-
50
-
51
-
52
-
53
-
54
-
55
-
56
-
57
-
58
-
59
-
60
-
61
-
62
-
63
-
64
-
65
-
66
-
67
-
68
-
69
-
70
-
71
-
72
-
73
-
74
-
75
-
76
-
 77
77 -
 78
78 -
 79
79 -
 80
80 -
 81
81 -
 82
82 -
 83
83 -
 84
84 -
 85
85 -
 86
86 -
 87
87 -
88
-
89
-
90
-
91
-
92
-
93
-
94
-
95
-
96
-
97
-
98
-
99
-
100
-
101
-
102
-
103
-
104
-
105
-
106
-
107
-
108
-
109
-
110
-
111
-
112
-
113
-
114
-
115
-
116
-
117
-
118
-
119
-
120
-
121
-
122
-
123
-
124
-
125
-
126
-
127
-
128
-
129
-
130
-
131
-
132
-
133
-
134
-
135
-
136
-
137
-
138
-
139
-
140
-
141
-
142
 |
 |
