Philips CD4552B User manual - Page 18
Warning, Checking the battery level, Setting the clock, Setting the date and time, format
 |
UPC - 609585144972
View all Philips CD4552B manuals
Add to My Manuals
Save this manual to your list of manuals |
Page 18 highlights
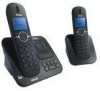
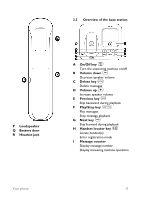
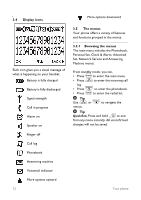
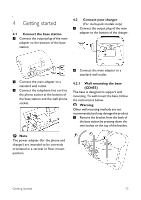
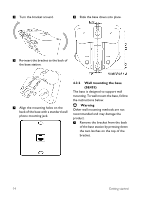
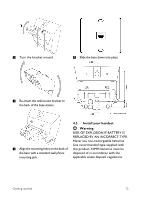
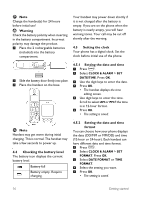
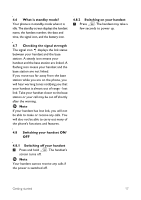
Note Charge the handset(s) for 24 hours before initial use! ! Warning Check the battery polarity when inserting in the battery compartment. Incorrect polarity may damage the product. 1 Place the 2 rechargeable batteries (included) into the battery compartment. Your handset may power down shortly if it is not charged after the battery is empty. If you are on the phone when the battery is nearly empty, you will hear warning tones. Your call may be cut off shortly after the warning. 4.5 Setting the clock Your phone has a digital clock. Set the clock before initial use of the phone. 2 Slide the battery door firmly into place. 3 Place the handset on the base. m 4.5.1 Setting the date and time 1 Press . 2 Select CLOCK & ALARM > SET DATE/TIME. Press OK. 3 Use the digit keys to enter the date. 4 Press OK. • The handset displays the time editing screen. 5 Use digit keys to enter the time. Scroll to select AM or PM if the time is in 12-hour format. 6 Press OK. • The setting is saved. Note Handset may get warm during initial charging. This is normal. The handset may take a few seconds to power up. 4.4 Checking the battery level The battery icon displays the current battery level. Battery full Battery empty. Require charging. 4.5.2 Setting the date and time format You can choose how your phone displays the date (DD/MM or MM/DD) and time (12-hour or 24-hour). Each handset can m have different date and time format. 1 Press . 2 Select CLOCK & ALARM > SET FORMAT. Press OK. 3 Select DATE FORMAT or TIME FORMAT. 4 Select the setting you want. 5 Press OK. • The setting is saved. 16 Getting started
-
 1
1 -
2
-
3
-
4
-
5
-
6
-
7
-
8
-
9
-
10
-
11
-
12
-
 13
13 -
 14
14 -
 15
15 -
 16
16 -
 17
17 -
 18
18 -
 19
19 -
 20
20 -
 21
21 -
 22
22 -
 23
23 -
24
-
25
-
26
-
27
-
28
-
29
-
30
-
31
-
32
-
33
-
34
-
35
-
36
-
37
-
38
-
39
-
40
-
41
-
42
-
43
-
44
-
45
-
46
-
47
-
48
-
49
-
50
-
51
-
52
-
53
-
54
-
55
-
56
-
57
-
58
-
59
-
60
-
61
-
62
-
63
-
64
 |
 |