Philips DVDR3506 User manual - Page 22
Main Menu
 |
UPC - 609585155190
View all Philips DVDR3506 manuals
Add to My Manuals
Save this manual to your list of manuals |
Page 22 highlights
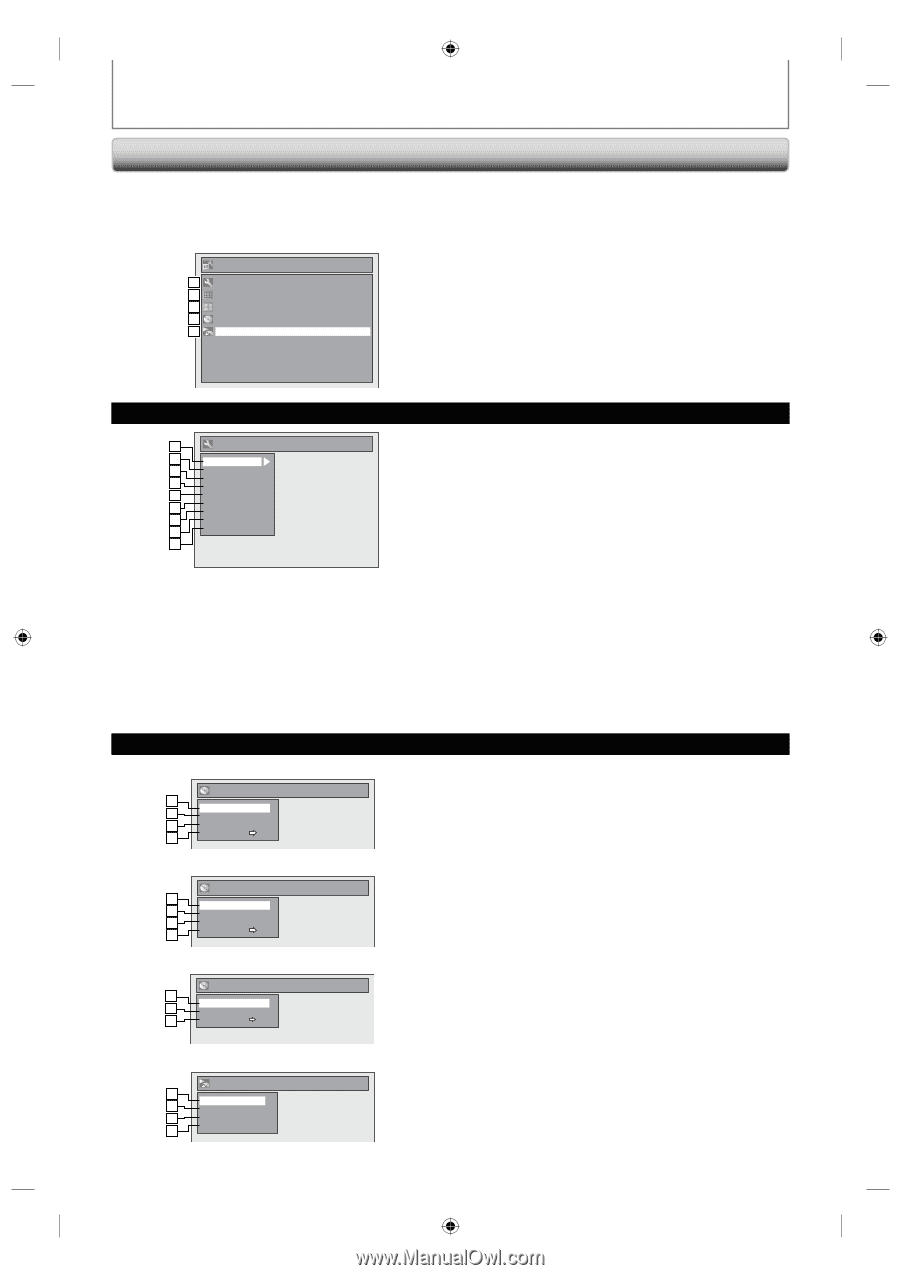
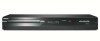
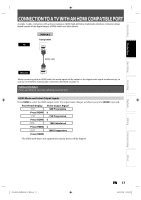
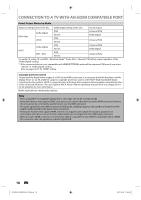
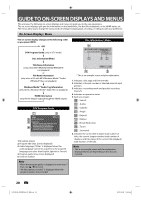
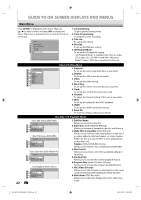
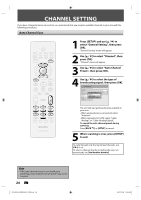
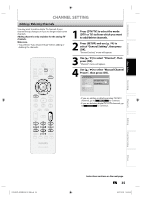
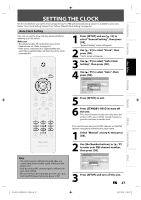
GUIDE TO ON-SCREEN DISPLAYS AND MENUS Main Menu Press [SETUP] to display the main menu. Then use [K / L] to select a menu and press [OK] to display the menu. These menus provide entries to all main functions of the unit. Setup 1 General Setting 2 Timer Programming 3 Title List 4 Disc Edit 5 CD Playback Mode 1. General Setting: To go to general setting menu. 2. Timer Programming: To program a timer recording. 3. Title List: To call up the title list. 4. Disc Edit: To set up the DVD disc setting. 5. CD Playback Mode: To set up the CD playback setting. • "CD Playback Mode" is available only when an audio CD, a video CD, a CD-RW/-R with MP3 / Windows Media™ Audio / JPEG files is inserted into the unit. 1 General Setting 2 Playback 3 Display 4 Video Recording 5 Clock 26 Channel DivX 37 HDMI 48 Reset All 59 General Setting Menu 1. Playback: To set up the unit to play back discs as you prefer. 2. Display: To set up the OSD screen as you prefer. 3. Video: To set up the video setting. 4. Recording: To set up the unit to record to discs as you prefer. 5. Clock: To set up the clock of the unit as you need. 6. Channel: To adjust the channel setting of the unit as you prefer. 7. DivX: To set up the setting for the DivX® playback. 8. HDMI: To set up the HDMI connection setting. 9. Reset All: To reset the setting to the factory default. Disc Edit / CD Playback Mode Disc Edit 1 2 Edit Disc Name Erase Disc 3 Make Edits Compatible 4 Disc Protect OFF ON Disc Edit 1 2 Edit Disc Name Erase Disc 3 Finalize 4 Disc Protect OFF ON Disc Edit 1 23 Edit Disc Name Finalize 34 Disc Protect OFF ON 22 CD Playback Mode 15 26 Random Play Program Play 37 PBC (Video CD only) 48 Slide Show EN 1. Edit Disc Name: Allows you to rename the disc. 2. Erase Disc: (DVD+RW/DVD-RW only) Allows you to erase all contents in the disc and format it. 3. Make Edits Compatible: (DVD+RW only) Allows you to memorize the editing status on the disc if you have added or deleted chapters, or made chapters hidden on this unit, and to effect it when playing back on the other unit. Finalize: (DVD+R/DVD-RW/-R only) Allows you to finalize a disc containing recorded titles. 4. Disc Protect : Allows you to protect a disc from accidental editing or recording. 5. Random Play: Allows you to activate the random playback feature. 6. Program Play: (audio CD/video CD only) Allows you to activate the program playback feature. 7. PBC (Video CD only): Allows you to select images or information on the menu screen by activating PBC (playback control) function. 8. Slide Show: (JPEG files only) Allows you to select the display time of the slide show mode. E7H42UD_DVDR3506-37_EN.indd 22 2007/12/28 10:52:55
-
 1
1 -
2
-
3
-
4
-
5
-
6
-
7
-
8
-
9
-
10
-
11
-
12
-
13
-
14
-
15
-
16
-
 17
17 -
 18
18 -
 19
19 -
 20
20 -
 21
21 -
 22
22 -
 23
23 -
 24
24 -
 25
25 -
 26
26 -
 27
27 -
28
-
29
-
30
-
31
-
32
-
33
-
34
-
35
-
36
-
37
-
38
-
39
-
40
-
41
-
42
-
43
-
44
-
45
-
46
-
47
-
48
-
49
-
50
-
51
-
52
-
53
-
54
-
55
-
56
-
57
-
58
-
59
-
60
-
61
-
62
-
63
-
64
-
65
-
66
-
67
-
68
-
69
-
70
-
71
-
72
-
73
-
74
-
75
-
76
-
77
-
78
-
79
-
80
-
81
-
82
-
83
-
84
-
85
-
86
-
87
-
88
-
89
-
90
-
91
-
92
-
93
-
94
-
95
-
96
-
97
-
98
-
99
-
100
-
101
-
102
-
103
-
104
-
105
-
106
-
107
-
108
 |
 |