Philips HTS3565D User manual - Page 18
Step 4: Connecting the, power cord
 |
UPC - 609585146938
View all Philips HTS3565D manuals
Add to My Manuals
Save this manual to your list of manuals |
Page 18 highlights
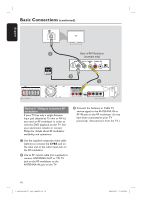
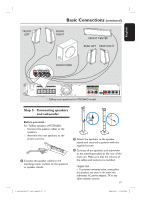
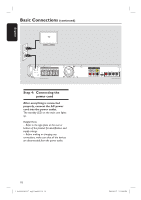
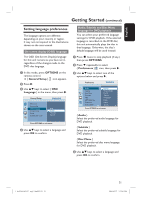
Basic Connections (continued) English AUX 2 AUX 1 Step 4: Connecting the power cord After everything is connected properly, connect the AC power cord into the power outlet. The standby LED on the main unit lights up. Helpful Hints: - Refer to the type plate at the rear or bottom of the product for identification and supply ratings. - Before making or changing any connections, make sure that all the devices are disconnected from the power outlet. 18 1_hts3565-66D_37_eng2_final813.i18 18 2008-03-27 3:12:00 PM
-
 1
1 -
2
-
3
-
4
-
5
-
6
-
7
-
8
-
9
-
10
-
11
-
12
-
 13
13 -
 14
14 -
 15
15 -
 16
16 -
 17
17 -
 18
18 -
 19
19 -
 20
20 -
 21
21 -
 22
22 -
 23
23 -
24
-
25
-
26
-
27
-
28
-
29
-
30
-
31
-
32
-
33
-
34
-
35
-
36
-
37
-
38
-
39
-
40
-
41
-
42
-
43
-
44
-
45
-
46
-
47
-
48
-
49
-
50
-
51
-
52
-
53
-
54
-
55
-
56
-
57
-
58
-
59
 |
 |
18
English
Basic Connections
(continued)
AUX 1
AUX 2
Step 4: Connecting the
power cord
After everything is connected
properly, connect the AC power
cord into the power outlet.
The standby LED on the main unit lights
up.
Helpful Hints:
– Refer to the type plate at the rear or
bottom of the product for identification and
supply ratings.
– Before making or changing any
connections, make sure that all the devices
are disconnected from the power outlet.
1_hts3565-66D_37_eng2_final813.i18 18
1_hts3565-66D_37_eng2_final813.i18
18
2008-03-27 3:12:00 PM
2008-03-27
3:12:00 PM