Pioneer AVICN5 Owner's Manual
Pioneer AVICN5 - AVIC N5 - Navigation System Manual
 |
UPC - 012562890166
View all Pioneer AVICN5 manuals
Add to My Manuals
Save this manual to your list of manuals |
Pioneer AVICN5 manual content summary:
- Pioneer AVICN5 | Owner's Manual - Page 1
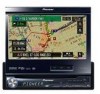
Operation Manual DVD MULTIMEDIA AV NAVIGATION SERVER AVIC-N5 Notice to all users: This software requires that the navigation system is properly connected to your vehicle's parking brake and depending on your vehicle, additional installation may be required. For more information, please contact your - Pioneer AVICN5 | Owner's Manual - Page 2
and function improvements. Introduction License Agreement 9 - PIONEER AVIC-N5 - for U.S.A. 9 - PIONEER AVIC-N5 - for Canada 11 - Terms and Conditions for the Tele Atlas Data 13 About the Data for the Map Database 15 Copyright Notices for North American data 16 Manual Overview 16 - How to use this - Pioneer AVICN5 | Owner's Manual - Page 3
navigation system to the initial (factory) setting 29 DVD Map Discs for Your Navigation System 29 - Configuration of data recorded on discs 29 Initial Use 29 Basic Operation Navigation the front panel 33 - Attaching the front panel 33 About NAVI MENU and AV MENU 34 Basic Navigation 34 - How to set - Pioneer AVICN5 | Owner's Manual - Page 4
driving status 77 - Checking the connections of leads and installation positions 78 Customizing Your Navigation System Modifying the Default Settings 80 Items Users can Change 80 - Volume 80 - System Options 81 - Short-Cut Selection 82 - Map Display Options 82 - Defined Locations 83 - Demo Mode 84 - Pioneer AVICN5 | Owner's Manual - Page 5
radio operation 100 - Storing the strongest broadcast frequencies 100 - Tuning in strong signals 100 Using the AV Source (Pioneer AV Equipment) Multi-DVD Player 101 - Playing a disc Advanced USB operation 103 XM Tuner 104 - Listening to XM Satellite Radio 104 - Switching the XM channel select mode - Pioneer AVICN5 | Owner's Manual - Page 6
random play with one touch 125 - Touch panel key operation (VIDEO) 126 - Advanced iPod operation 126 - Wide Screen 127 - Turning on or off charging for the iPod 127 Bluetooth Audio 127 - Listening to songs on BT Audio (Bluetooth audio player) 127 - Pausing track playback 128 - Advanced BT-Audio - Pioneer AVICN5 | Owner's Manual - Page 7
132 - Setting the simulated sound stage 132 - Adjusting DVD 143 Appendix Troubleshooting 144 Messages and how to react to them 149 Error Messages 154 Anti-theft function 155 - Setting the password 155 - Enter the password 155 - Delete the password 155 - If the password is forgotten 155 Installing - Pioneer AVICN5 | Owner's Manual - Page 8
of the Disc 168 - DVD Map Discs 168 - DVD drive and care 168 - DVD-Video 169 - DVD-R/-RW and CD-R/-RW 169 - About playing DualDisc 169 - MP3, WMA and AAC files 170 - DivX video files 171 - DivX subtitle files 172 - Ambient conditions for playing a disc 172 Using the Navigation System Correctly 173 - Pioneer AVICN5 | Owner's Manual - Page 9
Introduction License Agreement PIONEER AVIC-N5 - for U.S.A. THIS IS A LEGAL AGREEMENT BETWEEN YOU, AS THE END USER, AND PIONEER ELECTRONICS (USA) INC. ("PIONEER"). PLEASE READ THE TERMS AND CONDITIONS OF THIS AGREEMENT CAREFULLY BEFORE USING THE SOFTWARE INSTALLED ON THE PIONEER PRODUCTS. BY USING - Pioneer AVICN5 | Owner's Manual - Page 10
YOU AGREE THAT PIONEER'S LIABILITY SHALL NOT EXCEED FIFTY PERCENT (50%) OF THE PRICE PAID BY YOU FOR THE ENCLOSED PIONEER PRODUCT. Some that you will not re-export the Software nor any other technical data received from Pioneer, nor the direct product thereof, except as permitted by the laws and - Pioneer AVICN5 | Owner's Manual - Page 11
Chapter 01 Introduction PIONEER AVIC-N5 - for Canada THIS IS A LEGAL AGREEMENT BETWEEN YOU, AS THE END USER, AND PIONEER ELECTRONICS OF CANADA, INC. ("PIONEER"). PLEASE READ THE TERMS AND CONDITIONS OF THIS AGREEMENT CAREFULLY BEFORE USING THE SOFTWARE INSTALLED ON THE PIONEER PRODUCTS. BY USING - Pioneer AVICN5 | Owner's Manual - Page 12
YOU AGREE THAT PIONEER'S LIABILITY SHALL NOT EXCEED FIFTY PERCENT (50%) OF THE PRICE PAID BY YOU FOR THE ENCLOSED PIONEER PRODUCT. Some states that you will not re-export the Software nor any other technical data received from Pioneer, nor the direct product thereof, except as permitted by the laws - Pioneer AVICN5 | Owner's Manual - Page 13
. 1 Grant of License. Tele Atlas grants you a non-transferable, nonexclusive license to use the map data and business points of interest information (the "POIs"), (together, the "Data") contained on these discs, solely for personal, non-commercial use and not to operate a service bureau or for any - Pioneer AVICN5 | Owner's Manual - Page 14
use, duplication, reproduction, release, modification, disclosure or transfer of this commercial product and accompanying documentation, is restricted on the Government's rights shall control. Contractor/ manufacturer is Tele Atlas North America, Inc., 11 Lafayette Street, Lebanon, NH 037661445 - Pioneer AVICN5 | Owner's Manual - Page 15
et tous les documents attachés soient rédigés en Anglais. 10 Miscellaneous. This is the exclusive and complete Agreement between Tele Atlas and you regarding the direct benefit of Tele Atlas and may be enforced by Tele Atlas directly against you. About the Data for the Map Database ! This database - Pioneer AVICN5 | Owner's Manual - Page 16
on the screen, you will find the necessary page from the "Display Information" section at the end of the manual. How to use this manual For safety reasons, it is particularly important that you fully understand your navigation system before using it. Be sure to read " Introduction", Chapter - Pioneer AVICN5 | Owner's Manual - Page 17
(default settings), read the relevant section of this chapter. Using the AV Source (Built-in DVD Drive and Radio) Describes how to use DVD-Video, CD, ROM, DivX and the radio. Using the AV Source (Pioneer AV Equipment) When Pioneer AV equipment is connected to the navigation system, that equipment - Pioneer AVICN5 | Owner's Manual - Page 18
most accurate destination mapping. Upgrade DVDs are available for purchase through your local Pioneer dealer. p Never use headphones while driving. WARNING Do not attempt to install or service your navigation system by yourself. Installation or servicing of the navigation system by persons without - Pioneer AVICN5 | Owner's Manual - Page 19
this number on the enclosed warranty card. Failure to operate Should the navigation system fail to operate properly, contact your dealer or nearest authorized Pioneer Service Station. After-sales service for Pioneer products Please contact the dealer or distributor from which you purchased the - Pioneer AVICN5 | Owner's Manual - Page 20
be reprogrammed. WARNING Handling the cord on this product or cords associated with accessories sold with the product may expose you to chemicals listed on proposition 65 known of applicable laws, the navigation system is not for use with a "Video image" that is visible to the driver. 20 En - Pioneer AVICN5 | Owner's Manual - Page 21
"Video image" or to enable other functions offered by the navigation system, GPS signal detection, speed pulse wire connectivity, and driving habits or conditions of the place where the vehicle is parked. ! It is strongly suggested that the speed pulse wire be connected for accuracy of navigation - Pioneer AVICN5 | Owner's Manual - Page 22
without notice. Purchasing software upgrade Using the most current map DVDs will allow for most accurate destination mapping. Upgrade DVDs are available for purchase through your local Pioneer dealer. Features Touch panel key operation It is possible to operate the navigation function and the audio - Pioneer AVICN5 | Owner's Manual - Page 23
page 25. = For more information, refer to Handling and Care of the Disc on page 168. MP3 file playback It is possible to play back MP3 files recorded on CD-R/-RW/-ROM and DVD-R/-RW/-ROM. p Supply of this navigation system only con- veys a license for private, non-commercial use and does not convey - Pioneer AVICN5 | Owner's Manual - Page 24
), you can control a Bluetooth audio player featuring Bluetooth wireless technology. Dolby Digital When using Pioneer multi-channel processors that are planned to be compatible with this navigation system, please consult your dealer or nearest authorized Pioneer Service Station. p Manufactured under - Pioneer AVICN5 | Owner's Manual - Page 25
changes made by XM Satellite Radio in the lineup or icon of the broadcast station in the future may not be supported by the navigation system, and may cause the unit not to display the correct icons. About XM NavTraffic Service and Pioneer Navigation p XM NavTraffic subscription is required - Pioneer AVICN5 | Owner's Manual - Page 26
more information about the writing method, see the operation manual for the writing device. About DVD Map Disc You can use discs intended for this navigation system. Use only discs approved by Pioneer. = For details, refer to DVD Map Discs on page 168. Mark 2 2 3 16 : 9 LB 1 ALL Meaning Indicates - Pioneer AVICN5 | Owner's Manual - Page 27
or nearest authorized Pioneer service station regarding the satellite radio tuner that can be connected to this navigation system. Note: The system will use direct satellite-to-receiver broadcasting technology to provide listeners in their cars and at home with crystal-clear sound seamlessly from - Pioneer AVICN5 | Owner's Manual - Page 28
first time after installation. ! If the product fails to operate properly. ! If there appear to be problems with the op- eration of the system. ! When changing the combination of the equipment. ! When adding/removing additional pro- ducts that connect to the navigation system. 1 Turn the ignition - Pioneer AVICN5 | Owner's Manual - Page 29
Use If the initial learning is not complete, following screen appears. % If a message appears, touch [OK]. DVD Map Discs for Your Navigation System Configuration of data recorded on discs The map for this navigation system is supplied on two discs: one for the west and the other for the east - Pioneer AVICN5 | Owner's Manual - Page 30
gives information about the names of the parts and the main features using the buttons. 1 Disc indicator When a disc is set in navigation system, this indicator lights. 2 LCD panel 3 LCD screen 4 AV button Press to display the AV operation screen. 5 MAP button Press to view the map or change view - Pioneer AVICN5 | Owner's Manual - Page 31
, see page 156 and install the program. 1 Start the engine. The navigation system is also turned on. After some time, the navigation opening screen comes on for a few seconds. Then, a message screen is displayed. p Insert the Pioneer DVD Map Disc to the disc loading slot. 2 Check the details - Pioneer AVICN5 | Owner's Manual - Page 32
ACC), the LCD panel will open automatically. - Removing or attaching the front panel will automatically close or open the LCD panel. screen is displayed during the navigation screen, the map screen is displayed. When Flap Setup screen is displayed during the AV screen, the current AV operation screen - Pioneer AVICN5 | Owner's Manual - Page 33
screen appears. 2 Touch [Auto Flap]. Each touch of [Auto Flap] changes the settings as follows: ! Manual - You have to press OPEN/CLOSE button to open/close the display ! Auto - The display automatically opens/ closes when power to navigation system keeping. Attaching the front panel % Replace the - Pioneer AVICN5 | Owner's Manual - Page 34
] AV operation screen Press MENU button AV MENU Basic Navigation The most basic search function is Address Search, in which the address is specified and the destination searched. This section describes how to use Address Search and the basics of using the navigation system. CAUTION For safety - Pioneer AVICN5 | Owner's Manual - Page 35
the information about your destination. j 8 Navigation system calculates the route to your destination, and then shows the route on the map. j 9 After releasing the parking brake, drive in accordance with the navigation guidance, subject to the important safety instructions noted on page 19 to page - Pioneer AVICN5 | Owner's Manual - Page 36
You can input symbols such as "&" and "+". 0-9: You can input numbers. Back: Returns you to the previous screen. p For example, for [Early California Ct], you can just enter part of the name, such as [California]. p When entering the characters, the unit will automatically query the database for all - Pioneer AVICN5 | Owner's Manual - Page 37
. ! Touching the displays a map of the place you have selected. (Candidate place names may appear in the list screen.) = For details concerning operations, page 62. 10 Drive in accordance with the screen and voice information. Your navigation system gives you the following information with the timing - Pioneer AVICN5 | Owner's Manual - Page 38
Disc is removed from the navigation system. Some functions are restricted and different from the navigation using the DVD Map Disc (DVD navi mode). If you want to use these functions, please insert the DVD Map Disc again. During the memory navi mode, navigation is performed only using the data read - Pioneer AVICN5 | Owner's Manual - Page 39
p Touch [TRAFFIC] to switch to XM or SIRIUS screen that memorized traffic channel. = Refer to Using the direct traffic announcement function on page 107, page 112. p Sources that are not connected to the navigation system, sources that are busy reading a disc or magazine, and sources with incomplete - Pioneer AVICN5 | Owner's Manual - Page 40
knob to switch the source to mute. 3 Press VOLUME knob (or AV button) to switch DISC operation screen. How to listen to a CD You can listen to an audio CD by removing the DVD Map Disc from the navigation system. = Refer to Memory navi mode on page 38. (For details, refer to page 158.) 1 Press - Pioneer AVICN5 | Owner's Manual - Page 41
mode. Or, the function is not available for areas not stored on the disc. Touching this button activates a message indicating that the function is not available. direction of travel Next direction of travel p If you touch the screen, the touch panel keys are displayed again. The function is not - Pioneer AVICN5 | Owner's Manual - Page 42
in gray with white letters. If you want to use such functions, insert the DVD Map Disc. NAVI MENU Use this menu for basic operation of your navigation system. 1 With the map displayed, press MENU button. 2 To change to the menu you want to use, touch the name of the menu displayed at the top of the - Pioneer AVICN5 | Owner's Manual - Page 43
those that can be selected with the system as default setting. p Items marked destination on the map on page 49. : Change Route* Displayed when the map is not scrolled. the scroll cursor on page 51. : Registration Registers the location : Volume Setting The sound volume for the navigation can be set. = - Pioneer AVICN5 | Owner's Manual - Page 44
provided by your navigation system can be seen on the map. You need to get to know how the information that appears on the map. Switching the current position screen display mode There are four types of map display and two additional view modes. ! Map View ! Driver's View ! Guide View (during route - Pioneer AVICN5 | Owner's Manual - Page 45
Map Display Chapter 03 Navigation Menu and Map Display Guide View Overlays two arrows onto the standard map ("Map View"). 1 a8 2 7 f g 4 b 5 c 9 h6 3 Route View Displays the name times (e.g. when monitoring an attached trailer) as a split screen where map information is partially displayed. - Pioneer AVICN5 | Owner's Manual - Page 46
Navigation Menu and Map Display Enlarged map of the intersection When [Close-up of Junction] in Settings menu is [On], an enlarged map of the junction appears. When driving on a freeway, a special guide illustration is displayed. e d p The system cannot be changed to an enlarged intersection map - Pioneer AVICN5 | Owner's Manual - Page 47
Menu and Map Display Chapter 03 Navigation Menu and Map Display = Refer to Changing the scale of the map on this page. 8 Map scale The scale of the map is indicated by distance. = Refer to Changing the scale of the map on this page. 9 TRAFFIC icon This appears when an XM tuner (GEXP10XMT - Pioneer AVICN5 | Owner's Manual - Page 48
Navigation Menu and Map Display p In memory navi mode and/or when traversing an area not stored on the disc, selection of the scales is limited. 3 12 5 Direct scale key p The icon of a registered location and the traffic information icons are displayed when the map name, city name, area name - Pioneer AVICN5 | Owner's Manual - Page 49
Menu and Map Display Chapter 03 Navigation Menu and Map Display 2 Touch . Information for a specified location appears. The displayed information varies according to the location. (There may be no information for that location.) = For details, - Pioneer AVICN5 | Owner's Manual - Page 50
calculation, the calculation is canceled and the map display appears. p Inserting the DVD Map Disc will cause a forced reroute. (This by address on page 35. 3 Touch [Category]. Category Name: Touch if you wish to first specify the POI Name. City: Touch if you wish to first specify the destination - Pioneer AVICN5 | Owner's Manual - Page 51
Search]. 2 Touch the desired category. Category 3 Touch [OK]. Names of POIs and their distance from your current location appear. They are used when setting Vicinity Search icon to display as a shortcut on the map screen. = For details concerning operations, refer to Short-Cut Selection on page 51 - Pioneer AVICN5 | Owner's Manual - Page 52
key of the destination and touch [OK]. 3 Enter the name of the freeway and touch [OK]. 4 Touch the . = Refer to Finding a destination on the map on page 49. Route Calculation to Your Home Location in [Destination History]. Places that you have registered manually, such as your home, are stored in - Pioneer AVICN5 | Owner's Manual - Page 53
, and then touch [Address Book] or [Destination History]. 2 Touch your destination name. No: Returns to the previous display without deleting the route. p You can methods: checking the shape of the route by scrolling the map along the route, checking the passing streets with a list, and checking the - Pioneer AVICN5 | Owner's Manual - Page 54
the right of the list. 2 Touch [Scroll]. The screen for selecting the point to start scrolling appears. 3 Touch the Name of the streets you are driving through Driving distance 4 Touch [Back]. You can return to the previous display. p When a long distance route is calculated, your navigation system - Pioneer AVICN5 | Owner's Manual - Page 55
Selection]. Checking the set route from Shortcut menu You can also check the information about the set route from Shortcut menu. 1 Touch the map screen. Shortcut menu appears. 2 Touch . 3 Touch [Route Profile] or [Route Scroll]. = About "Route Profile", refer to Checking the set route by text on the - Pioneer AVICN5 | Owner's Manual - Page 56
Automatic: You can sort the destination and way points automatically. The system will show the nearest way point (distance in a straight line) the way points manually. Skipping a way point If the points are set, the next way point along the route can be skipped. 1 Touch the map screen. Shortcut menu - Pioneer AVICN5 | Owner's Manual - Page 57
is enclosed in a red frame. You can also change the map scale though the maximum map scale for registering Areas to Avoid is 0.1 mile (100 m). change or delete. 3 Select the desired operation. Rename: Changes the name. Enter the new name and touch [OK]. This returns you to Route Options menu. Change - Pioneer AVICN5 | Owner's Manual - Page 58
the POI shortcuts (e.g. ), you can start searching for POI directly in the selected category on the POI shortcut. 3 Press MAP button. POI's in the selected category appear on the map. p You can also display POI by using Shortcut menu if [Overlay POI] is selected on [Short-Cut Selection]. Registering - Pioneer AVICN5 | Owner's Manual - Page 59
Touch [Number of Routes]. The current settings appear under the name of the item. Each time you touch the item, the For details, refer to Checking the set route with the map on page 54. = For details, refer to Checking the as being optimum by your navigation system is calculated. Multiple: Several - Pioneer AVICN5 | Owner's Manual - Page 60
a route that may include toll roads (including toll areas). p The system may calculate a route that in- cludes toll roads even if [On] the displayed route. 1 32 The following information is displayed on this screen: 1 Route calculation condition Displays the conditions set by Route Options menu - Pioneer AVICN5 | Owner's Manual - Page 61
previous display.) = About "Route Scroll", refer to Checking the set route with the map on page 54. = About "Route Profile", refer to Checking the set route by 5 Touch [OK]. The route you selected is accepted, and the map of your surroundings appears. When you start driving, the route guidance - Pioneer AVICN5 | Owner's Manual - Page 62
a method of location search on the display. = For more details about "Address Search", refer to Basic Navigation on page 34. = About "Searching places to register", refer to page 50 to 52. p If you select [Map Search], move the scroll cursor to the location you want to set and touch [OK]. 4 Point - Pioneer AVICN5 | Owner's Manual - Page 63
place whose information you want to edit. : The map of that place can be displayed. = For details concerning Navigation on page 34. = About "Searching places to register", refer to page 50 to 52. p If you select [Map 5 6 1 Name You can enter the desired name. 2 Name (2nd line) The name of the city - Pioneer AVICN5 | Owner's Manual - Page 64
Chapter 05 Editing the Navigation Utilities The selected operating sound is played. 6 Modify Location You can change the registered location by scrolling the map. 4 Touch [Save]. Completes the registration. Changing a name 1 Touch [Edit Name]. 2 Enter a new name; touch [OK]. The name of the current - Pioneer AVICN5 | Owner's Manual - Page 65
locations data from a Disc Address Book data stored on a CD-R/-RW and DVD-R/-RW can be loaded to the navigation system. This function is used when moving Address Book data from a Pioneer navigation system with a PC card slot (e.g., AVIC-900DVD) to a Pioneer navigation system without a PC card - Pioneer AVICN5 | Owner's Manual - Page 66
attached to the navigation system, and have an active subscription to XM NavTraffic service, you can view current traffic conditions and information on your navigation display. When the unit receives updated traffic information, the navigation system will overlay the traffic information on your map - Pioneer AVICN5 | Owner's Manual - Page 67
the traffic list. p When is displayed, reading from the DVD Map Disc is required. Please insert the DVD Map Disc. Information on avoiding traffic congestion on route ahead If you are approaching traffic on your current route, the navigation system has the ability to recommend an alternative - Pioneer AVICN5 | Owner's Manual - Page 68
congestion information manually Touching on the screen allows you information along the route being guided, it is announced on screen and by voice. p The receiving information about a traffic congestion, the message announcing the presence of a traffic congestion is indicated. On this screen - Pioneer AVICN5 | Owner's Manual - Page 69
information to display There are different types of traffic information that can be received via the XM NavTraffic service, and you can select which types will be incorporated and displayed on your navigation system. 1 Touch [Info/Traffic] in NAVI MENU, and then touch [Traffic Settings]. The icon - Pioneer AVICN5 | Owner's Manual - Page 70
Traffic Settings screen. Using the XM Tuner to View Stock, Sports, and Other Information When an XM tuner (GEX-P10XMT) is connected, you can receive stock price, sports, and other information, and display it onscreen. You may also register favorite information on the navigation system. 3 Input the - Pioneer AVICN5 | Owner's Manual - Page 71
onscreen This navigation system can display the prices of up screen. Displaying favorite browsable Information XM special contents can be assigned as a shortcut or "My Favorites" so that it can be accessed without having to search every time an update is needed. The following are the instructions - Pioneer AVICN5 | Owner's Manual - Page 72
signal 3 Radio ID The radio ID appears. p If you have subscribed to either XM audio only or XM NavTraffic stand alone, you will see [Updating] in [Status]. This is because the GEX-P10XMT is constantly checking to see if you have decided to add the other service while your navigation system is turned - Pioneer AVICN5 | Owner's Manual - Page 73
Navigation Utilities WARNING The Emergency Info screen is only intended to provide information to a driver that may be useful during an emergency situation, and does not replace you register your navigation system with Pioneer. If you have not signed up for this service with Signature's Nationwide - Pioneer AVICN5 | Owner's Manual - Page 74
Auto Service categories that can be selected in Emergency Info are; [Automotive], [Rental Car Agency], and [Car Dealer]. 4 Touch [OK]. A list of names of and touch [OK] to select the Auto Service from the subcategories. WARNING The Emergency Info screen is only intended to provide information to a - Pioneer AVICN5 | Owner's Manual - Page 75
system starts up. ! AV Background: Background for the screen during AV operations or during playback. ! Navigation Background: Background of navigation menu screen. Several background pictures are stored in the Pioneer DVD Map Disc. If you want to use these pictures, insert the Pioneer DVD Map Disc - Pioneer AVICN5 | Owner's Manual - Page 76
[Splash Screen], [Navigation Background] or [AV Background]. Repeat: Selected picture is repeated in a pattern to cover the whole screen. The background image starts changing. After a short while, the new background image appears. p When you select images stored on the Pioneer DVD Map Disc, you - Pioneer AVICN5 | Owner's Manual - Page 77
power supply and voltage supplied from the battery to this system. Acceleration: Displays acceleration in a forward direction. + Adjust Look] to display a screen for selecting the panel pattern. Touch one of the pat- Checking the Navigation Status The navigation status, including the driving status - Pioneer AVICN5 | Owner's Manual - Page 78
connection status of the GPS antenna, the reception sensitivity and from how many satellites the signal is received. If the signal is received correctly, [OK] is displayed. If reception is poor, [NOK] appears. 3 Installation Position The installation position of the navigation system is shown. If - Pioneer AVICN5 | Owner's Manual - Page 79
5 Power Voltage The power supply (reference value) provided from the vehicle battery to the navigation system is shown. If the voltage does not fall within the range of 11 V to 15 Low]. (Which of these is displayed depends on the vehicle.) Chapter 05 Editing the Navigation Utilities En 79 - Pioneer AVICN5 | Owner's Manual - Page 80
[Settings] in NAVI MENU. Settings menu appears. 2 Touch [System Options]. The screen changes. [Mile] is displayed below [KM / Mile Setting], sound volume for the navigation can be set. You can set the volume of the route guidance and of the beep sound separately. To display the Volume setting screen - Pioneer AVICN5 | Owner's Manual - Page 81
of your vehicle and do not switch off the navigation system until the installation is completed and the map of your surroundings appears. KM / Mile Setting This setting controls the unit of distance displayed on your navigation system. Mile *: Show distances in miles. Mile&Yard: Show distances - Pioneer AVICN5 | Owner's Manual - Page 82
infor- mation on the map on page 67. : Vicinity Search* Find POIs (Points Of Interest) in the vicinity of the scroll cursor. = For details, refer to Searching the facilities around the scroll cursor on page 51. : Volume Setting* Set the sound volume for the navigation. = For details concerning - Pioneer AVICN5 | Owner's Manual - Page 83
navigation system is turned off (when turning off the engine of your vehicle). Off*: Do not display tracking dots. AV Guide Mode Set whether to automatically switch to the navigation screen from the AV operation screen 62. Map in Memory The memory area is the area in the map, which is being read in - Pioneer AVICN5 | Owner's Manual - Page 84
the DVD Map Disc during the demo drive, the demo mode will be stopped. Time Adjusts the systems clock. The time difference (+, -) between the time originally set in your navigation system is set here. You can also select summer time On/Off. = For details, refer to step 7 in Installing the Program - Pioneer AVICN5 | Owner's Manual - Page 85
and installation positions on page 78. 3D Calibration = For details, refer to Checking the Navigation Status on page 77. Service Info Screen Displays the disc production number and version information. Restore Factory Settings Reset various settings registered to the navigation system and restores - Pioneer AVICN5 | Owner's Manual - Page 86
MENU for AV operations and perform operations with the DVD drive and radio. How to Display each Menu 1 Press VOLUME knob (or AV button) to switch to the AV operation screen. 2 Press MENU button to change to AV MENU. 3 Touch [Sound], [Function] or [System] to enter the menu you want to operate. Each - Pioneer AVICN5 | Owner's Manual - Page 87
Chapter 07 Using the AV Source (Built-in DVD Drive and Radio) 2 3 1 Sound menu System menu p When the source is [OFF], [ DVD-Video: "DVD-V" - Audio data (CD-DA): "CD" - Compressed audio (MP3/WMA/AAC) files: "ROM" - DivX video files: "DivX" p Also see at "Handling and Care of the Disc - Pioneer AVICN5 | Owner's Manual - Page 88
DVD Drive and Radio) DVD-Video 1 2 3 76 4 CD 1 8 4 9 a ROM (MP3/WMA/AAC files) 1 c8 4 a 9 b DivX 1 c 3 e6 4 = Refer to Touch panel key operation (DVD display Displays the track title, artist and disc title. : Track title : Artist : Disc title (album title) p The "-" mark - Pioneer AVICN5 | Owner's Manual - Page 89
may be required to display the track list. Touch panel key operation (DVD-V) 1 Touch [DISC] in AV Source screen to select the built-in DVD drive. If no disc is loaded in navigation system, you cannot select [DISC] (built-in DVD drive). 2 6 743 Touch panel keys (Page 2) 8 5 743 743 Touch panel keys - Pioneer AVICN5 | Owner's Manual - Page 90
Source (Built-in DVD Drive and Radio) 2 Skip the screen, display the touch panel keys again. 4 Switch the display Touching [Disp] changes the information as follows: Disc the repeat play range changes to [Disc]. 2 Selecting audio output When playing DVD-Video discs recorded with LPCM audio, you - Pioneer AVICN5 | Owner's Manual - Page 91
instructions provided with the disc. Using DVD menu direct touch control This function allows you to operate the DVD menu by touching the menu item on the screen - 1/8 - 1/4 - 1/2 p There is no sound during slow motion playback. p With some discs, images may be unclear during slow motion playback. p - Pioneer AVICN5 | Owner's Manual - Page 92
AV Source (Built-in DVD Drive and Radio) 1 Touch [Search] and then touch desired item. When playing a DVD, touch [Title] ( system recorded on the DVD. Depending on the setting, playback may not be with the same audio system playback (Bookmark) When playing DVD-Video discs, you can use this function - Pioneer AVICN5 | Owner's Manual - Page 93
over the point bookmarked with using [B.Mark]. Touch panel key operation (CD, ROM) 1 Touch [DISC] in AV Source screen to select the built-in DVD drive. If no disc is loaded in navigation system, you cannot select [DISC] (built-in DVD drive). = For details, refer to Selecting an AV source on page 39 - Pioneer AVICN5 | Owner's Manual - Page 94
DVD Drive and Radio) Displaying text information % Touch . The next piece of information is displayed. ! Album Title (album title) ! Track Title (track title) ! Folder Title (folder title) ! File Name (file name) ! Artist Name (artist name return to the previous screen, touch [Detail]. /AAC disc in - Pioneer AVICN5 | Owner's Manual - Page 95
tracks of each folders. Touch panel key operation (DivX) 1 Touch [DISC] in AV Source screen to select the built-in DVD drive. If the DVD map disc is loaded or there is no disc in navigation system, you cannot select [DISC] (built-in DVD drive). = For details, refer to Selecting an AV source on page - Pioneer AVICN5 | Owner's Manual - Page 96
DVD Drive and Radio screen, display the touch panel keys again. 4 Switch the display Touching [Disp] changes the information as follows: Audio, SubTitle, Repeat display - Folder name display - File name repeat play, the repeat play range changes to [Disc]. p If you perform file search or fast forward - Pioneer AVICN5 | Owner's Manual - Page 97
DVD Drive and Radio) Chapter 07 Using the AV Source (Built-in DVD Drive and Radio) % Touch r during playback. Each time you touch r, you move ahead one frame. To return to normal playback, touch f. p With some discs no sound during slow motion playback. p With some discs, same audio system as the - Pioneer AVICN5 | Owner's Manual - Page 98
the AV Source (Built-in DVD Drive and Radio) Playing DivX® VOD content Some DivX VOD (video on demand) content may only be playable a fixed number of times. When you load a disc containing this type of DivX VOD content, the remaining number of plays is shown on-screen and you then have the option - Pioneer AVICN5 | Owner's Manual - Page 99
DVD Drive and Radio) Chapter 07 Using the AV Source (Built-in DVD Drive and Radio) 2 Touch [Band] to select a band. Touch [Band] repeatedly until the desired band is displayed, FM1, FM2, FM3 or AM. 3 To perform manual switch the left side of the basic screen according to your preference. % Touch - Pioneer AVICN5 | Owner's Manual - Page 100
Built-in DVD Drive and Radio) Advanced radio operation 1 the strongest stations, while lower settings let you receive progressively weaker stations. Storing the strongest broadcast frequencies Storing broadcast frequencies with BSM may replace broadcast frequencies you have saved using P1 - - Pioneer AVICN5 | Owner's Manual - Page 101
When Pioneer AV equipment is connected to the navigation system using IP-BUS, such equipment can be operated from the navigation system. When reading this chapter, please also refer to the operation manual of the AV equipment connected to the navigation system. Multi-DVD Player Playing a disc DVD - Pioneer AVICN5 | Owner's Manual - Page 102
navigation system. For details concerning operation, refer to the USB adapter's operation manual supported USB memory, refer to USB adapter's operation manual. 1 Source icon 2 Folder number indicator 3 Track number indicator 4 Play time indicator 5 Current folder name AV Source screen to select - Pioneer AVICN5 | Owner's Manual - Page 103
AV Equipment) Chapter 08 Using the AV Source (Pioneer AV Equipment) Switching between the detail information display and the list display You can switch the left side of the basic screen according to your preference. % Touch [List] (or [Detail]). Each touch of [List] (or [Detail]) changes the - Pioneer AVICN5 | Owner's Manual - Page 104
Using the AV Source (Pioneer AV Equipment) 1 XM tuner's operation manuals. This section provides information on XM operations with 104 En navigation system which differs from that described in the XM tuner's operation manual. Only the logo data that is contained in the navigation DVD Map Disc - Pioneer AVICN5 | Owner's Manual - Page 105
08 Using the AV Source (Pioneer AV Equipment) = Refer to Switching the XM channel select mode on this page. 6 XM channel category or XM channel information 7 Detailed information or preset list display 8 Category icon 1 Touch [XM] in AV Source screen to select the XM. = For details, refer to - Pioneer AVICN5 | Owner's Manual - Page 106
[Mode]. 1 Touch [List]. The XM channel list appears in the display. Each touch of [List] changes the settings as follows: Detail information display or Preset list display - Ch Name List (Channel name) - Song Title List (Song title) - Artist Name List (Artist name) 2 Touch the desired channel that - Pioneer AVICN5 | Owner's Manual - Page 107
XM channel is selected. 4 Touch [Back]. You can return to the previous display. Using the MyMix function The MyMix function memorizes the song title and artist name of the song currently being received provided depending on the situation of the Navigation System. = Refer to Setting the notification - Pioneer AVICN5 | Owner's Manual - Page 108
Using the AV Source (Pioneer AV Equipment) Display the Radio ID If you select CH: 000, the Radio ID is displayed. 1 Touch [Direct]. 2 Input [000] and then touch [Enter]. If you select another channel, display of the Radio ID is canceled. Display of the Radio ID repeats displaying [RADIO ID] and the - Pioneer AVICN5 | Owner's Manual - Page 109
Navigation System, Pioneer SIRIUS BUS INTERFACE is required. For details concerning operation, refer to the owner's manual of Pioneer information or preset list display 7 Category icon 1 Touch [SIRIUS] in AV Source screen to select the SIRIUS tuner. = For details, refer to Selecting an AV source - Pioneer AVICN5 | Owner's Manual - Page 110
Chapter 08 Using the AV Source (Pioneer AV Equipment) Switching the SIRIUS channel select mode You can the detailed information display and the preset list display You can switch the left side of the basic screen according to your preference. % Touch [Detail] (or [Preset]). Each touch of [Detail] ( - Pioneer AVICN5 | Owner's Manual - Page 111
received. When a track that matches the memorized song title and artist name is being broadcast on a station other than the one you are listening to, you will be alerted, and you can switch the station to listen to that song. p A track itself is NOT downloaded of the Navigation System. = Refer - Pioneer AVICN5 | Owner's Manual - Page 112
Chapter 08 Using the AV Source (Pioneer AV Equipment) Using the direct traffic announcement sources other than SIRIUS. p To cancel traffic announcement, touch [TRFC Off]. Display the Radio ID If you select CH: 000, the Radio ID is displayed. 1 Touch [Direct]. 2 Input [000] and then touch [Enter]. - Pioneer AVICN5 | Owner's Manual - Page 113
for Game Alert This navigation system can alert you when menu. The game name and the broadcast screen when the registered phone is connected) If you use a Bluetooth adapter (e.g. CDBTB200) (sold separately), you can connect a cellular phone featuring Bluetooth Bluetooth adapter's operation manual - Pioneer AVICN5 | Owner's Manual - Page 114
switch is set to ACC or ON. p The line-of-sight distance between this navigation system and your cellular phone must be 10 meters or less when sending and receiving voice and data via Bluetooth technology. However, the transmission distance may become shorter than the estimated distance, depending - Pioneer AVICN5 | Owner's Manual - Page 115
may differ from the actual call time. p The name (if registered on the phone book) and phone navigation system. 1 Touch [Log]. The history list screen appears. 2 Touch [Log] to change the list. p Each touch of [Log] changes the lists as follows: Missed calls list - Dialed calls list - Received - Pioneer AVICN5 | Owner's Manual - Page 116
P1 to P6 until the beep sounds. The selected phone number is stored is stored in the preset, [No Name] will be displayed. p If a transfer the phone book in your cellular phone to this navigation system. = Refer to Transferring the phone book on page 121. 1 Touch [PH.Book]. The phone book list screen - Pioneer AVICN5 | Owner's Manual - Page 117
[Next] in the phone book edit screen are treated in the same way as other name of your contact. For more details concerning the voice recognition operation, refer to your cellular phone's instruction manual time. p You can set this navigation system to automatically answering incoming calls. = Refer - Pioneer AVICN5 | Owner's Manual - Page 118
(Pioneer AV Phonebook Transfer] or [Clear Memory]. p You can only select [Echo Cancel] while transmitting or receiving a call, or during conversation. Connecting a cellular phone To use a phone wirelessly with the navigation system, it is necessary first to establish a connection using Bluetooth - Pioneer AVICN5 | Owner's Manual - Page 119
phone to connect to the navigation system. Connection to the cellular phone starts. When the connection is established, the device name of the connected cellular phone is displayed. p Operation varies depending on the type of your cellular phone. Refer to the instruction manual that came with your - Pioneer AVICN5 | Owner's Manual - Page 120
a 12-digit of hexadecimal string. This navigation system can display the BD address of your registered cellular phone featuring Bluetooth technology. 1 Touch [Phone Connect] in Function menu. The phone connection menu screen appears. 2 Touch [Phone Name]. The 12-digit hexadecimal string is displayed - Pioneer AVICN5 | Owner's Manual - Page 121
this navigation system via Bluetooth technology, this navigation system may not be able to display the phone book correctly. (Some characters may be garbled.) p If the phone book in the cellular phone contains image data, phone book may not be correctly transferred. 1 Touch [Phonebook Transfer] in - Pioneer AVICN5 | Owner's Manual - Page 122
the numbers. OK: The change is fixed, and the phone book edit screen reappears. Name edit screen You can input letters or numbers. Next: Each touch of [Next] , dialled/received/missed call history list and preset dials. 1 Touch [Clear Memory] in Function menu. The clear memory screen appears. 122 - Pioneer AVICN5 | Owner's Manual - Page 123
Pioneer AV Equipment) 2 Touch [Clear] on the right-hand side of the item that you want to clear memory for. On this screen, you can select the following items: Phonebook: You can clear the registered phone book. Dialled Calls: You can clear the dialed call history list. Received navigation system's - Pioneer AVICN5 | Owner's Manual - Page 124
cannot be reproduced depending on the generation of the iPod. p If the error occurs when an iPod with video compatibilities is connected to the navigation system, the icon is displayed. = Refer to Problems in the AV screen (during iPod playback) on page 148 p o and p buttons on the hardware are - Pioneer AVICN5 | Owner's Manual - Page 125
Pioneer AV Equipment) : Shuffle 6 Song title, Artist name and Album title indicator Displays the song title, artist name and album title. : Song title : Artist name operation (MUSIC) 1 Connect the iPod to the navigation system. 2 Touch [iPod] in AV Source screen to select the iPod. = For details, - Pioneer AVICN5 | Owner's Manual - Page 126
AV Source (Pioneer AV Equipment) Touch panel key operation (VIDEO) This navigation system can play video if an iPod with video capabilities is connected. p Change the video setting on the iPod so that the iPod can output the video to an external device, before you display the video screen. p For - Pioneer AVICN5 | Owner's Manual - Page 127
(available on the market) to your audio player and connect Bluetooth adapter (e.g. CD-BTB200) to this unit. p Depending on the Bluetooth audio player connected to this navigation system, the available operations with this navigation system are limited to the following two levels: - Lower level: Only - Pioneer AVICN5 | Owner's Manual - Page 128
the AV Source (Pioneer AV Equipment) p Since there are a number of Bluetooth audio players available on the market, operations with your Bluetooth audio player using this navigation system vary greatly in range. Please refer to the instruction manual that came with your Bluetooth audio player as - Pioneer AVICN5 | Owner's Manual - Page 129
Using the AV Source (Pioneer AV Equipment) Connecting a Bluetooth audio player % Touch [Connection Open] in Function menu to turn the connection open on. Pairing is displayed. This navigation system is now on standby for connection from Bluetooth audio player. If your Bluetooth audio player is set - Pioneer AVICN5 | Owner's Manual - Page 130
Using the AV Source (Pioneer AV Equipment) Operate the screen. = For details, refer to Selecting an AV source on page 39. p If you want to switch AV source, select [Video] in [AV1 Input] or [AV2 Input]. = For details, refer to Setting the video input on page 139. Switching the automatic and manual - Pioneer AVICN5 | Owner's Manual - Page 131
. This chapter describes the methods of changing the various settings and how to set of the LCD panel. Audio Adjustments Introduction to audio adjustments 1 1 Sound display = Refer to step 3 in How to Display each Menu on page 86. p Only when the subwoofer controller setting is [Preout] [Full], [Non - Pioneer AVICN5 | Owner's Manual - Page 132
: You can select the decibel (dB) level of the selected EQ. ! Q: You can select the details of the curve characteristics. 1 Touch [EQ Menu] in Sound menu. 2 Touch [Customize]. 3 Touch c or d to select the equalizer band to adjust. Each time you touch c or d selects equalizer bands in the following - Pioneer AVICN5 | Owner's Manual - Page 133
When the non fading output setting is on, the audio signal does not pass through navigation system's low pass filter (for the subwoofer), but is output through the RCA output. 1 Touch [Non Fading] in Sound menu. Only when [Preout] (the subwoofer controller setting in Initial menu) is [Full], you can - Pioneer AVICN5 | Owner's Manual - Page 134
or rear speakers. 1 Touch [HPF] in Sound menu. 2 Touch [On] to turn high DVD and M-DVD ! EXT-1 and EXT-2 ! AV-1 and AV-2 ! XM and SIRIUS Setting Up the DVD/DivX Player Configure the DVD/DivX player. DVD/DivX Setup adjustments 1 1 DVD/DivX setup menu display 1 Play the disc that contains DVD-Video - Pioneer AVICN5 | Owner's Manual - Page 135
may result in an unnatural picture. p If you select the TV aspect, navigation system's display changes to the same setting. % Touch [TV Aspect]. Each touch of [TV Aspect] changes the settings as follows: ! 16:9 - Wide screen picture (16:9) is displayed as it is (initial setting) ! Letter Box - The - Pioneer AVICN5 | Owner's Manual - Page 136
code number, touch [Clear] 10 times on the screen in the Step 2. The registered code number is canceled, letting you register a new one. Displaying your DivX® VOD registration code In order to play DivX VOD (video on demand) content on this navigation system, you first need to register the unit with - Pioneer AVICN5 | Owner's Manual - Page 137
initial set up of different settings for navigation system. 1 Function display 1 Touch [Off] in AV Source screen to turn source off. = For details setting, there is no output unless you turn [Non Fading] or [Sub Woofer] in Sound menu [On]. = For details, refer to Using non fading output on page 133. - Pioneer AVICN5 | Owner's Manual - Page 138
: ! When a call is made or received using a cellular phone connected to navigation system. ! When the voice guidance is output. p The sound muting/attenuation function does not work when you use a cellular phone connected to the navigation system via the Bluetooth adapter, which is sold separately - Pioneer AVICN5 | Owner's Manual - Page 139
as follows: ! Mirror - The video on the front screen of the navigation unit is output to the "Rear display" ! DVD - The video and sound of the DVDs are output to the "Rear display" ! AV1 - The video and sound of AV-1 are output to the "Rear display" ! AV2 - The video and sound of AV-2 are output to - Pioneer AVICN5 | Owner's Manual - Page 140
a separately sold rear view camera (e.g. ND-BC2). (For details, consult your dealer.) Camera for backing up The navigation system features a function that automatically switches to the full-screen rear camera image installed on your vehicle. When the shift lever is in the REVERSE (R) position, the - Pioneer AVICN5 | Owner's Manual - Page 141
differently. p Remember that use of this system for commercial or public viewing purposes may constitute an infringement on the author's rights protected by the Copyright Law. p Video will appear grainy when viewed in Cinema or Zoom mode. p The navigation map and the rear view camera picture is - Pioneer AVICN5 | Owner's Manual - Page 142
(refer to Parking brake interlock on page 20). 1 Touch [V.Adjust] in System menu. 2 Select the desired item you want to adjust. ! Camera - Hue for the source without video and navigation map display. p If you select [Source], sources without video and sources with video are saved separately in - Pioneer AVICN5 | Owner's Manual - Page 143
Customizing the AV Source Setting Chapter 09 Customizing the AV Source Setting Language Code Chart for DVD Language (code), input code Japanese (ja), 1001 English (en), 0514 French (fr), 0618 Spanish (es), 0519 German (de), 0405 Italian (it), 0920 Chinese (zh), 2608 - Pioneer AVICN5 | Owner's Manual - Page 144
ON (or turned to ACC), the motor sounds. The navigation system confirms whether a disc is loaded or not. This is a normal operation. You cannot position your vehicle The quality of signals from the GPS Check the GPS signal reception and the posi- on the map or the positioning satellites is poor - Pioneer AVICN5 | Owner's Manual - Page 145
reception of GPS signals. Snow buildup error is large. can also degrade the signals. Signals from the vehicle's speed Check that the cables are properly connected. pulse are not being picked up prop- If necessary, consult the dealer that installed erly. the system. The navigation system may - Pioneer AVICN5 | Owner's Manual - Page 146
ejecting the disc, switch the source. the navigation system has been This problem may occur when certain con- ejected. nection methods are used. There was a problem with the rear display or a faulty wiring connection. Check the rear display and its connection. The source without a video is - Pioneer AVICN5 | Owner's Manual - Page 147
the touch panel keys cannot be used. The navigation system is not firmly Secure the navigation system firmly. secured. There was a problem with the "Rear Check the "Rear display" and its connection. display" or a faulty wiring connection, for example. [DVD/DivX Setup] is carried out. You can not - Pioneer AVICN5 | Owner's Manual - Page 148
When the screen is frozen... Park your vehicle in a safe place, and cut off the engine. Turn the ignition key back to "Acc off". Then start the engine again, and turn the power to the navigation system back on. If this does not solve the problem, press RESET button on the navigation system. 148 En - Pioneer AVICN5 | Owner's Manual - Page 149
system and press "OK". See the "Installation Manual" and set the direction of the navigation unit correctly. Gyro Sensor is not working properly. Please consult your dealer or Pioneer service center. Abnormal output is detected from the Gyrosensor. Note down the error code shown on the screen - Pioneer AVICN5 | Owner's Manual - Page 150
the limitation of the installation angle. Confirm the installation angle. (The navigation system must be installed within the allowed installation angle. For details refer to Installation Manual.) No data available at this time. If no data is available that can be used with the XM tuner. Wait for - Pioneer AVICN5 | Owner's Manual - Page 151
nation or way point(s) that do not pass bypassing toll roads (including toll through toll roads (including city or street and that ing the instructions shown on the screen. house number does not exist on areas not stored on the DVD Map Disc. Replace the DVD Map Disc and perform Vicinity Search again - Pioneer AVICN5 | Owner's Manual - Page 152
This zone is not available on the disc. Please insert an appropriate disc. When areas not stored on the DVD Map Disc are included in the search. Set the destination or way point(s) in the countries stored on the DVD Map Disc, or replace the DVD Map Disc and perform the search again. Failed to - Pioneer AVICN5 | Owner's Manual - Page 153
on the DVD Map Disc. Or, replace the DVD Map Disc and try to zoom in again. Failed to save to memory. Please re-enter setting. The settings could not be saved for • Retry. some reason. • Consult the Pioneer Local dealer if this mes- sage persists. CAUTION! System detected improper connection - Pioneer AVICN5 | Owner's Manual - Page 154
problem, then take the suggested corrective action. If the error persists, contact your dealer or your nearest PIONEER Service Center. The messages in "( )" will appear on the "Rear display". Message Cause Action (See) Reading error (ERROR-02-XX) Dirty Scratched disc Clean disc. Replace disc - Pioneer AVICN5 | Owner's Manual - Page 155
the setting. 11 Touch [OK]. The password is set. Enter the password In password input screen, you must enter the current password. If you enter the incorrect password three times, the navigation system is locked. 1 Enter the password. 2 Touch [OK]. The password mode is canceled. Delete the password - Pioneer AVICN5 | Owner's Manual - Page 156
in a safe place. Leave the engine on, and make sure that the parking brake is applied. 2 Insert the Pioneer DVD Map Disc into the disc loading slot of the navigation system. When the upgraded program has been found, installation of the program starts immediately. p Do not insert anything other than - Pioneer AVICN5 | Owner's Manual - Page 157
message and touch [OK]. 6 To set the time difference, touch [+] or [-]. The map of your surroundings appears. This completes the setup of your navigation system. Chapter 2 explains the basic operation of your navigation system. = For details, refer to Time on page 84. Time difference The time - Pioneer AVICN5 | Owner's Manual - Page 158
properly, consult your local Pioneer dealer. Navigation in the memory navi mode During the memory navi mode, navigation is performed only using the data read into the memory. Therefore, some functions are restricted compared with navigation using the DVD Map Disc (DVD navi mode). These function - Pioneer AVICN5 | Owner's Manual - Page 159
What is the manual downloaded memory area? Memory area is the area of the map data that the user voluntarily read into the memory for the memory navi mode. Normal guidance is available if the memory area is stored and you drive within the stored area. What is the auto downloaded memory area? This - Pioneer AVICN5 | Owner's Manual - Page 160
Info s* • Restore Factory Settings 1 *: Product Number in Service Info Screen is not displayed. Shortcut menu : Destination - : Change route guidance starts, the route data from the DVD Map Disc is read into the memory of the navigation system. The status of the memory navi mode is indicated - Pioneer AVICN5 | Owner's Manual - Page 161
map display mode used during the DVD navi mode when the DVD Map Disc is set again. ! In memory navi mode, map scale data that cannot be read in the memory cannot be displayed. Accordingly, the edge of the map or scrolling the map at the same scale, set the DVD Map Disc in the navigation system. ! You - Pioneer AVICN5 | Owner's Manual - Page 162
these limitations, insert the DVD Map Disc to the navigation system. Positioning Technology The navigation system accurately measures your current location by combining the positioning by GPS and by Dead Reckoning. Positioning by GPS The Global Positioning System (GPS) uses a network of satellites - Pioneer AVICN5 | Owner's Manual - Page 163
is operating in Simple hybrid mode, the distance calculation value cannot be replaced automatically. Map matching As mentioned, the GPS and dead reckoning systems used by this navigation system are susceptible to certain errors. Their calculations may, on occasion, place you in a location on the - Pioneer AVICN5 | Owner's Manual - Page 164
signals cannot be received, learning and error correction are not possible. If GPS positioning has been operating for only a short time, your vehicle's actual position and the current location mark on the map may diverge considerably. Once GPS reception is restored, accuracy will be recovered. ! If - Pioneer AVICN5 | Owner's Manual - Page 165
case of an elevated freeway. ! If there is a loop or similar road configuration. Appendix ! If you take a recently opened road that is not on the map. ! If you take a ferry. ! If you drive in zig-zags. ! If you are driving on a long, straight road or a gently curving road. ! If the road - Pioneer AVICN5 | Owner's Manual - Page 166
parking lot or similar structure using a spiral ramp. ! If trees or other obstacles block the GPS signals for a considerable period. ! If your vehicle is turned on a turntable or similar after starting the engine. ! If you insert the disc and turn your navigation system on while driving. 166 En - Pioneer AVICN5 | Owner's Manual - Page 167
! Memory area memorized manually ! Registered area in Guide View, Route View or Driver's View, upon entering an area not stored on the disc the display automatically switches to Map system may forcibly switch to the zone selection screen. ! A Freeway Search covers all areas, regardless of the disc - Pioneer AVICN5 | Owner's Manual - Page 168
when you set another disc. Handling and Care of the Disc Some basic precautions are necessary when handling your discs. DVD Map Discs ! Do not use discs other than those intended for this product. Use only discs approved by Pioneer. p If you wish to use other DVD Map Discs, first check that they - Pioneer AVICN5 | Owner's Manual - Page 169
lens of this product. ! It is not possible to read DVD-ROM discs other than Pioneer DVD map discs or DVDROMs with MP3, WMA, AAC, or DivX files burned to it. ! This product can play back the disc that finalized with the following file systems (logical format): - CD: ISO9660 level 1 and level 2, Romeo - Pioneer AVICN5 | Owner's Manual - Page 170
back multi-session compatible recorded discs. ! MP3/WMA/AAC files are not compatible with packet write data transfer. ! The maximum number of characters for the file and folder name is 64 characters, including extension (.mp3). However the navigation system uses proportional font. Therefore, the - Pioneer AVICN5 | Owner's Manual - Page 171
Appendix Appendix Appendix ! This unit doesn't support the following formats: - Windows Media Audio 9 Professional (5.1ch) - possible to play back up to 255 folders on one disc. DivX video files ! This unit corresponds to DivX video format implemented in relation to DivX standards. However, it - Pioneer AVICN5 | Owner's Manual - Page 172
discs. ! Some special operation may be prohibited because of the composition of DivX files. ! DivX files downloaded naming a DivX video file, add the corresponding filename extension (.avi or .divx). ! The navigation system that use a high transfer rate, the subtitles and video may not be completely - Pioneer AVICN5 | Owner's Manual - Page 173
notice smoke, a strange noise or smell from the navigation system, or any other abnormal signs on the LCD screen, turn off the power immediately and consult your dealer or the nearest authorized Pioneer Service Station. Using this navigation system in this condition may result in permanent damage to - Pioneer AVICN5 | Owner's Manual - Page 174
this happens, consult your dealer or the nearest authorized Pioneer service station. Route Setting Information Route search specifications Your navigation system sets a route to your destination by applying certain built-in rules to the map data. This section provides some useful information about - Pioneer AVICN5 | Owner's Manual - Page 175
destination decided by the navigation system while taking the type to the range of the disc in use. ! The , and other guide points may not cases, you are instructed to turn around; please screen may differ from the actual number of roads. ! If the intersection is approached in a gentle curve, the map - Pioneer AVICN5 | Owner's Manual - Page 176
area stored in the disc during DVD navigation mode - when the ! Your navigation system marks your course on the map in certain navigable route. Pioneer Navigation will only display a navigable route on the map (only the arrival guidance for the destination or a way point is available). Please review - Pioneer AVICN5 | Owner's Manual - Page 177
MENU Destination Traffic On Route Traffic Events Traffic Flow*2 Traffic Settings*2 XM Status Stock Info Set My Favorites My Favorites Emergency Info Overlay Telephone Search Cancel Route Info/Traffic Page 35 52, 62 52, 62 50 51 52, 62 52, 62 52 52 53 Edit Current Route View Current Route - Pioneer AVICN5 | Owner's Manual - Page 178
Volume*2 System Options Language Selection KM / Mile Setting*2 Average Speed*2 Background Picture Setting Read from Disc Shortcut menu Map Display Options*2 Tracking Display*2 AV Guide Mode*2 My Favorites Page 43, 49 55 53 55 55 56 55 43, 62 51 80 55 58 52, 63 177 56, 59 67 70 71 71 178 En - Pioneer AVICN5 | Owner's Manual - Page 179
Appendix Menu in the AV Screen Sound menu System menu FAD/BAL (Balance) EQ Menu Staging Loudness Sub Woofer (Non Fading) HPF SLA Initial menu Rear SP Rear SP Preout PIN Edit Mute Input/Guide 5.1CH Page 131 132 132 133 133 134 134 AV1 Input AV2 Input Camera Camera Polarity Antenna Control Wide - Pioneer AVICN5 | Owner's Manual - Page 180
Appendix Appendix CD/ROM M-DVD Repeat Random Scan DivX Page 94 95 95 Repeat Random Scan USB Repeat DVD/DivX Setup RADIO BSM Local 180 En Page 96 90 Repeat Random Scan XM Page 100 100 Memo Page 90 95 95 Page 103 103 103 Page 108 - Pioneer AVICN5 | Owner's Manual - Page 181
SIRIUS iPod Appendix Appendix Memo Game Alert Game Info BT-TEL Page 112 113 113 Repeat Shuffle Wide Screen iPod Charge BT-AUDIO Phone Connect Phone Register Phonebook Transfer Phonebook Name View Clear Memory Auto Answer Refuse All Calls Ring Tone Auto Connect Echo Cancel Page 119 120 121 - Pioneer AVICN5 | Owner's Manual - Page 182
-Video discs featuring chapters, you can quickly find a desired scene with chapter search. Current location The present location of your vehicle; your current location is shown on the map by a red triangle. Default setting A factory setting which applies when you first switch on the system; you can - Pioneer AVICN5 | Owner's Manual - Page 183
as the Dolby Digital surround sound system used in theaters. DRM This technology preserves the copyrights for digital data by limiting the number of copies that can be made for audio and video files. DVD Map Discs The DVD-ROM discs contain Pioneer navigation software. Map data is also recorded on - Pioneer AVICN5 | Owner's Manual - Page 184
system used for music CDs and DVDs. Generally, DVDs are recorded with higher sampling frequency and bit rate than CDs. Therefore, DVDs can provide higher sound as is done with files on floppy or hard discs. Parental lock Some DVD-Video discs with violent or adult-oriented scenes feature parental lock - Pioneer AVICN5 | Owner's Manual - Page 185
destination. Set route The route marked out by the system to your destination. It is highlighted on the map. Title DVD-Video discs have a high data capacity, enabling recording of multiple movies on a single disc. If, for example, one disc contains three separate movies, they are divided into title - Pioneer AVICN5 | Owner's Manual - Page 186
mm × 140 mm (5-7/8 in. × 1-1/8 in. × 3-7/8 in.) Weight 0.7 kg (1.5 lbs) Navigation GPS Receiver: System L1, C/Acode GPS SPS (Standard Positioning Service) Reception system .......... 8-channel multi-channel reception system Reception frequency .... 1 575.42 MHz Sensitivity 130 dBm Position update - Pioneer AVICN5 | Owner's Manual - Page 187
Subwoofer: Frequency 50/80/125 Hz Slope 18 dB/oct Gain 12 dB Phase Normal/Reverse DVD Drive System DVD-Video, Compact disc audio, MP3, WMA, AAC, DivX system Usable discs DVD-Video, Compact disc, MP3, WMA, AAC, DivX Region number 1 Signal format: Sampling frequency ..... 44.1/48/96 kHz Number - Pioneer AVICN5 | Owner's Manual - Page 188
PIONEER EUROPE NV Haven 1087, Keetberglaan 1, B-9120 Melsele, Belgium TEL: (0) 3/570.05.11 PIONEER PIONEER ELECTRONICS AUSTRALIA PTY. LTD. 178-184 Boundary Road, Braeside, Victoria 3195, Australia TEL: (03) 9586-6300 PIONEER -283-5901 TEL: 905-479-4411 PIONEER ELECTRONICS DE MEXICO, S.A. de C.V. Blvd
-
 1
1 -
 2
2 -
 3
3 -
 4
4 -
 5
5 -
 6
6 -
 7
7 -
8
-
9
-
10
-
11
-
12
-
13
-
14
-
15
-
16
-
17
-
18
-
19
-
20
-
21
-
22
-
23
-
24
-
25
-
26
-
27
-
28
-
29
-
30
-
31
-
32
-
33
-
34
-
35
-
36
-
37
-
38
-
39
-
40
-
41
-
42
-
43
-
44
-
45
-
46
-
47
-
48
-
49
-
50
-
51
-
52
-
53
-
54
-
55
-
56
-
57
-
58
-
59
-
60
-
61
-
62
-
63
-
64
-
65
-
66
-
67
-
68
-
69
-
70
-
71
-
72
-
73
-
74
-
75
-
76
-
77
-
78
-
79
-
80
-
81
-
82
-
83
-
84
-
85
-
86
-
87
-
88
-
89
-
90
-
91
-
92
-
93
-
94
-
95
-
96
-
97
-
98
-
99
-
100
-
101
-
102
-
103
-
104
-
105
-
106
-
107
-
108
-
109
-
110
-
111
-
112
-
113
-
114
-
115
-
116
-
117
-
118
-
119
-
120
-
121
-
122
-
123
-
124
-
125
-
126
-
127
-
128
-
129
-
130
-
131
-
132
-
133
-
134
-
135
-
136
-
137
-
138
-
139
-
140
-
141
-
142
-
143
-
144
-
145
-
146
-
147
-
148
-
149
-
150
-
151
-
152
-
153
-
154
-
155
-
156
-
157
-
158
-
159
-
160
-
161
-
162
-
163
-
164
-
165
-
166
-
167
-
168
-
169
-
170
-
171
-
172
-
173
-
174
-
175
-
176
-
177
-
178
-
179
-
180
-
181
-
182
-
183
-
184
-
185
-
186
-
187
-
188
 |
 |

Operation Manual
DVD MULTIMEDIA AV NAVIGATION SERVER
AVIC-N5
Notice to all users:
This software requires that the navigation system is
properly connected to your vehicle
’
s parking brake and
depending on your vehicle, additional installation may
be required. For more information, please contact your
Authorized Pioneer Electronics retailer or call us at
(800) 421-1404.
English