Pioneer DEQ-P9 Owner's Manual - Page 26
Adjusting the 31 Band Graphic Equalizer <FINE> Open state
 |
View all Pioneer DEQ-P9 manuals
Add to My Manuals
Save this manual to your list of manuals |
Page 26 highlights
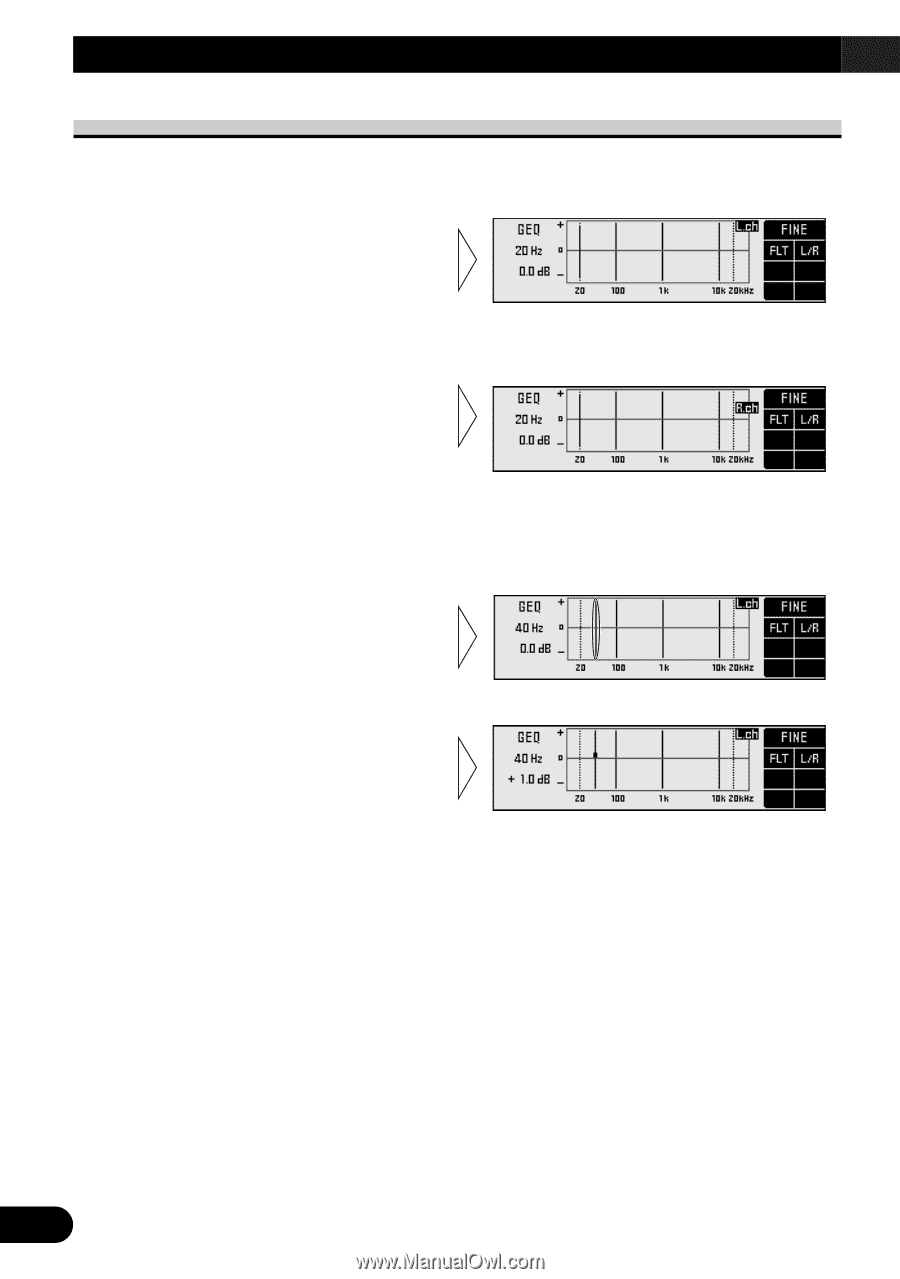
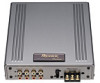
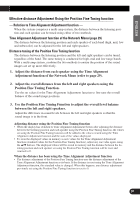
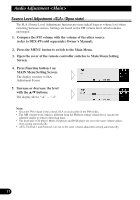
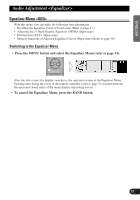
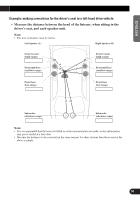
Audio Adjustment Adjusting the 31 Band Graphic Equalizer (Open state) Adjustable frequency : 20 Hz - 20 kHz (Every 1/3 octaves, total 31 bands) Level adjustment range: -12 dB - +12 dB (0.5 dB/1 step) 1. Open the cover of the remote controller in the Equalizer Menu (refer to page 5). This switches to Equalizer Menu Setting Screen. 2. Press the FUNCTION button 2 and select left or right channel. (Only for LR/IND mode.) Each press the FUNCTION button 2 switches left and right channel. Note: • If you selected LR/COM mode (refer to page 9), you can't switch between left and right channel. In this case, is displayed and the equalizer setting of left and right channel go to the same. 3. Press the 2/3 buttons and select the desired band (frequency) to be adjusted. 4. Press the 5/∞ buttons and adjust the level. 5. Adjust the other bands. Repeat steps 3 and 4 to adjust to the desired sound. 6. Switch between right and left to set up the equalizer curve. Repeat steps 2-5 to set up equalizer curves for the left and right speakers separately. When completing the adjustment • It is recommended that adjustment settings be stored in memory soon after the adjustments are completed. Refer to page 38 for Memory operations. 25
-
 1
1 -
2
-
3
-
4
-
5
-
6
-
7
-
8
-
9
-
10
-
11
-
12
-
13
-
14
-
15
-
16
-
17
-
18
-
19
-
20
-
 21
21 -
 22
22 -
 23
23 -
 24
24 -
 25
25 -
 26
26 -
 27
27 -
 28
28 -
 29
29 -
 30
30 -
 31
31 -
32
-
33
-
34
-
35
-
36
-
37
-
38
-
39
-
40
-
41
-
42
-
43
-
44
-
45
-
46
-
47
-
48
-
49
-
50
-
51
-
52
-
53
-
54
-
55
-
56
-
57
-
58
-
59
-
60
-
61
-
62
-
63
-
64
 |
 |