Pioneer DEQ-P9 Owner's Manual - Page 29
Network Menu <N.W.>
 |
View all Pioneer DEQ-P9 manuals
Add to My Manuals
Save this manual to your list of manuals |
Page 29 highlights
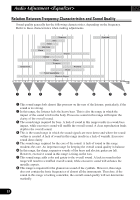
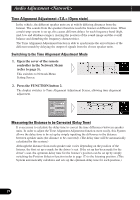
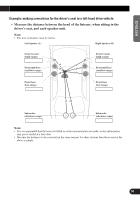
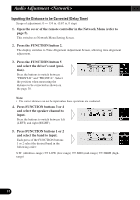
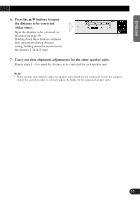
ENGLISH ESPAÑOL DEUTSCH Network Menu With this menu, you can make the following three adjustments. • Time Alignment Adjustment (Open state) • Filter Adjustment (Open state) • Memory functions of Adjusted Network (Open state) (Refer to page 38.) Switching to the Network Menu • Press the MENU button and select the Network Menu (refer to page 14). After the title screen, the display switches to the operation screen of the Network Menu. Opening and closing the cover of the remote controller (refer to page 5) switches between the open and closed states of the menu display and setting screen. • To cancel the Network Menu, press the BAND button. If adjustments are difficult • Adjusting the Network requires technical skills and knowledge of the amplifiers and speakers installed in the system. Consult your dealer from which the products were purchased if adjustments are difficult. • When adjustments have already been made at your dealer, the optimum setup for vehicle's particular interior has already been installed in the memory. In this case, recall the corresponding memory for use (refer to page 41). When completing the adjustment • It is recommended that adjustment settings be stored in memory soon after the adjustments are completed. Refer to page 38 for Memory operations. • After completing the network adjustments, adjust the overall balance of the sound image by using the Position Fine Tuning function of the Main Menu as necessary (refer to page 18). 28 FRANÇAIS ITALIANO NEDERLANDS
-
 1
1 -
2
-
3
-
4
-
5
-
6
-
7
-
8
-
9
-
10
-
11
-
12
-
13
-
14
-
15
-
16
-
17
-
18
-
19
-
20
-
21
-
22
-
23
-
 24
24 -
 25
25 -
 26
26 -
 27
27 -
 28
28 -
 29
29 -
 30
30 -
 31
31 -
 32
32 -
 33
33 -
 34
34 -
35
-
36
-
37
-
38
-
39
-
40
-
41
-
42
-
43
-
44
-
45
-
46
-
47
-
48
-
49
-
50
-
51
-
52
-
53
-
54
-
55
-
56
-
57
-
58
-
59
-
60
-
61
-
62
-
63
-
64
 |
 |
