Samsung LNS3241D User Manual (ENGLISH) - Page 26
Adjusting the Color Tone, DNIe Demo(Digital Natural Image engine), ENTER - factory reset
 |
UPC - 036725232419
View all Samsung LNS3241D manuals
Add to My Manuals
Save this manual to your list of manuals |
Page 26 highlights
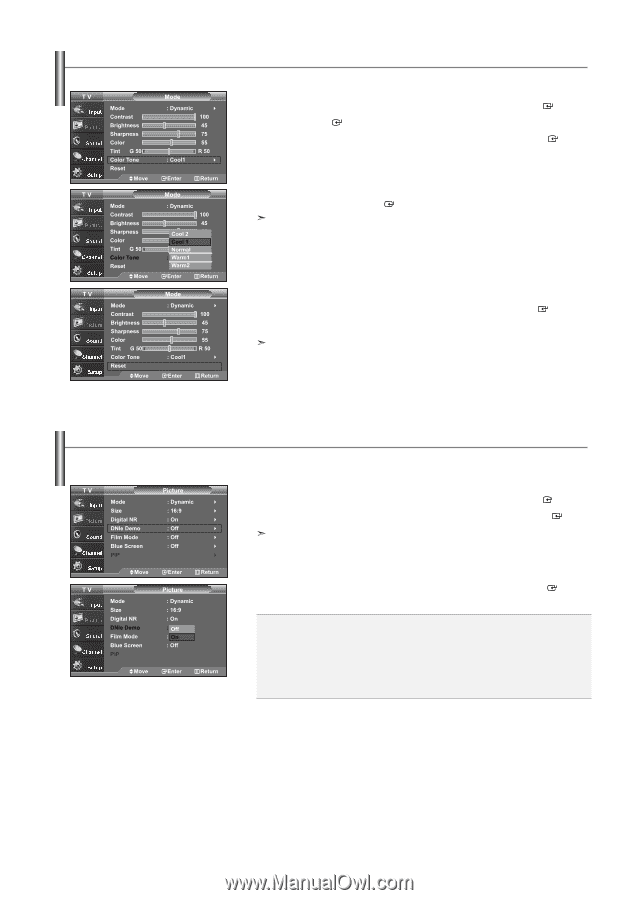
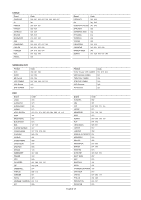
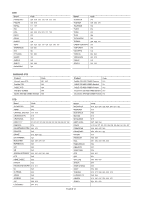
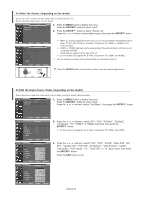
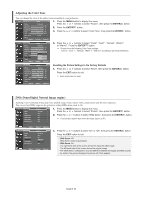
Adjusting the Color Tone You can change the color of the entire screen according to your preference. 1. Press the MENU button to display the menu. Press the or buttons to select "Picture", then press the ENTER button. 2. Press the ENTER button. 3. Press the or buttons to select "Color Tone", then press the ENTER button. 4. Press the or buttons to select "Cool2", "Cool1", "Normal", "Warm1", or "Warm2". Press the ENTER button. Choose from the following Color Tone settings: "Cool 2", "Cool 1", "Normal", "Warm 1", "Warm 2" according to personal preference. Resetting the Picture Settings to the Factory Defaults 1. Press the or buttons to select "Reset", then press the ENTER Press the EXIT button to exit. Each mode can be reset. button. DNIe Demo(Digital Natural Image engine) Samsung's new technology brings you more detailed images with contrast, white enhancement and 3D noise reduction. You can see how DNIe improves the picture by setting DNIe demo mode to On. 1. Press the MENU button to display the menu. Press the or buttons to select "Picture", then press the ENTER button. 2. Press the or buttons to select "DNIe Demo", then press the ENTER button. This function doesn't work when the Input Source is PC. 3. Press the or buttons to select "On" or "Off", then press the ENTER button. Press the EXIT button to exit. • DNIe Demo: Off DNIe Demo mode is deactivated. • DNIe Demo: On The right-hand side of the screen shows the improved DNIe image. The left-hand side of the screen shows the original image. • The "DNIe Demo" is designed to show the difference between the regular and DNIe pictures. • By default, the product displays the picture with DNIe applied. English-24
-
 1
1 -
2
-
3
-
4
-
5
-
6
-
7
-
8
-
9
-
10
-
11
-
12
-
13
-
14
-
15
-
16
-
17
-
18
-
19
-
20
-
 21
21 -
 22
22 -
 23
23 -
 24
24 -
 25
25 -
 26
26 -
 27
27 -
 28
28 -
 29
29 -
 30
30 -
 31
31 -
32
-
33
-
34
-
35
-
36
-
37
-
38
-
39
-
40
-
41
-
42
-
43
-
44
-
45
-
46
-
47
-
48
-
49
-
50
-
51
-
52
-
53
-
54
-
55
-
56
-
57
-
58
-
59
-
60
-
61
-
62
-
63
-
64
-
65
-
66
-
67
-
68
-
69
-
70
-
71
-
72
-
73
-
74
-
75
-
76
-
77
-
78
-
79
-
80
-
81
-
82
-
83
-
84
-
85
-
86
-
87
-
88
-
89
-
90
-
91
-
92
-
93
-
94
-
95
-
96
-
97
-
98
-
99
-
100
-
101
-
102
-
103
-
104
-
105
-
106
-
107
-
108
-
109
-
110
-
111
-
112
-
113
-
114
-
115
-
116
-
117
-
118
-
119
-
120
-
121
-
122
-
123
-
124
-
125
-
126
-
127
-
128
-
129
-
130
-
131
-
132
-
133
-
134
-
135
-
136
-
137
-
138
-
139
-
140
-
141
-
142
-
143
-
144
-
145
-
146
-
147
-
148
-
149
-
150
-
151
-
152
-
153
-
154
-
155
-
156
-
157
-
158
-
159
-
160
-
161
-
162
-
163
-
164
-
165
-
166
-
167
-
168
-
169
-
170
-
171
-
172
-
173
-
174
-
175
-
176
-
177
-
178
-
179
 |
 |