Samsung NQ70M7770DG/AA User Manual - Page 73
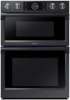
Removing the oven door (Lower oven only), Disconnect the LED light's Wire Harness
 |
View all Samsung NQ70M7770DG/AA manuals
Add to My Manuals
Save this manual to your list of manuals |
Page 73 highlights
Oven door 5. Repeat for the right (front and back) slide mechanism of the rack. 6. Open and close the rack several times to distribute the lubricant. 7. Replace the cap on the lubricant and shake it again. Turn the rack over and repeat steps 3, 4, 5, and 6. 8. Close the rack, turn the rack rightside-up, and then place in oven. See Installing the gliding rack on page 60. NOTE • Do not spray the gliding rack with cooking spray or other lubricant sprays. • Don't hand clean the oven door gasket. You may hand clean the door. • Use soap and water to thoroughly clean the top, sides, and front of the oven door. Rinse well. You may use a glass cleaner on the outside glass of the oven door. DO NOT immerse the door in water. DO NOT spray or allow water or the glass cleaner to enter the door vents. DO NOT use oven cleaners, cleaning powders, or any harsh abrasive cleaning materials on the outside of the oven door. DO NOT clean the oven door gasket. The oven door gasket is made of a woven material which is essential for a good seal. Care should be taken not to rub, damage, or remove this gasket. Removing the oven door (Lower oven only) CAUTION • The door is very heavy. Be careful when removing and lifting the door. • Do not lift the door by the handle. Use two hands to remove an oven door. WARNING You can't remove the upper oven door for safety reason. 1. Prior to removing the oven door, prepare a surface where you will place it. This surface should be flat and covered with a soft blanket. You can also use the corner posts from your packaging material. 2. Disconnect the LED light's Wire Harness A from the bottom right of the door. A. Wire Harness Maintaining your appliance NQ70M7770D_AA_DE68-04447A-03_EN+MES+CFR.indb 73 English 73 2018-08-30 12:55:46
-
 1
1 -
2
-
3
-
4
-
5
-
6
-
7
-
8
-
9
-
10
-
11
-
12
-
13
-
14
-
15
-
16
-
17
-
18
-
19
-
20
-
21
-
22
-
23
-
24
-
25
-
26
-
27
-
28
-
29
-
30
-
31
-
32
-
33
-
34
-
35
-
36
-
37
-
38
-
39
-
40
-
41
-
42
-
43
-
44
-
45
-
46
-
47
-
48
-
49
-
50
-
51
-
52
-
53
-
54
-
55
-
56
-
57
-
58
-
59
-
60
-
61
-
62
-
63
-
64
-
65
-
66
-
67
-
 68
68 -
 69
69 -
 70
70 -
 71
71 -
 72
72 -
 73
73 -
 74
74 -
 75
75 -
 76
76 -
 77
77 -
 78
78 -
79
-
80
-
81
-
82
-
83
-
84
-
85
-
86
-
87
-
88
-
89
-
90
-
91
-
92
-
93
-
94
-
95
-
96
-
97
-
98
-
99
-
100
-
101
-
102
-
103
-
104
-
105
-
106
-
107
-
108
-
109
-
110
-
111
-
112
-
113
-
114
-
115
-
116
-
117
-
118
-
119
-
120
-
121
-
122
-
123
-
124
-
125
-
126
-
127
-
128
-
129
-
130
-
131
-
132
-
133
-
134
-
135
-
136
-
137
-
138
-
139
-
140
-
141
-
142
-
143
-
144
-
145
-
146
-
147
-
148
-
149
-
150
-
151
-
152
-
153
-
154
-
155
-
156
-
157
-
158
-
159
-
160
-
161
-
162
-
163
-
164
-
165
-
166
-
167
-
168
-
169
-
170
-
171
-
172
-
173
-
174
-
175
-
176
-
177
-
178
-
179
-
180
-
181
-
182
-
183
-
184
-
185
-
186
-
187
-
188
-
189
-
190
-
191
-
192
-
193
-
194
-
195
-
196
-
197
-
198
-
199
-
200
-
201
-
202
-
203
-
204
-
205
-
206
-
207
-
208
-
209
-
210
-
211
-
212
-
213
-
214
-
215
-
216
-
217
-
218
-
219
-
220
-
221
-
222
-
223
-
224
-
225
-
226
-
227
-
228
-
229
-
230
-
231
-
232
-
233
-
234
-
235
-
236
-
237
-
238
-
239
-
240
-
241
-
242
-
243
-
244
-
245
-
246
-
247
-
248
-
249
-
250
-
251
-
252
-
253
-
254
-
255
-
256
-
257
-
258
-
259
-
260
-
261
-
262
-
263
-
264
 |
 |
