Sony DSX-S210X Operating Instructions - Page 25
Enjoying sophisticated sound functions - Advanced Sound Engine
 |
View all Sony DSX-S210X manuals
Add to My Manuals
Save this manual to your list of manuals |
Page 25 highlights
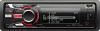
Dynamic Loudness (page 27) Enjoying sophisticated sound functions - Advanced Sound Engine Advanced Sound Engine, Sony's new sound engine, creates an ideal in-car sound field with digital signal processing. Advanced Sound Engine contains the following features: EQ7, Listening Position, DM+ Advanced, Rear Bass Enhancer, Dynamic Loudness. Selecting the sound quality - EQ7 Preset You can select an equalizer curve from 7 equalizer curves ("Xplod," "Vocal," "Edge," "Cruise," "Space," "Gravity," "Custom" or "off"). 1 During reception/playback, press the multi-way encoder. 2 Rotate the multi-way encoder until "EQ7 Preset" appears, then press it. 3 Push the multi-way encoder up/down until desired equalizer curves appears, then press it. 4 Press (BACK). The display returns to normal reception/play mode. To cancel the equalizer curve, select "off" on step 3. Tip Adjusted equalizer curve settings can be memorized separately for Tuner and USB (SensMe™, Pandora USB) sources. Customizing the equalizer curve - EQ7 Parametric Tune "Custom" of EQ7 allows you to make your own equalizer settings. Select "Custom" of EQ7 Preset. If you set "off" for EQ7 Preset, "EQ7 Parametric Tune" does not appear in the sound settings menu. 1 Select a source, then press the multi- way encoder. 2 Rotate the multi-way encoder until "EQ7 Parametric Tune" appears, then press it. 3 Setting the equalizer curve. • Frequency range Rotate the multi-way encoder to select "Band1" to "Band7." • Center frequency Push the multi-way encoder left/right to select the center frequency. Selectable center frequency in each band: Band1: "40 Hz" or "63 Hz" Band2: "100 Hz" or "160 Hz" Band3: "250 Hz" or "400 Hz" Band4: "630 Hz" or "1.0 kHz" Band5: "1.6 kHz" or "2.5 kHz" Band6: "4.0 kHz" or "6.3 kHz" Band7: "10.0 kHz" or "16.0 kHz" • Volume level Push the multi-way encoder up/down to adjust the equalizer curve. The volume level is adjustable in 1 dB steps, from -6 dB to +6 dB. 4 Press the multi-way encoder when you finish all equalizer settings. 5 Press (BACK). The display returns to normal reception/play mode. To restore the factory-set equalizer curve, select "Initialize" and "Yes" in step 3. Tip Other equalizer curves are also adjustable. Optimizing sound by Time Alignment - Listening Position The unit can change the localization of sound by delaying the sound output from each speaker to suit your position, and simulate a natural sound field with the feeling of being in the center of it wherever you sit in the car. continue to next page t 25
-
 1
1 -
2
-
3
-
4
-
5
-
6
-
7
-
8
-
9
-
10
-
11
-
12
-
13
-
14
-
15
-
16
-
17
-
18
-
19
-
 20
20 -
 21
21 -
 22
22 -
 23
23 -
 24
24 -
 25
25 -
 26
26 -
 27
27 -
 28
28 -
 29
29 -
 30
30 -
31
-
32
-
33
-
34
-
35
-
36
-
37
-
38
-
39
-
40
-
41
-
42
-
43
-
44
-
45
-
46
-
47
-
48
-
49
-
50
-
51
-
52
-
53
-
54
-
55
-
56
-
57
-
58
-
59
-
60
-
61
-
62
-
63
-
64
-
65
-
66
-
67
-
68
-
69
-
70
-
71
-
72
 |
 |
