Sony PEG-N710C Add-on Application Manual - Page 27
Playing audio files Audio Player, File List view.
 |
View all Sony PEG-N710C manuals
Add to My Manuals
Save this manual to your list of manuals |
Page 27 highlights
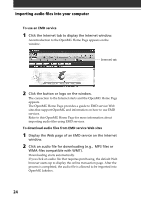
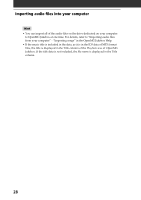
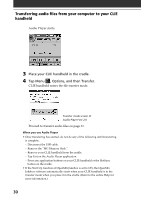
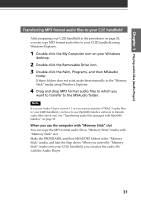
Chapter 1 Playing audio files (Audio Player) 4 Select the audio format you want to import from the Format drop-down list. 5 To import data while converting it into the ATRAC3 format, select the recording bit rate (see page 23) from the Bit Rate drop-down list. Note When you select "Without External Device/Media" from "Set the default External Device/Media" in step 2, you cannot change the recording bit rate. 6 In the File Tree view, click the folder containing the audio file you want to import. The audio files in the selected folder are listed in the File List view. 7 Click to select an audio file you want to import from the File List view. 8 Click to select the desired Playlist on the right side of the window, and then click (Import). The audio file you selected in step 7 can be imported into the Playlist. Based on the setting made in step 1, the file is imported in its original format or converted into the ATRAC3 format. Notes • The original MP3/WAV files imported are referenced to by the OpenMG Jukebox when playing back or checking-out the data. Therefore, to prevent moving or deleting the files, copy them to a specific folder on the hard disk before importing them to OpenMG Jukebox. If the original file is stored on removable media and the source media is removed, the following messages are displayed when try to playback or check-out the data. - For playback: "Cannot play selected song. The song file not found." - For check-out: "Detected song(s) which cannot be checked-out." • When the original file is on a network, the same messages are displayed when your computer is not connected to the network. • When you delete an audio file, note that the original MP3/WAV is also deleted when you select "Delete the song file from the computer." 27
-
 1
1 -
2
-
3
-
4
-
5
-
6
-
7
-
8
-
9
-
10
-
11
-
12
-
13
-
14
-
15
-
16
-
17
-
18
-
19
-
20
-
21
-
 22
22 -
 23
23 -
 24
24 -
 25
25 -
 26
26 -
 27
27 -
 28
28 -
 29
29 -
 30
30 -
 31
31 -
 32
32 -
33
-
34
-
35
-
36
-
37
-
38
-
39
-
40
-
41
-
42
-
43
-
44
-
45
-
46
-
47
-
48
-
49
-
50
-
51
-
52
-
53
-
54
-
55
-
56
-
57
-
58
-
59
-
60
-
61
-
62
-
63
-
64
-
65
-
66
-
67
-
68
-
69
-
70
-
71
-
72
-
73
-
74
-
75
-
76
-
77
-
78
-
79
-
80
-
81
-
82
-
83
-
84
-
85
-
86
-
87
-
88
-
89
-
90
-
91
-
92
-
93
-
94
-
95
-
96
-
97
-
98
-
99
-
100
-
101
-
102
-
103
-
104
 |
 |
