TP-Link TL-WR842ND TL-WR842ND V1 User Guide
TP-Link TL-WR842ND Manual
 |
View all TP-Link TL-WR842ND manuals
Add to My Manuals
Save this manual to your list of manuals |
TP-Link TL-WR842ND manual content summary:
- TP-Link TL-WR842ND | TL-WR842ND V1 User Guide - Page 1
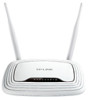
TL-WR842ND 300Mbps Multi-Function Wireless N Router Rev: 1.0.0 1910010537 - TP-Link TL-WR842ND | TL-WR842ND V1 User Guide - Page 2
TP-LINK TECHNOLOGIES CO., LTD. Other brands and product names are trademarks or registered trademarks of their respective holders. No part of the specifications in accordance with the instructions, may cause harmful interference the equipment off and on, the user is encouraged to try to correct the - TP-Link TL-WR842ND | TL-WR842ND V1 User Guide - Page 3
environment, this product may cause radio interference, in which case the user may be required to take adequate measures. National restrictions This device is Luxembourg None General authorization required for network and service supply(not for spectrum) Norway Implemented This subsection - TP-Link TL-WR842ND | TL-WR842ND V1 User Guide - Page 4
5 dBi are strictly prohibited for use with this device. The required antenna impedance is 50 ohms. To reduce potential radio interference to other users, the antenna type and its gain should be so chosen that the equivalent isotropically radiated power (e.i.r.p.) is not more than that permitted for - TP-Link TL-WR842ND | TL-WR842ND V1 User Guide - Page 5
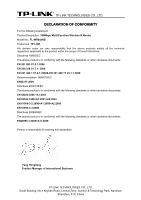
TECHNOLOGIES CO., LTD DECLARATION OF CONFORMITY For the following equipment: Product Description: 300Mbps Multi-Function Wireless N Router Model No.: TL-WR842ND Trademark: TP-LINK We declare under our own responsibility that the above products satisfy all the technical regulations applicable to the - TP-Link TL-WR842ND | TL-WR842ND V1 User Guide - Page 6
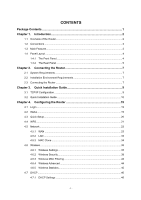
/IP Configuration 9 3.2 Quick Installation Guide 10 Chapter 4. Configuring the Router 19 4.1 Login ...19 4.2 Status ...19 4.3 Quick Setup...20 4.4 WPS ...21 4.5 Network ...23 4.5.1 WAN ...23 4.5.2 LAN ...33 4.5.3 MAC Clone 34 4.6 Wireless ...35 4.6.1 Wireless Settings 35 4.6.2 Wireless Security - TP-Link TL-WR842ND | TL-WR842ND V1 User Guide - Page 7
4.7.2 DHCP Clients List 47 4.7.3 Address Reservation 48 4.8 VPN...49 4.8.1 IKE...49 4.8.2 IPsec ...51 4.8.3 Security Alliance List 53 4.9 USB Settings ...54 4.9.1 Storage Sharing 54 4.9.2 FTP Server 56 4.9.3 Media Server 57 4.9.4 Print Server 60 4.9.5 User Accounts 61 4.10 Forwarding ...63 - TP-Link TL-WR842ND | TL-WR842ND V1 User Guide - Page 8
101 4.18.3 Firmware Upgrade 102 4.18.4 Factory Defaults 104 4.18.5 Backup & Restore 104 4.18.6 Reboot ...105 4.18.7 Password...105 4.18.8 System Log 106 4.18.9 Statistics ...108 Appendix A: FAQ 111 Appendix B: Configuring the PCs 117 Appendix C: Specifications 120 Appendix D: Glossary - TP-Link TL-WR842ND | TL-WR842ND V1 User Guide - Page 9
in your package: ¾ TL-WR842ND 300Mbps Multi-Function Wireless N Router ¾ DC Power Adapter for TL-WR842ND 300Mbps Multi-Function Wireless N Router ¾ Quick Installation Guide ¾ Resource CD for TL-WR842ND 300Mbps Multi-Function Wireless N Router, including: • This Guide • Other Helpful Information - TP-Link TL-WR842ND | TL-WR842ND V1 User Guide - Page 10
(SOHO) networks and the users demanding higher networking performance. Additionally, the TL-WR842ND provides a USB port which supports storage/FTP/Media/Print Server. Incredible Speed The TL-WR842ND 300Mbps Multi-Function Wireless N Router provides up to 300Mbps wireless connection with other 802 - TP-Link TL-WR842ND | TL-WR842ND V1 User Guide - Page 11
guide stands for TL-WR842ND 300Mbps Multi-Function Wireless N Router without any explanation. 1.3 Main Features ¾ Complies with IEEE 802.11n to provide a wireless data rate of up to 450Mbps. ¾ One 10/100M Auto-Negotiation RJ45 Internet port, four 10/100M Auto-Negotiation RJ45 LAN ports, supporting - TP-Link TL-WR842ND | TL-WR842ND V1 User Guide - Page 12
TL-WR842ND 300Mbps Multi-Function Wireless N Router 1.4 Panel Layout 1.4.1 The Front Panel Figure 1-1 Front Panel sketch The Router's LEDs are located on the front panel (View from left to right). Name (SYS) (Wireless) (LAN 1-4) (Internet) (USB) (WPS) Status Off Indication The device has a - TP-Link TL-WR842ND | TL-WR842ND V1 User Guide - Page 13
this TL-WR842ND 300Mbps Multi-Function Wireless N Router. ¾ WAN: This port is where you will connect the DSL/cable Modem, or Ethernet. ¾ 1,2,3,4 (LAN): These ports (1, 2, 3, 4) connect the Router to the local PC(s). ¾ USB: The USB port connects to a USB storage device or a USB printer. ¾ WPS/RESET - TP-Link TL-WR842ND | TL-WR842ND V1 User Guide - Page 14
TL-WR842ND 300Mbps Multi-Function Wireless N Router 2) Use the Factory Default WPS/RESET button: With the Router powered on, use a pin to press and hold the WPS/RESET button (approximately 8 seconds) until the SYS LED becomes quick-flash from slow-flash. And then release the button and wait the - TP-Link TL-WR842ND | TL-WR842ND V1 User Guide - Page 15
TL-WR842ND 300Mbps Multi-Function Wireless N Router Chapter 2. Connecting the Router 2.1 System Requirements ¾ Broadband Internet Access Service (DSL/Cable/Ethernet) ¾ One DSL/Cable Modem that has an RJ45 connector (which is not necessary if the Router is connected directly to the Ethernet.) ¾ PCs - TP-Link TL-WR842ND | TL-WR842ND V1 User Guide - Page 16
) Note: TL-WR842ND 300Mbps Multi-Function Wireless N Router If you want to use the Router to share files or printer, plug the USB storage device to the USB port or connect the printer to the Router with a matching cable. 6. Connect the power adapter to the power socket on the Router, and the - TP-Link TL-WR842ND | TL-WR842ND V1 User Guide - Page 17
TL-WR842ND 300Mbps Multi-Function Wireless N Router Chapter 3. Quick Installation Guide This chapter will show you how to configure the basic functions of your 300Mbps Multi-Function Wireless N Router using Quick Setup Wizard within minutes. 3.1 TCP/IP Configuration The default domain name of the - TP-Link TL-WR842ND | TL-WR842ND V1 User Guide - Page 18
TL-WR842ND 300Mbps Multi-Function Wireless N Router ¾ If the result displayed is similar to Figure 3-2, it means the connection between your PC and the Router failed. Figure 3-2 Failure result of Ping command Please check the connection following these steps: 1. Is the connection between your PC and - TP-Link TL-WR842ND | TL-WR842ND V1 User Guide - Page 19
300Mbps Multi-Function Wireless N Router Settings interface may not be opened with some web browsers, it is strongly recommended that you use Internet Explorer. 1. To access the configuration utility, open a web-browser and type in the default domain name http://tplinklogin.net in the address - TP-Link TL-WR842ND | TL-WR842ND V1 User Guide - Page 20
TL-WR842ND 300Mbps Multi-Function Wireless N Router Figure 3-5 Quick Setup 3. Click Next, and then WAN Connection Type page will appear as shown in Figure 3-6. Figure 3-6 WAN Connection Type The Router provides Auto-Detect function and supports three popular ways PPPoE, Dynamic IP and Static IP to - TP-Link TL-WR842ND | TL-WR842ND V1 User Guide - Page 21
TL-WR842ND 300Mbps Multi-Function Wireless N Router Figure 3-7 Quick Setup - PPPoE ¾ User Name/Password - Enter the User Name and Password connection type detected is Dynamic IP, the next screen will appear as shown in Figure 3-8. Figure 3-8 Quick Setup - MAC Clone A MAC address is a 12-digit - TP-Link TL-WR842ND | TL-WR842ND V1 User Guide - Page 22
TL-WR842ND 300Mbps Multi-Function Wireless N Router Figure 3-9 Quick Setup - MAC Clone z If you are visiting the Router from another computer, rather than the main computer, please select No, and then enter the main computer's MAC in the field WAN MAC Address. Figure 3-10 Quick Setup - MAC Clone ) - TP-Link TL-WR842ND | TL-WR842ND V1 User Guide - Page 23
TL-WR842ND 300Mbps Multi-Function Wireless N Router Figure 3-11 Find MAC Address 3) If the connection type detected is Static IP, the next screen will appear as shown in Figure 3-12. Figure 3-12 Quick Setup - Static IP ¾ IP Address - This is the WAN IP address as seen by external users on the - TP-Link TL-WR842ND | TL-WR842ND V1 User Guide - Page 24
TL-WR842ND 300Mbps Multi-Function Wireless N Router ¾ Secondary DNS - If your ISP provides another DNS server, enter it into this field. 5. Click Next to continue, the Wireless settings page will appear as shown in Figure 3-13. Figure 3-13 Quick Setup - Wireless ¾ Wireless Radio - Choose from the - TP-Link TL-WR842ND | TL-WR842ND V1 User Guide - Page 25
TL-WR842ND 300Mbps Multi-Function Wireless N Router ¾ Channel - This field determines which operating frequency will be used. It is not necessary to change the wireless channel unless you notice interference problems with another nearby access point. If you select auto, then the AP will select the - TP-Link TL-WR842ND | TL-WR842ND V1 User Guide - Page 26
TL-WR842ND 300Mbps Multi-Function Wireless N Router Figure 3-14 Quick Setup - Finish If there is anything changed on the Wireless page, you will see the Finish page as shown in Figure 3-15. Click the Reboot button to make your wireless configuration take effect and finish the Quick Setup. Figure 3- - TP-Link TL-WR842ND | TL-WR842ND V1 User Guide - Page 27
TL-WR842ND 300Mbps Multi-Function Wireless N Router Chapter 4. Configuring the Router This chapter will show each Web page's key functions and the , there are the corresponding explanations and instructions. The detailed explanations for each Web page's key function are listed below. 4.2 Status The - TP-Link TL-WR842ND | TL-WR842ND V1 User Guide - Page 28
TL-WR842ND 300Mbps Multi-Function Wireless N Router Figure 4-1 Router Status 4.3 Quick Setup Please refer to 3.2 Quick Installation Guide. - 20 - - TP-Link TL-WR842ND | TL-WR842ND V1 User Guide - Page 29
TL-WR842ND 300Mbps Multi-Function Wireless N Router 4.4 WPS This section will guide you to add a new wireless device to an existing network quickly by WPS (Wi-Fi Protected Setup) function. a). Choose menu "WPS", and you will see the next screen (shown in Figure 4-2 ). Figure 4-2 WPS ¾ WPS Status - - TP-Link TL-WR842ND | TL-WR842ND V1 User Guide - Page 30
TL-WR842ND 300Mbps Multi-Function Wireless N Router You can also keep the default WPS Status as Enabled and click the for further instructions. II. Enter the client device's PIN on the Router Use this method if your client device has a Wi-Fi Protected Setup PIN number. Step 1: Keep the default WPS - TP-Link TL-WR842ND | TL-WR842ND V1 User Guide - Page 31
TL-WR842ND 300Mbps Multi-Function Wireless N Router III. Enter the Router's PIN on your client device Use this method if your client device asks for the Router's PIN number. Step 1: On the client device, enter the PIN number listed on the Router's Wi-Fi Protected Setup screen. (It is also labeled on - TP-Link TL-WR842ND | TL-WR842ND V1 User Guide - Page 32
TL-WR842ND 300Mbps Multi-Function Wireless N Router Figure 4-6 WAN - Dynamic IP This page displays the WAN IP parameters assigned dynamically by your ISP, including IP address, Subnet Mask, Default Gateway, etc. Click the Renew button to renew the IP parameters from your ISP. Click the Release - TP-Link TL-WR842ND | TL-WR842ND V1 User Guide - Page 33
TL-WR842ND 300Mbps Multi-Function Wireless N Router Click the Save button to save your settings. 2. If your ISP provides a static or fixed IP Address, Subnet Mask, Gateway and DNS setting, select Static IP. The Static IP settings page will appear, shown in Figure 4-7. Figure 4-7 WAN - Static IP ¾ IP - TP-Link TL-WR842ND | TL-WR842ND V1 User Guide - Page 34
TL-WR842ND 300Mbps Multi-Function Wireless N Router Figure 4-8 WAN - PPPoE ¾ User Name/Password - Enter the User Name and Password provided by your ISP. These fields are case-sensitive. ¾ Secondary Connection - It's available only for PPPoE Connection. If your ISP provides an - TP-Link TL-WR842ND | TL-WR842ND V1 User Guide - Page 35
TL-WR842ND 300Mbps Multi-Function Wireless N Router down. ¾ Time-based Connecting - The connection . It is not recommended that you change the default MTU Size unless required by your ISP. ¾ Service Name/AC Name - The service name and AC (Access Concentrator) name should not be configured unless you - TP-Link TL-WR842ND | TL-WR842ND V1 User Guide - Page 36
TL-WR842ND 300Mbps Multi-Function Wireless N Router these fields blank will work. ¾ ISP Specified IP Address - If your ISP does not automatically assign IP addresses to the Router during login, please click "Use IP address specified by ISP" check box and enter the IP address provided by your ISP in - TP-Link TL-WR842ND | TL-WR842ND V1 User Guide - Page 37
TL-WR842ND 300Mbps Multi-Function Wireless N Router e.g. NSW / ACT - nsw.bigpond.net.au VIC / TAS / WA / SA / NT - vic.bigpond.net.au QLD - qld.bigpond.net.au ¾ MTU Size - The normal MTU ( - TP-Link TL-WR842ND | TL-WR842ND V1 User Guide - Page 38
TL-WR842ND 300Mbps Multi-Function Wireless N Router Figure 4-11 WAN - L2TP/Russia L2TP ¾ User Name/Password - Enter the User Name and Password provided by your ISP. These fields are case-sensitive. ¾ Dynamic IP/ Static IP - Choose either as you are given by your ISP. Click the Connect button to - TP-Link TL-WR842ND | TL-WR842ND V1 User Guide - Page 39
TL-WR842ND 300Mbps Multi-Function Wireless N Router ¾ Connect Automatically - Connect automatically after the Router is disconnected. To use this option, check the radio button. ¾ Connect Manually - You can configure the Router to make it connect or disconnect manually. After a specified period of - TP-Link TL-WR842ND | TL-WR842ND V1 User Guide - Page 40
TL-WR842ND 300Mbps Multi-Function Wireless N Router Figure 4-12 PPTP Settings ¾ User Name/Password - Enter the User Name and Password provided by your ISP. These fields are case-sensitive. ¾ Dynamic IP/ Static IP - Choose either as you are given by your ISP and enter the ISP's IP address or the - TP-Link TL-WR842ND | TL-WR842ND V1 User Guide - Page 41
TL-WR842ND 300Mbps Multi-Function Wireless N Router automatically re-establish your connection as soon as you attempt to access the user name and password. z Dynamic IP - Connections which use dynamic IP address assignment. z Static IP - Connections which use static IP address assignment. The Router - TP-Link TL-WR842ND | TL-WR842ND V1 User Guide - Page 42
TL-WR842ND 300Mbps Multi-Function Wireless N Router Figure 4-13 LAN ¾ MAC Address - The physical address of the Router, as seen from the LAN. The value can't be changed. ¾ IP Address - Enter the IP address of your Router or reset it in dotted-decimal notation (factory default: 192.168.0.1). ¾ Subnet - TP-Link TL-WR842ND | TL-WR842ND V1 User Guide - Page 43
TL-WR842ND 300Mbps Multi-Function Wireless N Router ¾ Your PC's MAC Address - This field displays the MAC address of the PC that is managing the Router. If the MAC address is required, you can click the Clone MAC Address To button and this MAC address will fill in the WAN MAC Address field. Click - TP-Link TL-WR842ND | TL-WR842ND V1 User Guide - Page 44
TL-WR842ND 300Mbps Multi-Function Wireless N Router Figure 4-16 Wireless Settings ¾ SSID (1-4) - Up to four SSIDs for each BSS (Basic Service Set) can be entered in the filed SSID1 ~ SSID4. The name can be up to 32 characters. The same name (SSID) must be assigned to all wireless devices in your - TP-Link TL-WR842ND | TL-WR842ND V1 User Guide - Page 45
TL-WR842ND 300Mbps Multi-Function Wireless N Router ) Note: Note Dialog Limited by local law regulations, version for North America does not have region selection option. ¾ Channel - This field determines which operating frequency will be used. The default channel is set to Auto, so the Router - TP-Link TL-WR842ND | TL-WR842ND V1 User Guide - Page 46
TL-WR842ND 300Mbps Multi-Function Wireless N Router or more Wlans. If this checkbox is selected, you will have to set the following parameters as shown in Figure 4-17. Make sure the following settings are correct. Figure 4-17 ¾ SSID(to be bridged) - The SSID of the AP your Router is going to connect - TP-Link TL-WR842ND | TL-WR842ND V1 User Guide - Page 47
TL-WR842ND 300Mbps Multi-Function Wireless N Router Figure 4-18 Wireless Security ¾ SSID - Select the desired SSID from the drop-down list. ¾ Disable Security - If you do not want to use wireless security, check this radio button. But it's strongly recommended to choose one of the following modes to - TP-Link TL-WR842ND | TL-WR842ND V1 User Guide - Page 48
TL-WR842ND 300Mbps Multi-Function Wireless N Router Figure 4-19 WEP • Type - you can choose the type for the WEP security on the drop-down list. The default setting is Automatic, which can select Shared Key or Open System authentication type automatically based on the wireless station's capability - TP-Link TL-WR842ND | TL-WR842ND V1 User Guide - Page 49
TL-WR842ND 300Mbps Multi-Function Wireless N Router notice in red as shown in Figure 4-20. Figure 4-20 WPA/WPA2 - Enterprise • Radius Server IP - Enter the IP address 64 Hexadecimal characters. • Group Key Update Period - Specify the group key update interval in seconds. The value should be 30 - TP-Link TL-WR842ND | TL-WR842ND V1 User Guide - Page 50
TL-WR842ND 300Mbps Multi-Function Wireless N Router Be sure to click the Save button to save your settings on this page. 4.6.3 Wireless MAC Filtering Choose menu "Wireless → MAC Filtering", you can control the wireless access by configuring the Wireless MAC Filtering function, shown in Figure 4-22. - TP-Link TL-WR842ND | TL-WR842ND V1 User Guide - Page 51
TL-WR842ND 300Mbps Multi-Function Wireless N Router 2. Give a simple description for the wireless station in the Description field. For example: Wireless station A. 3. Select Enabled or Disabled for this entry on the Status drop-down list. 4. Click the Save button to save this entry. To modify or - TP-Link TL-WR842ND | TL-WR842ND V1 User Guide - Page 52
TL-WR842ND 300Mbps Multi-Function Wireless N Router 4.6.4 Wireless Advanced Choose menu "Wireless → Wireless Advanced", you can configure the advanced settings of your wireless network. Figure 4-24 Wireless Advanced ¾ Transmit Power - Here you can specify the transmit power of Router. You can select - TP-Link TL-WR842ND | TL-WR842ND V1 User Guide - Page 53
TL-WR842ND 300Mbps Multi-Function Wireless N Router ¾ DTIM Interval - This value determines the interval of the Delivery Traffic Indication Message (DTIM). A DTIM field is a countdown field informing clients of the next window for listening to broadcast and multicast messages. When the Router has - TP-Link TL-WR842ND | TL-WR842ND V1 User Guide - Page 54
TL-WR842ND 300Mbps Multi-Function Wireless N Router If the numbers of connected wireless stations go beyond one page, the computer manually. ¾ Start IP Address - Specify an IP address for the DHCP Server to start with when assigning IP addresses. 192.168.0.100 is the default start address. - 46 - TP-Link TL-WR842ND | TL-WR842ND V1 User Guide - Page 55
TL-WR842ND 300Mbps Multi-Function Wireless N Router ¾ End IP Address - Specify an IP address for the DHCP Server to end with when assigning IP addresses. 192.168.0.199 is the default end address. ¾ Address Lease Time - The Address Lease Time is the amount of time a network user will be allowed - TP-Link TL-WR842ND | TL-WR842ND V1 User Guide - Page 56
TL-WR842ND 300Mbps Multi-Function Wireless N Router 4.7.3 Address Reservation Choose menu "DHCP → Address Reservation", you can view and add a reserved address for clients via the next screen (shown in Figure 4-29).When you specify a reserved IP address for a PC on the LAN, that PC will always - TP-Link TL-WR842ND | TL-WR842ND V1 User Guide - Page 57
TL-WR842ND 300Mbps Multi-Function Wireless N Router 2. Modify the information. 3. Click the Save button. Click the sure that the IKE settings should be the same for the local and peer endpoints. Choose menu "VPN→IKE", you can view the information of IKE Policies in this table (shown in Figure 4-33) - TP-Link TL-WR842ND | TL-WR842ND V1 User Guide - Page 58
TL-WR842ND 300Mbps Multi-Function Wireless N Router Figure 4-33 IKE Policy Settings ¾ Policy Name - Specify a unique name to the IKE policy for identification and management purposes. ¾ Exchanged Mode - Select the IKE Exchange Mode in phase 1, and ensure the remote VPN peer uses the same mode. z - TP-Link TL-WR842ND | TL-WR842ND V1 User Guide - Page 59
TL-WR842ND 300Mbps Multi-Function Wireless N Router ¾ DPD - Enable or disable DPD (Dead Peer Detect) function. If enabled, a Dead Peer Detection (DPD) packet is sent from the VPN Concentrator to the VPN Client to ensure its peer is still there. ¾ DPD Interval - Manually enter the number of seconds - TP-Link TL-WR842ND | TL-WR842ND V1 User Guide - Page 60
TL-WR842ND 300Mbps Multi-Function Wireless N Router Figure 4-35 IPsec Policy Settings ¾ Policy Name - Enter the name for the IPsec Policy. ¾ Local Subnet - Enter the local (LAN) subnet and mask.(ex. 192. - TP-Link TL-WR842ND | TL-WR842ND V1 User Guide - Page 61
TL-WR842ND 300Mbps Multi-Function Wireless N Router ¾ Out Authentication Key - It is for direction out authentication key set in manual mode Alliance List Choose "VPN→Security Alliance List", you Index) of each specific IPsec policy. IP address of WAN and the default gateway of remote peer are - 53 - - TP-Link TL-WR842ND | TL-WR842ND V1 User Guide - Page 62
TL-WR842ND 300Mbps Multi-Function Wireless N Router 10.0.0.10 and 10.0.0.1 respectively. Security protocol and other parameters for IPsec tunnel and the remote router should be configured the same. As Security Association is unidirectional, an ingoing SA and an outgoing SA are created to protect - TP-Link TL-WR842ND | TL-WR842ND V1 User Guide - Page 63
TL-WR842ND 300Mbps Multi-Function Wireless N Router ¾ Used - The used space of the USB driver. ¾ Free - The available space of the USB driver. ¾ Use% - The percentage of the used space. ¾ Shared - Indicates the shared or non-shared status of the volume. When the volume is shared, you can - TP-Link TL-WR842ND | TL-WR842ND V1 User Guide - Page 64
TL-WR842ND 300Mbps Multi-Function Wireless N Router 4.9.2 FTP Server Choose menu "USB Settings→FTP Server", you can create an FTP server that can be accessed from the Internet or your local network. Figure 4-40 FTP Server Configuration ¾ Server Status - Indicates the FTP Server's current status. ¾ - TP-Link TL-WR842ND | TL-WR842ND V1 User Guide - Page 65
TL-WR842ND 300Mbps Multi-Function Wireless N Router To add a new folder, follow the instructions below. 1. Click Add New Folder in Figure 4-40. Figure 4-41 Add or Modify Share Folder 2. Select the Share entire partition or a specific 4.9.3 Media Server Choose menu "USB Settings→Media Server", you can - TP-Link TL-WR842ND | TL-WR842ND V1 User Guide - Page 66
TL-WR842ND 300Mbps Multi-Function Wireless N Router Figure 4-42 Media Server Setting ¾ Server Name - The name To set up your media server, please follow the instructions below: 1. Plug an external USB hard disk drive or USB flash drive into this Router, and then the screen will appear as shown in - TP-Link TL-WR842ND | TL-WR842ND V1 User Guide - Page 67
TL-WR842ND 300Mbps Multi-Function Wireless N Router Figure 4-44 Media Server Setting 3. Click the Add share folder button to specify a folder as the search path of go to the media server configuration page. To add a new share folder for your media server, please follow the instructions below: - 59 - - TP-Link TL-WR842ND | TL-WR842ND V1 User Guide - Page 68
TL-WR842ND 300Mbps Multi-Function Wireless N Router 4.9.4 Print Server Choose menu "USB Settings→Print Server", you can service has been turned on, and no user is using the print services at present. You can click the "Stop" button to stop the print service. ¾ Offline - Indicates the print service - TP-Link TL-WR842ND | TL-WR842ND V1 User Guide - Page 69
TL-WR842ND 300Mbps Multi-Function Wireless N Router print service. ¾ Busy - Indicates the print service has been turned on, but at this moment other users are using print services. 4.9.5 User Accounts You can specify the user name and password for Storage Sharing and FTP Server users on this page. - TP-Link TL-WR842ND | TL-WR842ND V1 User Guide - Page 70
TL-WR842ND 300Mbps Multi-Function Wireless N Router Figure 4-49 Add or Modify User Account ¾ User Name - Type the user name that you want to give access to the USB drive. The user name must be composed of alphanumeric symbols not exceeding 15 characters in length. ¾ Password - Enter the password in - TP-Link TL-WR842ND | TL-WR842ND V1 User Guide - Page 71
Forwarding TL-WR842ND 300Mbps Multi-Function Wireless N Router Figure 4-50 The Forwarding menu There are four submenus under the Forwarding menu (shown in Figure 4-50): Virtual Servers, Port Triggering, DMZ and UPnP. Click any of them, and you will be able to configure the corresponding function - TP-Link TL-WR842ND | TL-WR842ND V1 User Guide - Page 72
TL-WR842ND 300Mbps Multi-Function Wireless N Router supported by the Router). ¾ Status - The status of this entry, "Enabled" means the virtual server entry is enabled. ¾ Common Service Port - Some common services available service. If so, select another service, and type the same IP address for - TP-Link TL-WR842ND | TL-WR842ND V1 User Guide - Page 73
TL-WR842ND 300Mbps Multi-Function Wireless N Router Click the Next button to go to the next page and click the Previous button to return to the previous page. ) Note: If you set the service need, enter the Trigger Port and the Incoming Ports manually. 3. Select the protocol used for Trigger Port from - TP-Link TL-WR842ND | TL-WR842ND V1 User Guide - Page 74
TL-WR842ND 300Mbps Multi-Function Wireless N Router Figure 4-54 Add or Modify a Triggering Entry ¾ Trigger Port - The port for outgoing traffic. An outgoing connection using this port will trigger this rule. ¾ Trigger - TP-Link TL-WR842ND | TL-WR842ND V1 User Guide - Page 75
TL-WR842ND 300Mbps Multi-Function Wireless N Router Once the Router is configured, the operation is as follows: 1. A local host makes an outgoing connection to an external host using a destination port number defined in the Trigger Port field. 2. The Router records this connection, opens the - TP-Link TL-WR842ND | TL-WR842ND V1 User Guide - Page 76
TL-WR842ND 300Mbps Multi-Function Wireless N Router such as Internet computers, to access the local host resources or devices as needed. UPnP devices can be automatically discovered by the UPnP service application on the LAN. Figure 4-56 UPnP Setting ¾ Current UPnP Status - UPnP can be enabled or - TP-Link TL-WR842ND | TL-WR842ND V1 User Guide - Page 77
4.11 Security TL-WR842ND 300Mbps Multi-Function Wireless N Router Figure 4-57 The Security menu There are four submenus under passing through the session conforms to the protocol. SPI Firewall is enabled by factory default. If you want all the computers on the LAN exposed to the outside world, you can disable - TP-Link TL-WR842ND | TL-WR842ND V1 User Guide - Page 78
TL-WR842ND 300Mbps Multi-Function Wireless N Router ¾ VPN - VPN Passthrough must be enabled if you want to allow VPN tunnels using VPN protocols to pass through the Router. • PPTP Passthrough - Point-to-Point Tunneling Protocol (PPTP) allows the Point-to-Point Protocol (PPP) to be tunneled through - TP-Link TL-WR842ND | TL-WR842ND V1 User Guide - Page 79
TL-WR842ND 300Mbps Multi-Function Wireless N Router Figure 4-59 Advanced Security ¾ Packets Statistics Interval (5~60) - The default value is ¾ DoS Protection - Denial of Service protection. Check the Enable or Disable button to enable or disable the DoS protection function. Only when it is enabled, - TP-Link TL-WR842ND | TL-WR842ND V1 User Guide - Page 80
TL-WR842ND 300Mbps Multi-Function Wireless N Router ¾ Enable TCP-SYN-FLOOD Attack Filtering - Enable or Disable the TCP-SYN-FLOOD Attack Filtering. ¾ TCP-SYN-FLOOD Packets Threshold (5~3600) - The default value is 50. Enter a value between 5 ~ 3600. When the current TCP-SYN-FLOOD Packets numbers is - TP-Link TL-WR842ND | TL-WR842ND V1 User Guide - Page 81
TL-WR842ND 300Mbps Multi-Function Wireless N Router use the password to browse the built-in web pages to perform Administrator tasks while all the others will be blocked. After click the Add button, your PC's MAC Address will be placed in the list above. Click the Save button to save your settings. - TP-Link TL-WR842ND | TL-WR842ND V1 User Guide - Page 82
TL-WR842ND 300Mbps Multi-Function Wireless N Router 2. Be sure to change the Router's default password to a very secure password. 4.12 Parental Control Choose menu "Parental Control", and then you can configure the parental control in the screen as shown in Figure 4-62. The Parental Control function - TP-Link TL-WR842ND | TL-WR842ND V1 User Guide - Page 83
TL-WR842ND 300Mbps Multi-Function Wireless N Router Figure 4-63 Add or Modify Parental Control Entry ¾ Parental Control - Check Enable if you want this function to take effect; otherwise, check Disable. ¾ MAC Address of Parental PC - In this field, enter the MAC address of the controlling PC, or you - TP-Link TL-WR842ND | TL-WR842ND V1 User Guide - Page 84
TL-WR842ND 300Mbps Multi-Function Wireless N Router 3. Give a description (e.g. Allow Google) for the website allowed to be accessed in the 1. Click Add New... button. 2. Enter 00-11-22-33-44-AA in the MAC Address of Child PC field. 3. Enter "Allow Google" in the Website Description field. 4. Enter - TP-Link TL-WR842ND | TL-WR842ND V1 User Guide - Page 85
TL-WR842ND 300Mbps Multi-Function Wireless N Router Figure 4-64 Parental Control Settings 4.13 Access Control Figure 4-65 Access Control There are four submenus under the Access Control menu as shown in Figure 4-59: Rule, Host, Target and Schedule. Click any of them, and you will be able to - TP-Link TL-WR842ND | TL-WR842ND V1 User Guide - Page 86
TL-WR842ND 300Mbps Multi-Function Wireless N Router ¾ Enable Internet Access Control - Select the check box to enable the Internet Access Control function, so the Default enable a specific entry. ¾ Modify - Here you can edit or delete an existing rule. ¾ Setup Wizard - Click the Setup Wizard button - TP-Link TL-WR842ND | TL-WR842ND V1 User Guide - Page 87
TL-WR842ND 300Mbps Multi-Function Wireless N Router ¾ Mode - Here are two options, IP Address and MAC Address. You can select either of them from the drop-down list. If the IP Address is selected, you can see the following item: ¾ LAN IP Address - Enter the IP address or address range of the host in - TP-Link TL-WR842ND | TL-WR842ND V1 User Guide - Page 88
TL-WR842ND 300Mbps Multi-Function Wireless N Router ¾ Protocol - Here are four options, All, TCP, UDP, and ICMP. Select one of them from the drop-down list for the target. ¾ Common Service Port - Here lists some common service ports. Select one from the drop-down list, and the corresponding port - TP-Link TL-WR842ND | TL-WR842ND V1 User Guide - Page 89
TL-WR842ND 300Mbps Multi-Function Wireless N Router 4. Click Next when finishing creating the advanced schedule entry, and the next screen will appear as shown in Figure 4-70. Figure 4-70 Quick Setup - Create an Internet Access Control Entry ¾ Rule - In this field, create a name for the rule. Note - TP-Link TL-WR842ND | TL-WR842ND V1 User Guide - Page 90
7. Click the Save button. TL-WR842ND 300Mbps Multi-Function Wireless N Router Figure 4-71 Add Internet Access Control Entry For example: If you desire to allow the host with MAC address 00-11-22-33-44-AA to access www.google.com only from 18:00 to 20:00 on Saturday and Sunday, and forbid other - TP-Link TL-WR842ND | TL-WR842ND V1 User Guide - Page 91
TL-WR842ND 300Mbps Multi-Function Wireless N Router 4.13.2 Host Choose menu "Access Control → Host", and then you can view and set a Host list in the screen as shown in Figure 4-72. The host list is necessary for the Access the Mode field, select IP Address or MAC Address. z If you select IP Address, - TP-Link TL-WR842ND | TL-WR842ND V1 User Guide - Page 92
TL-WR842ND 300Mbps Multi-Function Wireless N Router Figure 4-73 Add or Modify a Host Entry Figure 4-74 Add or Modify a Host Entry For example: If you desire to restrict the internet activities of host with MAC address Mode field, select MAC Address from the Target Choose menu "Access Control → Target - TP-Link TL-WR842ND | TL-WR842ND V1 User Guide - Page 93
TL-WR842ND 300Mbps Multi-Function Wireless N Router Figure 4-75 Target Settings ¾ Target Description - Here displays the description about the target and this description is unique. ¾ Information - The target can be IP address, port, or domain name. ¾ Modify - To modify or delete an existing entry. - TP-Link TL-WR842ND | TL-WR842ND V1 User Guide - Page 94
TL-WR842ND 300Mbps Multi-Function Wireless N Router Figure 4-77 Add or Modify an Access activities of host with MAC address 00-11-22-33-44-AA in the LAN to access www.google.com only, you 75 to enter the Add or Modify an Access Target Entry page. 2. In Mode field, select Domain Name from the drop-down - TP-Link TL-WR842ND | TL-WR842ND V1 User Guide - Page 95
TL-WR842ND 300Mbps Multi-Function Wireless N Router 4.13.4 Schedule Choose menu "Access Control → Schedule", and then you can view and set a Schedule list in the next screen as shown in Figure 4-78. The Schedule list is necessary for the Access Control Rule. Figure 4-78 Schedule Settings ¾ Schedule - TP-Link TL-WR842ND | TL-WR842ND V1 User Guide - Page 96
TL-WR842ND 300Mbps Multi-Function Wireless N Router Figure 4-79 Advanced Schedule Settings For example: If you desire to restrict the internet activities of host with MAC address 00-11-22-33-44-AA to access www.google.com only from 18:00 to 20:00 on Saturday and Sunday, you should first follow the - TP-Link TL-WR842ND | TL-WR842ND V1 User Guide - Page 97
corresponding function. TL-WR842ND 300Mbps Multi-Function Wireless N Router 4.14.1 Static Routing List Choose menu IP Address is the network portion, and which portion is the host portion. ¾ Default Gateway - This is the IP Address of the gateway device that allows for contact between the Router - TP-Link TL-WR842ND | TL-WR842ND V1 User Guide - Page 98
TL-WR842ND 300Mbps Multi-Function Wireless N Router 4. Click the Save button to make the entry take Figure 4-83). System routing table views all of the valid route entries in use. The Destination IP address, Subnet Mask, Gateway, and Interface will be displayed for each entry. Figure 4-83 System - TP-Link TL-WR842ND | TL-WR842ND V1 User Guide - Page 99
TL-WR842ND 300Mbps Multi-Function Wireless N Router 4.15 Bandwidth Control Figure 4-84 Bandwidth Control There are two submenus under the Bandwidth Control menu as shown in Figure 4-84: Control Settings and Rules List. Click any of them, and you will be able to configure the corresponding function. - TP-Link TL-WR842ND | TL-WR842ND V1 User Guide - Page 100
TL-WR842ND 300Mbps Multi-Function Wireless N Router Figure 4-86 Bandwidth Control Rules List ¾ Description - This is the information about the rules such as address range. ¾ Egress bandwidth - This field displays the max and mix upload bandwidth through the WAN port, the default is 0. ¾ Ingress - TP-Link TL-WR842ND | TL-WR842ND V1 User Guide - Page 101
TL-WR842ND 300Mbps Multi-Function Wireless N Router 4.16 IP & MAC Binding Setting Figure 4-88 the IP & MAC Binding menu There are two submenus under the IP &MAC Binding menu (shown in Figure 4-88): Binding Settings and ARP List. Click any of them, and you will be able to scan or configure - TP-Link TL-WR842ND | TL-WR842ND V1 User Guide - Page 102
TL-WR842ND 300Mbps Multi-Function Wireless N Router Figure 4-90 IP & MAC Binding Setting (Add & Modify) To add IP & MAC Binding entries, follow the steps below. 1. Click the Add New... button as shown in Figure 4-89. 2. Enter the MAC Address and IP Address. 3. Select the Bind checkbox. 4. Click the - TP-Link TL-WR842ND | TL-WR842ND V1 User Guide - Page 103
TL-WR842ND 300Mbps Multi-Function Wireless N Router 4.16.2 ARP List To manage the computer, you could observe the computers in the LAN by checking the relationship of MAC address and IP address on the ARP list, and you could also configure the items on the ARP list. This page displays the ARP List; - TP-Link TL-WR842ND | TL-WR842ND V1 User Guide - Page 104
TL-WR842ND 300Mbps Multi-Function Wireless N Router service providers such as www.comexe.cn, www.dyndns.org, or www.no-ip.com. The Dynamic DNS client service provider will give you a password or key. 4.17.1 Comexe.cn DDNS If the dynamic DNS Service Provider you select is www.comexe.cn, the page will - TP-Link TL-WR842ND | TL-WR842ND V1 User Guide - Page 105
) Note: TL-WR842ND 300Mbps Multi-Function Wireless N Router If you want to login again with another account after a successful login, please click the Logout button, then input your new username and password and click the Login button. 4.17.2 Dyndns.org DDNS If the dynamic DNS Service Provider - TP-Link TL-WR842ND | TL-WR842ND V1 User Guide - Page 106
TL-WR842ND 300Mbps Multi-Function Wireless N Router 4.17.3 No-ip.com DDNS If the dynamic DNS Service Provider you select is www.no-ip.com, the page will appear as shown in Figure 4-95. Figure 4-95 No-ip.com DDNS Settings To set up for DDNS, follow these instructions: 1. Enter the User Name for your - TP-Link TL-WR842ND | TL-WR842ND V1 User Guide - Page 107
4.18 System Tools TL-WR842ND 300Mbps Multi-Function Wireless N Router Figure 4-96 The System Tools menu Choose menu "System Tools", and you can see the submenus under the main menu: Time Settings, Diagnostic, Firmware Upgrade, Factory Defaults, Backup & Restore, Reboot, Password, System Log and - TP-Link TL-WR842ND | TL-WR842ND V1 User Guide - Page 108
-WR842ND 300Mbps Multi-Function Wireless N Router ¾ Time Zone - Select your local time zone from this pull down list. ¾ Date - Enter your local date in MM/DD/YY into the right blanks. ¾ Time - Enter your local time in HH/MM/SS into the right blanks. ¾ NTP Server I / NTP Server II - Enter the address - TP-Link TL-WR842ND | TL-WR842ND V1 User Guide - Page 109
TL-WR842ND 300Mbps Multi-Function Wireless N Router ) Note: 1. This setting will be used for some time-based functions such as firewall. You must specify your time zone once you login to the router successfully, otherwise, these functions will not take effect. 2. The time will be lost if the router - TP-Link TL-WR842ND | TL-WR842ND V1 User Guide - Page 110
TL-WR842ND 300Mbps Multi-Function Wireless N Router pinging/tracerouting the IP address is successful, but pinging/tracerouting the domain name is not, you might have a name resolution problem. In this case, ensure that the domain name you are specifying can be resolved by using Domain Name System ( - TP-Link TL-WR842ND | TL-WR842ND V1 User Guide - Page 111
TL-WR842ND 300Mbps Multi-Function Wireless N Router Figure 4-101 Firmware Upgrade ¾ Firmware Version - Displays the current firmware version. ¾ Hardware Version - Displays the current hardware version. The hardware version of the upgrade file must accord with the Router's current hardware version. - TP-Link TL-WR842ND | TL-WR842ND V1 User Guide - Page 112
TL-WR842ND 300Mbps Multi-Function Wireless N Router 6) The upgrade process takes a few moments and the Router restarts automatically when the upgrade is complete. 4.18.4 Factory Defaults Choose menu "System Tools → Factory Defaults", and then and you can restore the configurations of the Router to - TP-Link TL-WR842ND | TL-WR842ND V1 User Guide - Page 113
TL-WR842ND 300Mbps Multi-Function Wireless N Router • Click the Restore button to update the configuration with the file whose path is the one you have input or selected in the blank. ) Note: The current configuration will be covered - TP-Link TL-WR842ND | TL-WR842ND V1 User Guide - Page 114
TL-WR842ND 300Mbps Multi-Function Wireless N Router Figure 4-105 Password It is strongly recommended that you should change the factory default user name and password of the Router, because all users who try to access the Router's Web-based utility or Quick Setup will be prompted for the Router's - TP-Link TL-WR842ND | TL-WR842ND V1 User Guide - Page 115
TL-WR842ND 300Mbps Multi-Function Wireless N Router Figure 4-106 System Log ¾ Auto Mail Feature - Indicates whether auto mail feature is enabled or not. ¾ Mail Settings - Set the receiving and sending mailbox address, server address, validation information as well as the timetable for Auto Mail - TP-Link TL-WR842ND | TL-WR842ND V1 User Guide - Page 116
TL-WR842ND 300Mbps Multi-Function Wireless N Router • Authentication - Most SMTP Server requires Authentication. It is required by most mailboxes that need User Name and Password to log in. ) Note: Only when you select Authentication, do you have to enter the User Name and Password in the following - TP-Link TL-WR842ND | TL-WR842ND V1 User Guide - Page 117
TL-WR842ND 300Mbps Multi-Function Wireless N Router Figure 4-108 Statistics ¾ Current Statistics Status - Enable or Disable. The default value is disabled. To enable it, click the Enable button. If it is disabled, the function to refresh immediately. Click Reset All to reset the values of all the - TP-Link TL-WR842ND | TL-WR842ND V1 User Guide - Page 118
TL-WR842ND 300Mbps Multi-Function Wireless N Router Statistics Table: IP/MAC Address The IP and MAC address are displayed with related statistics. Total Packets The total number of packets received and transmitted by the Router Max transmitting rate". Modify Reset Delete Reset the value of he - TP-Link TL-WR842ND | TL-WR842ND V1 User Guide - Page 119
TL-WR842ND 300Mbps Multi-Function Wireless N Router Appendix A: FAQ 1. How do I configure the Router to access Internet by ADSL users? 1) First, configure the ADSL Modem configured in RFC1483 bridge model. 2) Connect the Ethernet cable from your ADSL Modem to the WAN port on the Router. The - TP-Link TL-WR842ND | TL-WR842ND V1 User Guide - Page 120
TL-WR842ND 300Mbps Multi-Function Wireless N Router ) Note: 1) Sometimes the connection cannot be disconnected although you specify a time to Max Idle Time, since some applications is visiting the Internet continually in the background. 2) If you are a Cable user, please configure the Router - TP-Link TL-WR842ND | TL-WR842ND V1 User Guide - Page 121
TL-WR842ND 300Mbps Multi-Function Wireless N Router Figure A-4 Virtual Servers Figure A-5 Add or Modify a Virtual server Entry ) Note: Your opposite side should call your WAN IP, which is displayed on the "Status" page. 4) How to enable DMZ Host: Log in to the Router, click the "Forwarding" menu on - TP-Link TL-WR842ND | TL-WR842ND V1 User Guide - Page 122
TL-WR842ND 300Mbps Multi-Function Wireless N Router check the Enable radio button next to H323 ALG. Remember to click the Save button. Figure A-7 Basic Security 4. I want to build a WEB Server on the - TP-Link TL-WR842ND | TL-WR842ND V1 User Guide - Page 123
TL-WR842ND 300Mbps Multi-Function Wireless N Router Figure A-8 Remote Management ) Note: If the above configuration takes effect, you can visit and configure the Router by typing http://192.168.0.1:88 (the Router's LAN IP address: Web Management Port) in the address field of the Web browser. If the - TP-Link TL-WR842ND | TL-WR842ND V1 User Guide - Page 124
TL-WR842ND 300Mbps Multi-Function Wireless N Router Figure A-10 Add or Modify a Virtual server Entry 5. The wireless stations cannot connect to the Router. 1) Make sure the "Wireless Router Radio" is enabled. 2) Make sure that the wireless stations' SSID accord with the Router's SSID. 3) Make sure - TP-Link TL-WR842ND | TL-WR842ND V1 User Guide - Page 125
TL-WR842ND 300Mbps Multi-Function Wireless N Router Appendix B: Configuring the PCs In this section, we'll introduce how to install and configure the TCP/IP correctly in Windows XP. First make sure your Ethernet Adapter is working, refer to the adapter's manual if needed. 1. Install TCP/IP component - TP-Link TL-WR842ND | TL-WR842ND V1 User Guide - Page 126
TL-WR842ND 300Mbps Multi-Function Wireless N Router 4) In the prompt page that showed below, double click on the Internet Protocol (TCP/IP). Figure B-2 5) The following TCP/IP Properties window will display and the IP Address tab is open on this window by default. - 118 - - TP-Link TL-WR842ND | TL-WR842ND V1 User Guide - Page 127
TL-WR842ND 300Mbps Multi-Function Wireless N Router 6) Select Obtain an IP address automatically and Obtain DNS server automatically, as shown in the Figure below: Figure B-3 - 119 - - TP-Link TL-WR842ND | TL-WR842ND V1 User Guide - Page 128
TL-WR842ND 300Mbps Multi-Function Wireless N Router Appendix C: Specifications General Standards Protocols Ports Cabling Type IEEE 802.11n, IEEE 802.11g, IEEE 802.11b, IEEE 802.11a, IEEE 802.11e, IEEE 802.11i, IEEE 802.1X, IEEE 802.3X, IEEE 802.3, IEEE 802.3u, IEEE 802.3ab TCP/IP, PPPoE, DHCP, - TP-Link TL-WR842ND | TL-WR842ND V1 User Guide - Page 129
TL-WR842ND 300Mbps Multi-Function Wireless N Router Appendix D: Glossary ¾ 802.11n - 802.11n builds upon previous 802.11 standards by adding MIMO (multiple-input multiple-output). MIMO uses multiple transmitter and receiver - TP-Link TL-WR842ND | TL-WR842ND V1 User Guide - Page 130
TL-WR842ND 300Mbps Multi-Function Wireless N Router hosts to the Internet over an always-on connection by simulating a dial-up connection. ¾ SSID - A Service Set Identification is a thirty-two character (maximum) alphanumeric key identifying a wireless local area network. For the wireless devices in
-
 1
1 -
 2
2 -
 3
3 -
 4
4 -
 5
5 -
 6
6 -
 7
7 -
8
-
9
-
10
-
11
-
12
-
13
-
14
-
15
-
16
-
17
-
18
-
19
-
20
-
21
-
22
-
23
-
24
-
25
-
26
-
27
-
28
-
29
-
30
-
31
-
32
-
33
-
34
-
35
-
36
-
37
-
38
-
39
-
40
-
41
-
42
-
43
-
44
-
45
-
46
-
47
-
48
-
49
-
50
-
51
-
52
-
53
-
54
-
55
-
56
-
57
-
58
-
59
-
60
-
61
-
62
-
63
-
64
-
65
-
66
-
67
-
68
-
69
-
70
-
71
-
72
-
73
-
74
-
75
-
76
-
77
-
78
-
79
-
80
-
81
-
82
-
83
-
84
-
85
-
86
-
87
-
88
-
89
-
90
-
91
-
92
-
93
-
94
-
95
-
96
-
97
-
98
-
99
-
100
-
101
-
102
-
103
-
104
-
105
-
106
-
107
-
108
-
109
-
110
-
111
-
112
-
113
-
114
-
115
-
116
-
117
-
118
-
119
-
120
-
121
-
122
-
123
-
124
-
125
-
126
-
127
-
128
-
129
-
130
 |
 |
TL-WR842ND
300Mbps Multi-Function Wireless N Router
Rev: 1.0.0
1910010537