Toshiba LX835-D3205 User Guide - Page 48
Recovering to a custom size partition
 |
View all Toshiba LX835-D3205 manuals
Add to My Manuals
Save this manual to your list of manuals |
Page 48 highlights
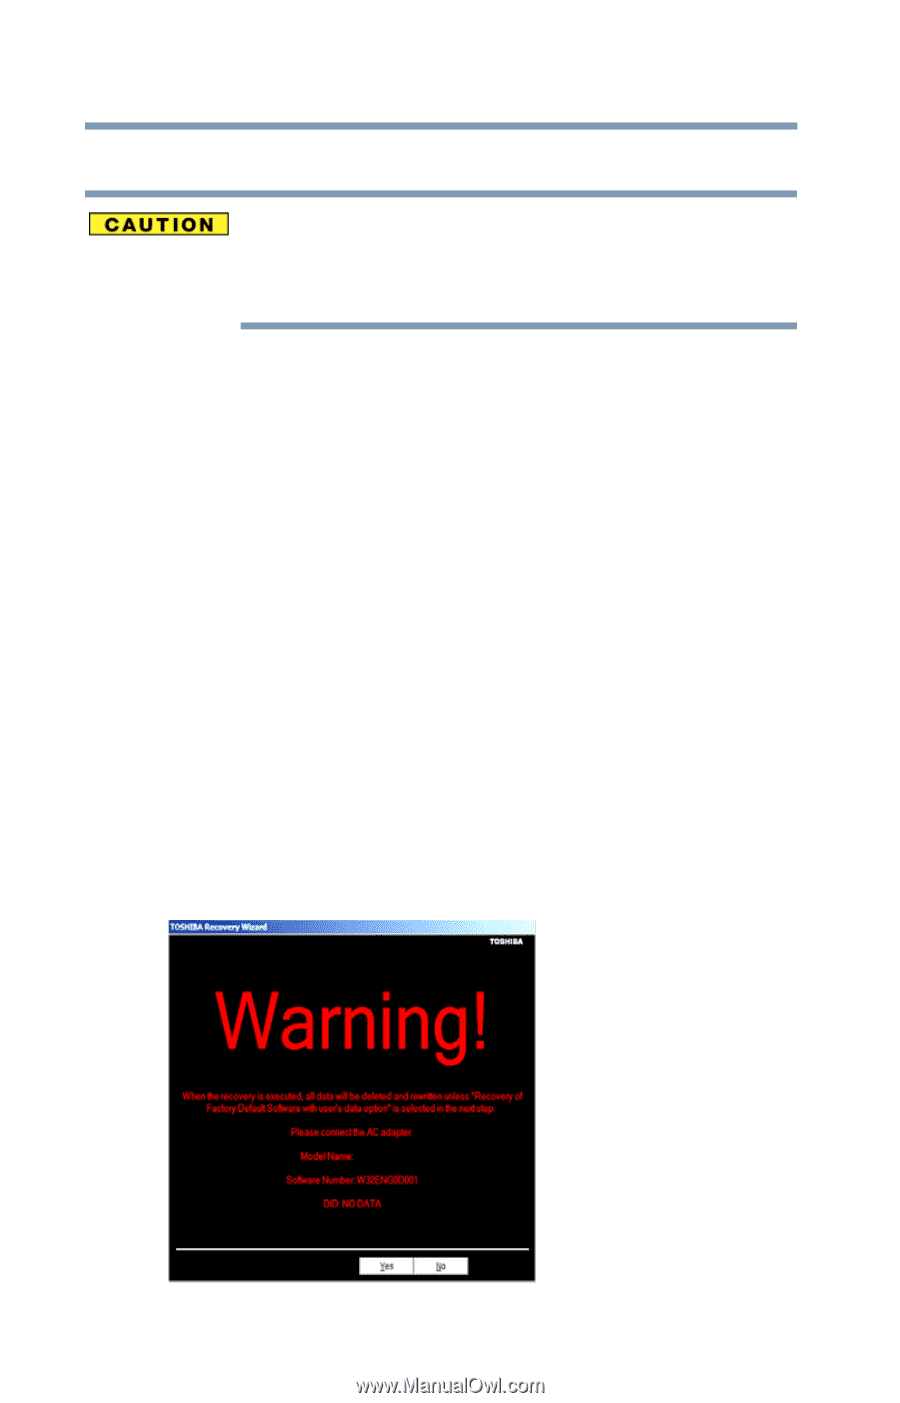
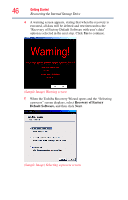
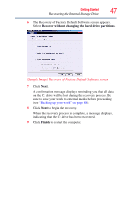
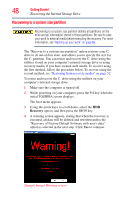
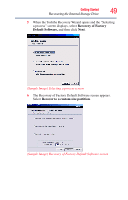
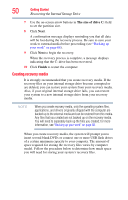
48 Getting Started Recovering the Internal Storage Drive Recovering to a custom size partition Recovering to a custom size partition deletes all partitions on the drive and all information stored in those partitions. Be sure to save your work to external media before executing the recovery. For more information, see "Backing up your work" on page 68. The "Recover to a custom size partition" option restores your C: drive to its out-of-box state, and allows you to specify the size for the C: partition. You can resize and recover the C: drive using the utilities stored on your computer's internal storage drive or using recovery media, if you have created such media. To recover using the first method, follow the procedure below. To recover using the second method, see "Restoring from recovery media" on page 52. To resize and recover the C: drive using the utilities on your computer's internal storage drive: 1 Make sure the computer is turned off. 2 While powering on your computer, press the F12 key when the initial TOSHIBA screen displays. The boot menu appears. 3 Using the arrow keys to scroll down, select the HDD Recovery option, and then press the ENTER key. 4 A warning screen appears, stating that when the recovery is executed, all data will be deleted and rewritten unless the "Recovery of Factory Default Software with user's data" option is selected in the next step. Click Yes to continue. (Sample Image) Warning screen
-
 1
1 -
2
-
3
-
4
-
5
-
6
-
7
-
8
-
9
-
10
-
11
-
12
-
13
-
14
-
15
-
16
-
17
-
18
-
19
-
20
-
21
-
22
-
23
-
24
-
25
-
26
-
27
-
28
-
29
-
30
-
31
-
32
-
33
-
34
-
35
-
36
-
37
-
38
-
39
-
40
-
41
-
42
-
 43
43 -
 44
44 -
 45
45 -
 46
46 -
 47
47 -
 48
48 -
 49
49 -
 50
50 -
 51
51 -
 52
52 -
 53
53 -
54
-
55
-
56
-
57
-
58
-
59
-
60
-
61
-
62
-
63
-
64
-
65
-
66
-
67
-
68
-
69
-
70
-
71
-
72
-
73
-
74
-
75
-
76
-
77
-
78
-
79
-
80
-
81
-
82
-
83
-
84
-
85
-
86
-
87
-
88
-
89
-
90
-
91
-
92
-
93
-
94
-
95
-
96
-
97
-
98
-
99
-
100
-
101
-
102
-
103
-
104
-
105
-
106
-
107
-
108
-
109
-
110
-
111
-
112
-
113
-
114
-
115
-
116
-
117
-
118
-
119
-
120
-
121
-
122
-
123
-
124
-
125
-
126
-
127
-
128
-
129
-
130
-
131
-
132
-
133
-
134
-
135
-
136
-
137
-
138
-
139
-
140
-
141
-
142
-
143
-
144
-
145
-
146
-
147
-
148
-
149
-
150
-
151
-
152
-
153
-
154
-
155
-
156
-
157
-
158
-
159
 |
 |