ViewSonic VPC101 User Manual - Page 21
Connecting the power
 |
View all ViewSonic VPC101 manuals
Add to My Manuals
Save this manual to your list of manuals |
Page 21 highlights
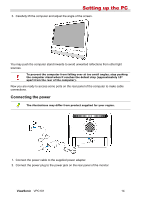
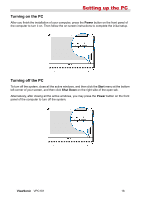
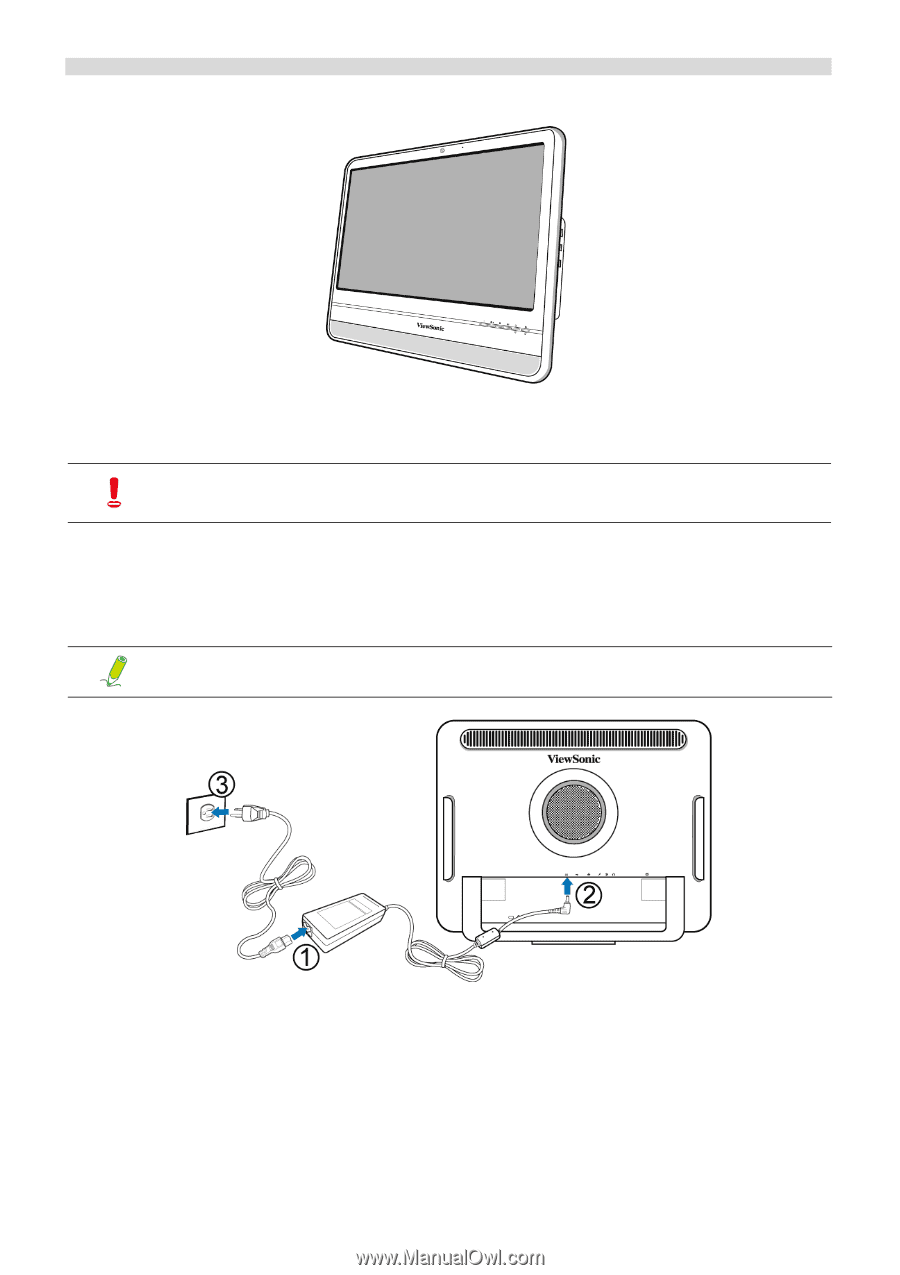
Setting up the PC 3. Carefully lift the computer and adjust the angle of the screen. You may push the computer stand inwards to avoid unwanted reflections from other light sources. To prevent the computer from falling over at too small angles, stop pushing the computer stand when it reaches the detent stop (approximately 10° apart from the rear of the computer). Now you are ready to access some ports on the rear panel of the computer to make cable connections. Connecting the power The illustrations may differ from product supplied for your region. 1. Connect the power cable to the supplied power adapter. 2. Connect the power plug to the power jack on the rear panel of the monitor. ViewSonic VPC101 14
-
 1
1 -
2
-
3
-
4
-
5
-
6
-
7
-
8
-
9
-
10
-
11
-
12
-
13
-
14
-
15
-
 16
16 -
 17
17 -
 18
18 -
 19
19 -
 20
20 -
 21
21 -
 22
22 -
 23
23 -
 24
24 -
 25
25 -
 26
26 -
27
-
28
-
29
-
30
-
31
-
32
-
33
-
34
-
35
-
36
-
37
-
38
-
39
-
40
-
41
-
42
-
43
-
44
-
45
-
46
-
47
-
48
-
49
-
50
-
51
-
52
-
53
-
54
-
55
-
56
-
57
-
58
-
59
-
60
-
61
-
62
-
63
-
64
 |
 |
ViewSonic
VPC101
14
Setting up the PC
3.
Carefully lift the computer and adjust the angle of the screen.
You may push the computer stand inwards to avoid unwanted reflections from other light
sources.
Now you are ready to access some ports on the rear panel of the computer to make cable
connections.
Connecting the power
1.
Connect the power cable to the supplied power adapter.
2.
Connect the power plug to the power jack on the rear panel of the monitor.
To prevent the computer from falling over at too small angles, stop pushing
the computer stand when it reaches the detent stop (approximately 10°
apart from the rear of the computer).
The illustrations may differ from product supplied for your region.