Vivitar 8225 Camera Manual - Page 49
Install the Vivitar Experience Image Manager Software
 |
View all Vivitar 8225 manuals
Add to My Manuals
Save this manual to your list of manuals |
Page 49 highlights
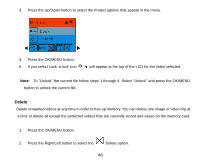
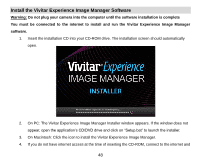
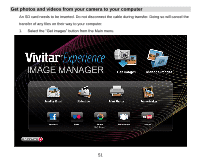
Install the Vivitar Experience Image Manager Software Warning: Do not plug your camera into the computer until the software installation is complete You must be connected to the internet to install and run the Vivitar Experience Image Manager software. 1. Insert the installation CD into your CD-ROM drive. The installation screen should automatically open. 2. On PC: The Vivitar Experience Image Manager Installer window appears. If the window does not appear, open the application‟s CD/DVD drive and click on "Setup.bat" to launch the installer. 3. On Macintosh: Click the icon to install the Vivitar Experience Image Manager. 4. If you do not have internet access at the time of inserting the CD-ROM, connect to the internet and 48
-
 1
1 -
2
-
3
-
4
-
5
-
6
-
7
-
8
-
9
-
10
-
11
-
12
-
13
-
14
-
15
-
16
-
17
-
18
-
19
-
20
-
21
-
22
-
23
-
24
-
25
-
26
-
27
-
28
-
29
-
30
-
31
-
32
-
33
-
34
-
35
-
36
-
37
-
38
-
39
-
40
-
41
-
42
-
43
-
 44
44 -
 45
45 -
 46
46 -
 47
47 -
 48
48 -
 49
49 -
 50
50 -
 51
51 -
 52
52 -
 53
53 -
 54
54 -
55
-
56
-
57
-
58
 |
 |

48
Install the Vivitar Experience Image Manager Software
Warning:
Do not plug your camera into the computer until the software installation is complete
You must be connected to the internet to install and run the Vivitar Experience Image Manager
software.
1.
Insert the installation CD into your CD-ROM drive. The installation screen should automatically
open.
2.
On PC: The Vivitar Experience Image Manager Installer window appears. If the window does not
appear, open the application‟s CD/DVD drive and click on “Setup.bat” to launch the installer.
3.
On Macintosh: Click the icon to install the Vivitar Experience Image Manager.
4.
If you do not have internet access at the time of inserting the CD-ROM, connect to the internet and