Western Digital WDBHG70000NBK User Manual - Page 34
NFS, Accessing a Shared Folder, WD's My Book
 |
View all Western Digital WDBHG70000NBK manuals
Add to My Manuals
Save this manual to your list of manuals |
Page 34 highlights
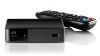
WD TV Live Streaming Media Player User Manual Samba displays shared computers and network attached storage devices (such as WD's My Book® Live™ personal cloud storage NAS drive) connected to your network via the Samba protocol. NFS NFS is popular with power users and Linux users because of the increased speed and performance it can provide. NFS is better suited to Linux since using NFS with Windows requires installation of third party applications. Follow the steps below under "Accessing a Shared Folder," selecting the name of your NAS device or computer and referencing your NAS device or operating system documentation for password setup and administration if nessecary. Accessing a Shared Folder To create a shared folder, follow the instructions under "Share a Folder on Your Computer" on page 35. To access a shared folder under Network Share: 1. Select the name of your computer and press OK twice. 2. If necessary, enter your user name and password to access your computer, or accept the default login. For further information regarding password setup and administration, refer to your operating system documentation. 3. Press to select OK, then press OK. Supported content for the selected media type displays. 4. Select the content you wish to access, then press OK to start media playback. FINDING YOUR CONTENT - 29
-
 1
1 -
2
-
3
-
4
-
5
-
6
-
7
-
8
-
9
-
10
-
11
-
12
-
13
-
14
-
15
-
16
-
17
-
18
-
19
-
20
-
21
-
22
-
23
-
24
-
25
-
26
-
27
-
28
-
 29
29 -
 30
30 -
 31
31 -
 32
32 -
 33
33 -
 34
34 -
 35
35 -
 36
36 -
 37
37 -
 38
38 -
 39
39 -
40
-
41
-
42
-
43
-
44
-
45
-
46
-
47
-
48
-
49
-
50
-
51
-
52
-
53
-
54
-
55
-
56
-
57
-
58
-
59
-
60
-
61
-
62
-
63
-
64
-
65
-
66
-
67
-
68
-
69
-
70
-
71
-
72
-
73
-
74
-
75
-
76
-
77
-
78
-
79
-
80
-
81
-
82
-
83
-
84
-
85
-
86
-
87
-
88
-
89
-
90
-
91
-
92
-
93
-
94
-
95
-
96
-
97
-
98
-
99
-
100
-
101
-
102
-
103
-
104
-
105
-
106
-
107
-
108
-
109
-
110
-
111
-
112
-
113
-
114
-
115
-
116
-
117
-
118
-
119
-
120
-
121
-
122
-
123
-
124
-
125
-
126
-
127
-
128
-
129
-
130
-
131
-
132
-
133
-
134
-
135
-
136
-
137
-
138
-
139
-
140
-
141
-
142
-
143
-
144
-
145
-
146
-
147
-
148
-
149
-
150
-
151
-
152
-
153
-
154
-
155
-
156
-
157
-
158
-
159
-
160
-
161
-
162
-
163
-
164
-
165
-
166
-
167
-
168
-
169
-
170
-
171
-
172
-
173
-
174
-
175
-
176
-
177
-
178
-
179
-
180
-
181
-
182
-
183
-
184
-
185
-
186
-
187
-
188
-
189
-
190
-
191
-
192
-
193
-
194
-
195
-
196
-
197
-
198
-
199
-
200
-
201
-
202
-
203
-
204
-
205
-
206
-
207
-
208
-
209
-
210
-
211
-
212
-
213
-
214
-
215
-
216
-
217
-
218
-
219
-
220
-
221
-
222
-
223
-
224
-
225
-
226
-
227
-
228
-
229
 |
 |
