Whirlpool GBS277PDB Technical Guide
Whirlpool GBS277PDB Manual
 |
View all Whirlpool GBS277PDB manuals
Add to My Manuals
Save this manual to your list of manuals |
Whirlpool GBS277PDB manual content summary:
- Whirlpool GBS277PDB | Technical Guide - Page 1
KAC-28 TECHNICAL EDUCATION ELECTRIC BUILT-IN SINGLE OVEN JOB AID 4317323 - Whirlpool GBS277PDB | Technical Guide - Page 2
Oven," (Part No. 4317323), provides the technician with information on the installation, operation, and service of the Electric Built-In Single Oven. It is to be used as a training Job Aid and Service Manual. For specific information on the model being serviced, refer to the "Use and Care Guide," or - Whirlpool GBS277PDB | Technical Guide - Page 3
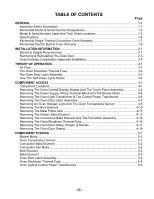
TABLE OF CONTENTS Page GENERAL ...1-1 Important Safety Information 1-1 KitchenAid Model & Serial Number Designations 1-2 Model & Serial Number Label And Tech Sheet Locations 1-3 Specifications ...1-4 KitchenAid Single Thermal Convection Oven Warranty 1-7 KitchenAid Electric Built-In Oven - Whirlpool GBS277PDB | Technical Guide - Page 4
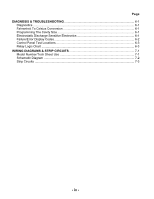
Page DIAGNOSIS & TROUBLESHOOTING 6-1 Diagnostics ...6-1 Fahrenheit To Celsius Conversion 6-1 Programming The Cavity Size 6-1 Electrostatic Discharge Sensitive Electronics 6-1 Failure/Error Display Codes 6-2 Control Panel Test Locations 6-3 Relay Logic Chart ...6-3 WIRING - Whirlpool GBS277PDB | Technical Guide - Page 5
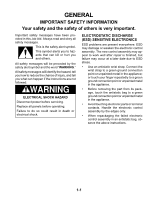
you what can happen if the instructions are not followed. WARNING ELECTRICAL SHOCK HAZARD Disconnect power before servicing. Replace all panels before operating connection point or unpainted metal in the appliance. • Avoid touching electronic parts or terminal contacts. Handle the electronic control - Whirlpool GBS277PDB | Technical Guide - Page 6
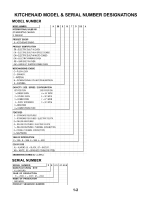
/ SIZE / SERIES / CONFIGURATION 1ST POSITION 2ND POSITION 1 = SINGLE OVEN 4 = 24˝ WIDE 2 = DOUBLE OVEN 6 = 36˝ WIDE 3 = COMBO OVEN 7 = 27˝ WIDE 4 = OVEN W/DRAWER 0 = 30˝ WIDE 5 = MINI OVEN 6 = COMBO W/MINI OVEN FEATURES 0 = STANDARD FEATURES 1 = STANDARD FEATURES / ELECTRIC CLOCK - Whirlpool GBS277PDB | Technical Guide - Page 7
MODEL & SERIAL NUMBER LABEL AND TECH SHEET LOCATIONS The Model/Serial Number label and Tech Sheet locations are shown below. Model & Serial Number Location Tech Sheet Location (Below Top Front Cover) 1-3 - Whirlpool GBS277PDB | Technical Guide - Page 8
Cookbook Part/Comment Installation Instructions Part/Comment Service Manual Part/Comment Tech Sheet Part/Comment Use & Care Guide Oven Part/ CSA Yes Yes Yes 12 60 60 120 KEBS177D SS Single Built-In Oven 27" 28 7/8" 26 3/4" 25 1/8" 23 7/8" 27 3/4" 25 1/2" 23 1/4" 48"; 1/2" 126 134 4.9 kw 3.7 kw - Whirlpool GBS277PDB | Technical Guide - Page 9
Cookbook Part/Comment Installation Instructions Part/Comment Service Manual Part/Comment Tech Sheet Part/Comment Use & Care Guide Oven Part/ Yes 12 60 60 120 1-5 KEBC177H BT, BL, WH Single Built-In Oven 27" 28 7/8" 26 3/4" 25 1/8" 23 7/8" 27 3/4" 25 1/2" 23 1/4" 48"; 1/2" 126 134 4.9 kw 3.7 kw 30 - Whirlpool GBS277PDB | Technical Guide - Page 10
Part/Comment Installation Instructions Part/Comment Service Manual Part/Comment Tech Sheet Part/Comment Use & Care Guide Oven Part 120 1-6 KEBC107H BL Single Built-In Oven 30" 28 7/8" 29 3/4" 25 1/8" 23 7/8" 27 3/4" 28 1/2" 23 1/4" 48"; 1/2" 131 139 4.9 kw 3.7 kw 30 AMP Porcelain Electronic - Whirlpool GBS277PDB | Technical Guide - Page 11
by Whirlpool. E. Repairs to parts or systems caused by unauthorized modifications made to the appliance. KITCHENAID Whirlpool or KitchenAid distributor or military exchange. If you need service first see the "Troubleshooting" section of the Use and Care Guide. After checking "Troubleshooting - Whirlpool GBS277PDB | Technical Guide - Page 12
. If you need assistance or service, first see the "Diagnosis & Troubleshooting" section of this book. After checking "Diagnosis & Troubleshooting," additional help can be found by checking the "Requesting Assistance or Service" section in the Use And Care Guide. In the U.S.A., call our Consumer - Whirlpool GBS277PDB | Technical Guide - Page 13
appliance. • Do not use an extension cord with this appliance. • If a cold water as to whether the appliance is properly grounded. Failure to follow these instructions could result in death the junction box and the appliance so that the appliance can be moved if servicing is ever necessary. Do not - Whirlpool GBS277PDB | Technical Guide - Page 14
grounded. • Turn off power to the junction box before making the electrical connections. • Connect the appliance to a grounded, metallic, permanent wiring system. Failure to follow these instructions could result in death or serious injury. 1. Insert the end of the flexible conduit through the - Whirlpool GBS277PDB | Technical Guide - Page 15
top of the door towards the oven so the hinge hangers fit onto the support pins. 3. Close the oven door as far as the pins will allow, and make sure that the hinge hangers are fully seated on the support pins. If they are not seated properly, the door will not close tightly and - Whirlpool GBS277PDB | Technical Guide - Page 16
OVEN / COOKTOP COMBINATION-APPROVED INSTALLATION The following built-in ovens are approved for installation over electric and gas cooktops, as noted. U.S. MODELS BUILT-IN OVENS KEBI141D / KEBS147D / KEBI171D / KEBS177D / KEBI101D KEBS107D / GBS277PD / GBS307PD / RBS240PD / RBS245PD RBS270PD / - Whirlpool GBS277PDB | Technical Guide - Page 17
bottom of the door, and is drawn between the two pieces of inner door glass, where it exits through the top slots in the upper part of the door. This air is then drawn into the blower, and is forced down the back of the unit between the inner and outer - Whirlpool GBS277PDB | Technical Guide - Page 18
THE OVEN SHUTDOWN THERMAL FUSE The thermal fuse is located on the rear of the oven at the indicated location. The oven shutdown thermal fuse opens L2 to the oven if the temperature at the rear panel exceeds 160˚C/ 320˚F. The fuse is a one-time, non-resettable safety device. Oven Shutdown Thermal - Whirlpool GBS277PDB | Technical Guide - Page 19
THE OVEN DOOR LATCH ASSEMBLY The door latch solenoid operates on a 120-volt dc pulse from the electronic control board. When the solenoid plunger is retracted, the oven door is in the "unlocked" position. When the solenoid plunger is extended, the oven door is in the "locked" position. When the - Whirlpool GBS277PDB | Technical Guide - Page 20
HOW THE SELF-CLEAN CYCLE WORKS TEMPERATURE The Self-Clean cycle uses high heat to burn away soil and grease from inside the oven. During this cycle, the oven will get much hotter than it does under normal baking and broiling conditions (see the following chart). 875˚F (468˚C) CLEANING CYCLE OVEN - Whirlpool GBS277PDB | Technical Guide - Page 21
COMPONENT ACCESS This section instructs you on how to service each component inside the Electric Built-In Single Oven. The components and their locations are shown below. COMPONENT LOCATIONS Oven Control/ Display Boards Broil Element - Whirlpool GBS277PDB | Technical Guide - Page 22
SHOCK HAZARD Disconnect power before servicing. Replace all panels before operating in oven, be careful when handling the sheet metal parts. Sharp edges may be present, and you can cut from the oven cabinet support at the top. Oven Control Panel Lift Off Top Support 7. Disconnect the wire - Whirlpool GBS277PDB | Technical Guide - Page 23
8. To remove the oven control/display boards: a) Remove the five mounting screws. Screws b) Remove the six screws from the control panel bracket and remove the bracket. Bracket Screw (1 of 6) Control Panel Bracket Screws Lift Ends Of Locking Arm b) Lift the ends of the locking arm and disconnect - Whirlpool GBS277PDB | Technical Guide - Page 24
THE BLOWER MOTOR WARNING ELECTRICAL SHOCK HAZARD Disconnect power before servicing. Replace all panels before operating. Failure to do so When you work on the built-in oven, be careful when handling the sheet metal parts. Sharp edges may be present, and you can cut yourself if you are not careful - Whirlpool GBS277PDB | Technical Guide - Page 25
7. To remove the blower motor assembly: a) Remove the rear cover from the oven (11 screws) . Screw (1 of 11) b) Remove the four screws from the blower cover and remove the cover. Rear Cover 2 Screws Blower Cover 2 Screws c) Disconnect the two wires from the blow- er motor terminals. 2 Wires - Whirlpool GBS277PDB | Technical Guide - Page 26
chassis slot. Disconnect power before servicing. Replace all panels before operating. Failure to do so could result in death or electrical shock. Light Transformer Transformer Screws CAUTION: When you work on the built-in oven, be careful when handling the sheet metal parts. Sharp edges may be - Whirlpool GBS277PDB | Technical Guide - Page 27
LATCH ASSEMBLY WARNING ELECTRICAL SHOCK HAZARD Disconnect power before servicing. Replace all panels before operating. Failure to do : When you work on the built-in oven, be careful when handling the sheet metal parts. Sharp edges may be present, and you can cut yourself if you are not careful. - Whirlpool GBS277PDB | Technical Guide - Page 28
THE OVEN TEMPERATURE SENSOR WARNING ELECTRICAL SHOCK HAZARD Disconnect power before servicing. Replace all panels before operating. Failure to do so you work on the built-in oven, be careful when handling the sheet metal parts. Sharp edges may be present, and you can cut yourself if you are not - Whirlpool GBS277PDB | Technical Guide - Page 29
d) Pull the halogen socket assembly out of the oven liner and cut the wires near the socket terminals. Cut Wires Here 4. To remove the oven temperature sensor: a) Remove the two mounting screws from the oven temperature sensor and pull the connector out of the mounting hole in the oven liner. - Whirlpool GBS277PDB | Technical Guide - Page 30
ELEMENT WARNING ELECTRICAL SHOCK HAZARD Disconnect power before servicing. Replace all panels before operating. Failure to do CAUTION: When you work on the built-in oven, be careful when handling the sheet metal parts. Sharp edges may be present, and you can cut yourself if you are not careful. 1. - Whirlpool GBS277PDB | Technical Guide - Page 31
servicing. Replace all panels before operating. Failure to do so could result in death or electrical shock. CAUTION: When you work on the built-in oven, be careful when handling the sheet metal parts splice the new jack to the oven wires. Star Washer Access Cover Meat Probe Jack Hex Nut 4. Pull - Whirlpool GBS277PDB | Technical Guide - Page 32
ELEMENT WARNING ELECTRICAL SHOCK HAZARD Disconnect power before servicing. Replace all panels before operating. Failure to CAUTION: When you work on the built-in oven, be careful when handling the sheet metal parts. Sharp edges may be present, and you can cut yourself if you are not careful. 1. - Whirlpool GBS277PDB | Technical Guide - Page 33
8. Remove the four mounting bracket screws and the two hidden bake element bracket screws. Remove Two Screws 9. Carefully pull the hidden bake element and its mounting bracket out of the oven. Remove Four Screws Pull Out Hidden Bake Element 4-13 - Whirlpool GBS277PDB | Technical Guide - Page 34
work on the built-in oven, be careful when handling the sheet metal parts. Sharp edges may be present, and you can cut yourself if you are not careful. 1. Disconnect the electrical power to the oven. 2. To make servicing easier, remove the oven door from the unit (see page 2-3 for the - Whirlpool GBS277PDB | Technical Guide - Page 35
6. To remove the convection fan motor: a) If not already done, remove the convection cover and the convection bake element from the rear of the oven liner (see page 4-14). b) Use a 10 mm (7/16˝) socket and remove the hex nut from the convection fan. NOTE: The nut has a left-rotation thread for - Whirlpool GBS277PDB | Technical Guide - Page 36
Oven Shutdown Thermal Fuse ELECTRICAL SHOCK HAZARD Disconnect power before servicing. Replace all panels before operating. Failure to do so When you work on the built-in oven, be careful when handling the sheet metal parts. Sharp edges may be present, and you can cut yourself if you are not careful - Whirlpool GBS277PDB | Technical Guide - Page 37
REMOVING THE OVEN DOOR GLASS, HINGES, & HANDLE CAUTION: When you work on the built-in oven, be careful when handling the sheet metal parts. Sharp edges may be present, and you can cut yourself if you are not careful. 1. Remove the oven door from the oven (see page 2-3 for - Whirlpool GBS277PDB | Technical Guide - Page 38
6. To remove the hinges and the inner door glass: NOTE: You will have to remove both hinges to remove the inner door glass from the oven door liner. a) Lift either side of the door liner, remove the two door hinge screws, and remove the hinge. Hinge Screws (4 total) Inner Door Glass d) Remove the - Whirlpool GBS277PDB | Technical Guide - Page 39
REMOVING THE OVEN DOOR GASKET CAUTION: When you work on the built-in oven, be careful when handling the sheet metal parts. Sharp edges may be present, and you can cut yourself if you are not careful. 1. Open the oven door to its fully open position. 3. Pull - Whirlpool GBS277PDB | Technical Guide - Page 40
- NOTES - 4-20 - Whirlpool GBS277PDB | Technical Guide - Page 41
before operating. Failure to do so could result in death or electrical shock. OVEN TEMPERATURE SENSOR Refer to page 4-4 for the procedure for servicing the blower motor. 1. Disconnect the electrical power to the oven. 2. Disconnect the wires from the blower motor terminals. 3. Set the ohmmeter to - Whirlpool GBS277PDB | Technical Guide - Page 42
operating. Failure to do so could result in death or electrical shock. CONVECTION FAN MOTOR Refer to page 4-14 for the procedure for servicing the convection bake element. 1. Disconnect the electrical power to the oven. 2. Disconnect the wires from the convection bake element terminals. 3. Set the - Whirlpool GBS277PDB | Technical Guide - Page 43
leads to the outer broil element terminals. The meter should indicate between 45 and 55 Ω. Refer to page 4-12 for the procedure for servicing the hidden bake element. 1. Disconnect the electrical power to the oven. 2. Disconnect the wires from the bake element terminals. 3. Set the ohmmeter to - Whirlpool GBS277PDB | Technical Guide - Page 44
operating. Failure to do so could result in death or electrical shock. OVEN SHUTDOWN THERMAL FUSE Refer to page 4-7 for the procedure for servicing the oven door latch assembly. 1. Disconnect the electrical power to the oven. 2. Disconnect the wires from the door latch assembly component under test - Whirlpool GBS277PDB | Technical Guide - Page 45
do so could result in death or electrical shock. OVEN LIGHT & CONTROL POWER TRANSFORMERS LOAD LINE Refer to page 4-6 for the procedure for servicing the oven light & control power transformers. 1. Disconnect the electrical power to the oven. 2. Disconnect the wires from the transformer under test - Whirlpool GBS277PDB | Technical Guide - Page 46
- NOTES - 5-6 - Whirlpool GBS277PDB | Technical Guide - Page 47
TROUBLESHOOTING DIAGNOSTICS Before servicing ) SENSITIVE ELECTRONICS ESD problems are present everywhere. appliance -OR- Touch your finger repeatedly to a green ground connection point or unpainted metal in the appliance. • Before removing the part the appliance. • Avoid touching electronic parts or - Whirlpool GBS277PDB | Technical Guide - Page 48
disconnect the power to the unit before touching the internal parts of the oven. • Upon replacement, immediately return the - Check latch arm pivot joint, arm/solenoid connection, solenoid spring, and spring washer. 2. Check the Latch Solenoid: - Check for firm electrical connections. - Disconnect - Whirlpool GBS277PDB | Technical Guide - Page 49
Fuse Bake Element Inner Broil Element Outer Broil Element Convection Ring Element Convection Fan Motor Meat Probe Jack Latch Switch FRONT/REAR SERVICEABLE Front CHECK POINTS P7-2 (BR) to P7-1 (TAN) RESULTS Door Open = Closed Circuit Door Closed = Open Circuit Front P6-1 (Y) to P6-2 (W) 50 - Whirlpool GBS277PDB | Technical Guide - Page 50
- NOTES - 6-4 - Whirlpool GBS277PDB | Technical Guide - Page 51
WIRING DIAGRAM & STRIP CIRCUITS MODEL NUMBER / TECH SHEET USE MODEL NUMBER KEBI141D**6 KEBS147D**6 KEBI171D**6 KEBI177D**6 KEBI101D**6 KEBI107D**6 KEBC177D**6 KEBC107D**6 KEBI141D**7 KEBI141D**8 KEBI141D**9 KEBI141D**10 KEBI141D**11 KEBI141D**12 KEBS147D**7 KEBS147D**8 KEBS147D**9 KEBS147D**10 - Whirlpool GBS277PDB | Technical Guide - Page 52
P7-4 TEMP SENSOR V P6-5 NOT CONNECTED P7-5 NOT CONNECTED P6-6 NOT CONNECTED P7-6 GROUND GN P7-7 MEAT PROBE SENSOR (GRND) GN P7-8 MEAT PROBE SENSOR Y PART NO. 4451876 REV. D 7-2 - Whirlpool GBS277PDB | Technical Guide - Page 53
STRIP CIRCUITS BAKE & PREHEAT-BAKE L1 BK P4-1 BK P4-2 BK P1-1 P5-3 R BAKE-2000W P5-1 BU OUT BROIL-1000W P5-2 OR P1-5 GY BU IN BROIL-1667W R OR BLOWER ~M N L2 R W ECONO BROIL L1 BK P4-1 BK P4-2 BK P1-1 P5-2 OR IN BROIL-1667W OR P1-5 GY BLOWER ~M N L2 R W MAXI BROIL L1 BK P4-1 BK P4-2 - Whirlpool GBS277PDB | Technical Guide - Page 54
CONVECTION BROIL (THERMAL CONVECTION MODELS ONLY) L1 BK P4-1 BK P4-2 BK P1-1 P5-1 BU OUT BROIL-1000W P5-2 OR P1-5 GY P1-6 OR BU OR IN BROIL-1667W ~M ~M BLOWER CONV. FAN N L2 R W W CONVECTION ROAST & PREHEAT-CONVECTION BAKE (THERMAL CONVECTION MODELS ONLY) L1 BK P4-1 BK P4-2 BK P1-1 P5-3 - Whirlpool GBS277PDB | Technical Guide - Page 55
CLEAN DOOR ON LATCH ASSY SWITCH TAN BR P7-2 LATCH SWITCH (OPERATED BY SOLENOID) TAN BU P7-3 RETURN LINE MUST BE CONNECTED P7-1 L1 BK P4-1 BK P4-2 BK P1-1 + LATCH DRIVE CIRCUIT P6-1 P6-2 P5-3 Y W 18V DC SOLENOID DOOR LOCK R BAKE-2000W SOLENOID R N L2 P5-1 BU OUT BROIL-1000W R - Whirlpool GBS277PDB | Technical Guide - Page 56
- NOTES - 7-6 - Whirlpool GBS277PDB | Technical Guide - Page 57
- NOTES - 7-7 - Whirlpool GBS277PDB | Technical Guide - Page 58
- NOTES - 7-8 - Whirlpool GBS277PDB | Technical Guide - Page 59
UNITED STATES: FOR PRODUCT SPECIFICATIONS AND WARRANTY INFORMATION CALL: FOR WHIRLPOOL PRODUCTS: 1-800-253-1301 FOR KITCHENAID PRODUCTS: 1-800-422 -253-2870 HAVE YOUR STORE NUMBER READY TO IDENTIFY YOU AS AN AUTHORIZED SERVICER FOR LITERATURE ORDERS: PHONE: 1-800-851-4605 IN CANADA: FOR PRODUCT - Whirlpool GBS277PDB | Technical Guide - Page 60
-
 1
1 -
 2
2 -
 3
3 -
 4
4 -
 5
5 -
 6
6 -
 7
7 -
8
-
9
-
10
-
11
-
12
-
13
-
14
-
15
-
16
-
17
-
18
-
19
-
20
-
21
-
22
-
23
-
24
-
25
-
26
-
27
-
28
-
29
-
30
-
31
-
32
-
33
-
34
-
35
-
36
-
37
-
38
-
39
-
40
-
41
-
42
-
43
-
44
-
45
-
46
-
47
-
48
-
49
-
50
-
51
-
52
-
53
-
54
-
55
-
56
-
57
-
58
-
59
-
60
 |
 |
TECHNICAL EDUCATION
JOB AID 4317323
KAC-28
ELECTRIC BUILT-IN
SINGLE OVEN