Whirlpool GBS277PDB Technical Guide - Page 31
Removing The Meat Probe Jack - washers
 |
View all Whirlpool GBS277PDB manuals
Add to My Manuals
Save this manual to your list of manuals |
Page 31 highlights
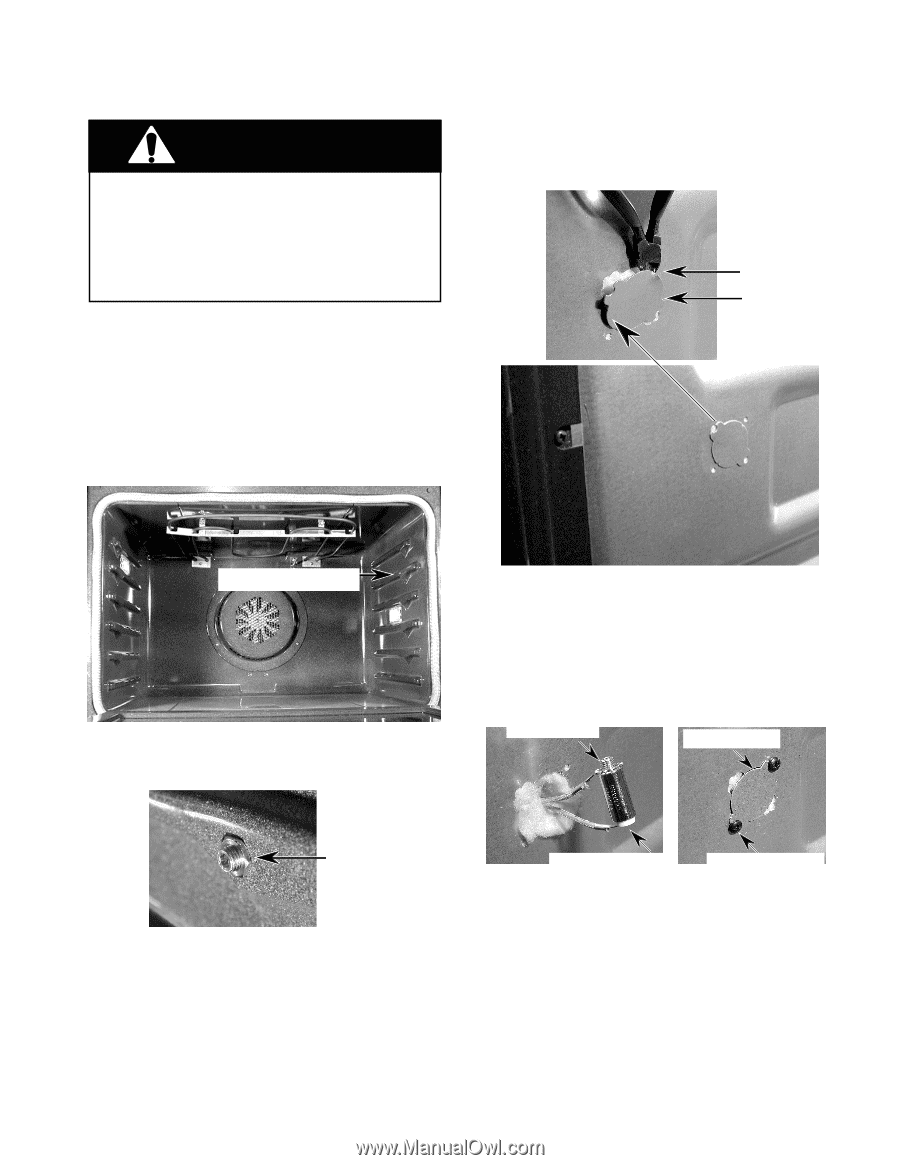
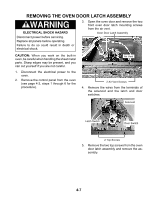
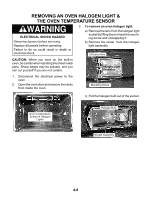
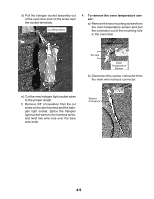
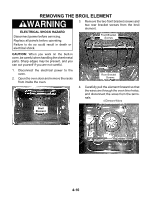
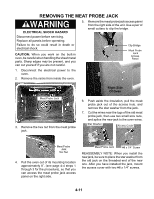
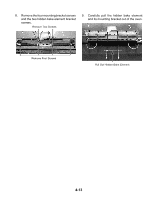
REMOVING THE MEAT PROBE JACK WARNING ELECTRICAL SHOCK HAZARD Disconnect power before servicing. Replace all panels before operating. Failure to do so could result in death or electrical shock. CAUTION: When you work on the built-in oven, be careful when handling the sheet metal parts. Sharp edges may be present, and you can cut yourself if you are not careful. 5. Remove the meat probe jack access panel from the right side of the unit. Use a pair of small cutters to clip the bridge. Clip Bridge Meat Probe Jack Access Panel 1. Disconnect the electrical power to the oven. 2. Remove the racks from inside the oven. Meat Probe Jack 3. Remove the hex nut from the meat probe jack. Right Side Of Oven 6. Push aside the insulation, pull the meat probe jack out of the access hole, and remove the star washer from the jack. 7. Cut the wires near the lugs of the old meat probe jack, then use two small wire nuts, and splice the new jack to the oven wires. Star Washer Access Cover Meat Probe Jack Hex Nut 4. Pull the oven out of its mounting location approximately 8˝, (see page 4-4 steps 1 through 3 for the procedure), so that you can access the meat probe jack access panel on the right side. Meat Probe Jack #8 x 1/4˝ Screw REASSEMBLY NOTE: When you install the new jack, be sure to place the star washer from the old jack on the threaded end of the new one. After you have installed the jack, mount the access cover with two #8 x 1/4˝ screws. 4-11
-
 1
1 -
2
-
3
-
4
-
5
-
6
-
7
-
8
-
9
-
10
-
11
-
12
-
13
-
14
-
15
-
16
-
17
-
18
-
19
-
20
-
21
-
22
-
23
-
24
-
25
-
 26
26 -
 27
27 -
 28
28 -
 29
29 -
 30
30 -
 31
31 -
 32
32 -
 33
33 -
 34
34 -
 35
35 -
 36
36 -
37
-
38
-
39
-
40
-
41
-
42
-
43
-
44
-
45
-
46
-
47
-
48
-
49
-
50
-
51
-
52
-
53
-
54
-
55
-
56
-
57
-
58
-
59
-
60
 |
 |