Whirlpool GBS277PDB Technical Guide - Page 23
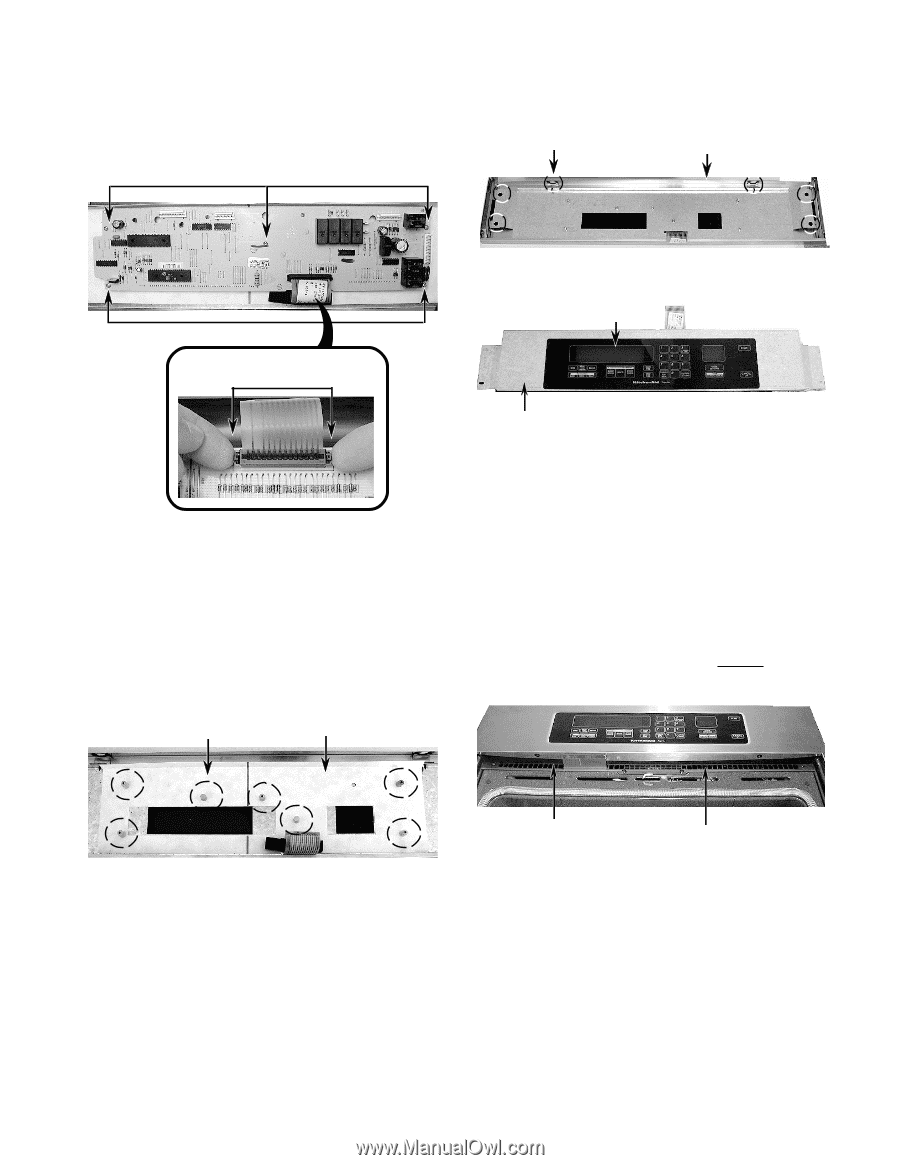
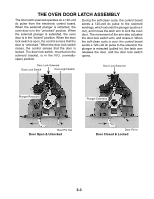
To remove the oven control/display, boards, To remove the touch panel assembly
 |
View all Whirlpool GBS277PDB manuals
Add to My Manuals
Save this manual to your list of manuals |
Page 23 highlights
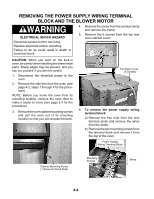
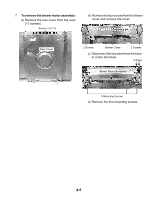
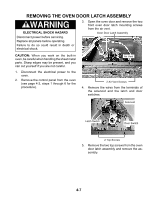
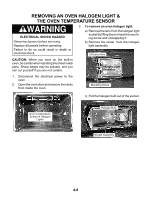
8. To remove the oven control/display boards: a) Remove the five mounting screws. Screws b) Remove the six screws from the control panel bracket and remove the bracket. Bracket Screw (1 of 6) Control Panel Bracket Screws Lift Ends Of Locking Arm b) Lift the ends of the locking arm and disconnect the ribbon cable from its connector. NOTE: The control and display boards are designed to be replaced as an assembly. 9. To remove the touch panel assembly: a) Remove the seven spacers and the cardboard shield from the panel. Spacer (1 of 7) Cardboard Shield c) Peel the touch panel off the bracket. Touch Panel Bracket REASSEMBLY NOTE: When you reinstall the oven control panel, use the following procedure (refer to the photos on the previous page, as necessary): 1. Reconnect the wiring to the control board terminals. 2. Hook the ends of the control panel over the rubber tips of the brackets. 3. Push the bottom of the control panel in and position the plastic air duct under the lip of the panel. Air Duct Bottom Lip Of Control Panel 4. Align the mounting holes and install the two side screws in the control panel. 4-3
-
 1
1 -
2
-
3
-
4
-
5
-
6
-
7
-
8
-
9
-
10
-
11
-
12
-
13
-
14
-
15
-
16
-
17
-
 18
18 -
 19
19 -
 20
20 -
 21
21 -
 22
22 -
 23
23 -
 24
24 -
 25
25 -
 26
26 -
 27
27 -
 28
28 -
29
-
30
-
31
-
32
-
33
-
34
-
35
-
36
-
37
-
38
-
39
-
40
-
41
-
42
-
43
-
44
-
45
-
46
-
47
-
48
-
49
-
50
-
51
-
52
-
53
-
54
-
55
-
56
-
57
-
58
-
59
-
60
 |
 |