Yamaha CLP-S308PE Owners Manual
Yamaha CLP-S308PE Manual
 |
View all Yamaha CLP-S308PE manuals
Add to My Manuals
Save this manual to your list of manuals |
Yamaha CLP-S308PE manual content summary:
- Yamaha CLP-S308PE | Owners Manual - Page 1
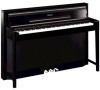
CLP-370/340/330 CLP-S308/S306 DEUTSCH OWNER'S MANUAL BEDIENUNGSANLEITUNG MODE D'EMPLOI MANUAL votre région. Le sélecteur de tension est réglé sur 240 V au départ d'usine. Pour modifier ce réglage, utilisez sur l'assemblage du support du clavier, reportez-vous aux instructions à la fin de - Yamaha CLP-S308PE | Owners Manual - Page 2
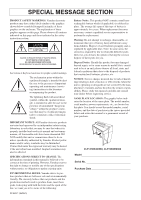
operating and maintenance (servicing) instructions in the literature accompanying NOTICE: All Yamaha electronic products are tested and approved by an independent safety testing laboratory in manual as a permanent record of your purchase. CLP-370/340/330, CLP-S308/S306 Model Serial No. Purchase Date - Yamaha CLP-S308PE | Owners Manual - Page 3
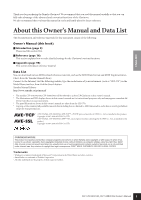
click the Search button. Yamaha Manual Library http://www.yamaha.co.jp/manual/ * The models CLP-370/340/330, CLP-S308/S306 will be referred to as the CLP/Clavinova in this owner's manual. * The illustrations and LED displays shown in this owner's manual are for instructional purposes only and may - Yamaha CLP-S308PE | Owners Manual - Page 4
outlet. Then have the instrument inspected by qualified Yamaha service personnel. • Never insert or remove an electric plug outlet you are using is easily accessible. If some trouble or malfunction occurs, immediately turn off the power CLP-370/340/330, CLP-S308/S306 Owner's Manual (1)B-12 1/2 - Yamaha CLP-S308PE | Owners Manual - Page 5
unplug the power cord from the AC outlet. Then have the instrument inspected by qualified Yamaha service personnel. • Do not place vinyl, plastic or rubber objects on the instrument, since this the power cord from the wall AC outlet. (1)B-12 2/2 CLP-370/340/330, CLP-S308/S306 Owner's Manual 5 - Yamaha CLP-S308PE | Owners Manual - Page 6
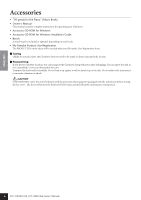
for the Piano" (Music Book) • Owner's Manual This manual contains complete instructions for operating your Clavinova. • Accessory CD-ROM for Windows • Accessory CD-ROM for Windows Installation Guide • Bench A bench may be included or optional, depending on your locale. • My Yamaha Product User - Yamaha CLP-S308PE | Owners Manual - Page 7
CLP-330) and Graded Hammer 3 (GH3) keyboard with artificial ivory top (CLP-340, CLP-S306) The Graded Hammer keyboard features natural grand-piano are released. Internet Direct Connection function (CLP-370/340, CLP-S308/S306) You can connect these digital piano models to the Internet, enabling you to - Yamaha CLP-S308PE | Owners Manual - Page 8
ENGLISH Table of Contents Introduction About this Owner's Manual and Data List 3 Accessories...6 Panel Controls and Terminals 10 Before Using the Clavinova 12 Key Cover ...12 Music Rest ...13 Music Braces (CLP-370/340) ...14 Turning the Power On ...14 Setting the Volume ...15 Using Headphones... - Yamaha CLP-S308PE | Owners Manual - Page 9
CLP-S308/S306, CLP-330) Other Functions 66 F6. (CLP-370/340) / F5. (CLP-S308/S306, CLP-330) Metronome Volume 67 F7. (CLP-370/340) / F6. (CLP-S308/S306, CLP-330) MIDI Functions 67 F8. (CLP-370/340) / F7. (CLP-S308/S306, CLP-330) Backup Functions 70 F8.5 (CLP-370/340)/ F7.5 (CLP-S308/S306, CLP-330 - Yamaha CLP-S308PE | Owners Manual - Page 10
CLP-370/340/330 ∞ THRU L/L+R AUX IN ¡ R OUT MIDI £ IN L/L+R AUX OUT º R ™ TO DEVICE TO HOST USB § CLP-370/ 340 only Front ( CLP-370/ 340 only CLP shown is taken from the CLP-370. Pedal jack for CLP-340/330 is next to the MIDI jacks. Pedal jack for CLP-S308/S306 is next to - Yamaha CLP-S308PE | Owners Manual - Page 11
a variety of functions. § [LAN] jack (CLP-370/340, CLP-S308/S306 page 72 For connecting a LAN cable to access special Internet websites for this instrument, and playing songs from the Internet. ¶ [PEDAL] jack page 83 For connecting a pedal cable. CLP-370/340/330, CLP-S308/S306 Owner's Manual 11 - Yamaha CLP-S308PE | Owners Manual - Page 12
ENGLISH Before Using the Clavinova Before Using the Clavinova Key Cover CLP-370/340/330 To open the key cover: Lift the key cover with both hands and close it slowly. 12 CLP-370/340/330, CLP-S308/S306 Owner's Manual CAUTION Be careful not to pinch your fingers (or those of children) when opening - Yamaha CLP-S308PE | Owners Manual - Page 13
Clavinova CLP Rest CLP-370/340/330 To raise the music rest: 1. Pull the music rest up and toward yourself as far as it will go. 2. Flip down the two metal supports at the left and right on the rear of the music rest. 3. Lower the music rest so that it rests on the metal supports supports CLP- - Yamaha CLP-S308PE | Owners Manual - Page 14
Clavinova, and the other into a standard AC outlet. In some areas, a plug adaptor may be provided to match the pin configuration of the AC wall outlets in your area. 1-1 (bottom surface) CLP-370/340/330 Clavinova. If the supplied cord is lost or damaged and needs to be replaced, contact your Yamaha - Yamaha CLP-S308PE | Owners Manual - Page 15
. CAUTION Do not hang anything other than the headphones on the hanger. Doing so may damage the Clavinova or the hanger. Using the Speaker Switch OFF ON This switch turns the internal speakers on or off sound. OFF The speakers produce no sound. CLP-370/340/330, CLP-S308/S306 Owner's Manual 15 - Yamaha CLP-S308PE | Owners Manual - Page 16
the piano voices with various effects by pressing the [VARIATION] button, then pressing the desired voice button. Refer to the "Piano Voice Demo Description" on page 95 for the complete list of demo sounds for the piano voices with various effects. 16 CLP-370/340/330, CLP-S308/S306 Owner's Manual - Yamaha CLP-S308PE | Owners Manual - Page 17
" or "r n d" playback. NOTE When you select a different song (or a different song is selected during chained playback), appropriate reverb and effect types will be selected accordingly. CLP-370/340/330, CLP-S308/S306 Owner's Manual 17 - Yamaha CLP-S308PE | Owners Manual - Page 18
ENGLISH Listening to 50 Piano Preset Songs Practicing a Clavinova locates the top of the song. If you wish to stop playback in the middle of a song, press the SONG [STOP] button. You can also pause playback by pressing the SONG [PLAY/PAUSE] button. 18 CLP-370/340/330, CLP-S308/S306 Owner's Manual - Yamaha CLP-S308PE | Owners Manual - Page 19
Listening to 50 Piano Preset Songs A-B Repeat letting the song play to the end. NOTE An automatic lead-in (to help guide you into the phrase) starts at the A point of the song. 2. Stop playback automatically canceled when a new song is selected. CLP-370/340/330, CLP-S308/S306 Owner's Manual 19 - Yamaha CLP-S308PE | Owners Manual - Page 20
List" on page 92 for more information on the characteristics of each preset voice. TERMINOLOGY Voice: On the Clavinova, a voice means a "tone" or "tonal color." NOTE You can control the loudness of a voice . Refer to "Preset Voice List" on page 92. 20 CLP-370/340/330, CLP-S308/S306 Owner's Manual - Yamaha CLP-S308PE | Owners Manual - Page 21
When DAMPER RES. is on, the Clavinova simulates the sustain sound that occurs when you press the damper pedal of a grand piano, as you press the damper pedal and or variation function (CLP-370/340) via the "Left Pedal Mode" described on page 66. CLP-370/340/330, CLP-S308/S306 Owner's Manual 21 - Yamaha CLP-S308PE | Owners Manual - Page 22
setting) obtained when you first turn on the power to the Clavinova. NOTE The left pedal can be assigned to ON or OFF VOLUME level. [REVERB] This control enables you to select various digital reverb effects that would add extra depth and expression to the CLP-370/340/330, CLP-S308/S306 Owner's Manual - Yamaha CLP-S308PE | Owners Manual - Page 23
Damper Resonance lets you hear a simulation of the sustain sound of the damper pedal on a grand piano, as you press the damper pedal and play the keyboard. This effect is applied to the entire = ON NOTE Depth 0: no effect Depth 20: maximum depth CLP-370/340/330, CLP-S308/S306 Owner's Manual 23 - Yamaha CLP-S308PE | Owners Manual - Page 24
Refer to the "Preset Voice List" on page 92.) [-/NO] [+/YES] buttons [TOUCH] button CLP- 370 Procedure To select a touch sensitivity type press the [TOUCH] button a few times until the not change the touch type. (FIXED mode will remain selected.) 24 CLP-370/340/330, CLP-S308/S306 Owner's Manual - Yamaha CLP-S308PE | Owners Manual - Page 25
Transpose: Change the key signature of a song. On the Clavinova, transposing shifts the pitch of the entire keyboard. NOTE The transposition range: -12: -12 semitones (down one octave) 0: normal pitch 12: 12 semitones (up one octave) ENGLISH CLP-370/340/330, CLP-S308/S306 Owner's Manual 25 - Yamaha CLP-S308PE | Owners Manual - Page 26
default value of the voice combination. However, using function F3 (page 64) you can adjust the depth value for each voice to your liking. 26 CLP-370/340/330, CLP-S308/S306 Owner's Manual - Yamaha CLP-S308PE | Owners Manual - Page 27
Playing Voices Splitting the Keyboard Range and Playing Two Different Voices (Split mode) (CLP-370/340) Split mode enables you to play two different voices on the keyboard - one bar if flat A -1 C1 C2 F#2 C3 C4 C5 C6 C7 Normal setting=F#2 CLP-370/340/330, CLP-S308/S306 Owner's Manual 27 - Yamaha CLP-S308PE | Owners Manual - Page 28
setting via the panel controls (i.e. pressing the [-/NO] or [+/YES] buttons while holding the [EFFECT] button - will be applied to the right voice only. 28 CLP-370/340/330, CLP-S308/S306 Owner's Manual - Yamaha CLP-S308PE | Owners Manual - Page 29
Clavinova features a built-in metronome (a device that keeps an accurate tempo) that is conve- nient for practicing. 12 [-/NO] [+/YES] buttons CLP in the next section) can be set from 32 to 280 beats per minute by using the [TEMPO/FUNCTION ▼, ▲] CLP-370/340/330, CLP-S308/S306 Owner's Manual 29 - Yamaha CLP-S308PE | Owners Manual - Page 30
songs, the Clavinova produces sound based on the saved information. Therefore, recording on the Clavinova may be more accurately called "saving information." However, this book often uses the word "recording" because it seems to make more sense. 30 CLP-370/340/330, CLP-S308/S306 Owner's Manual - Yamaha CLP-S308PE | Owners Manual - Page 31
step, and adjust the tempo by using the [TEMPO/FUNCTION ▼, ▲] buttons. (Range: 32 - 280) Record Ready mode can be disengaged before recording by pressing the [REC] button again. 3. Start recording All recorded data up to that point will be retained.) CLP-370/340/330, CLP-S308/S306 Owner's Manual 31 - Yamaha CLP-S308PE | Owners Manual - Page 32
a part or when recording to another part, do so after you engage Record Ready mode. You cannot re-record in the middle of a song. 32 CLP-370/340/330, CLP-S308/S306 Owner's Manual - Yamaha CLP-S308PE | Owners Manual - Page 33
), press the playback part button before pressing the [REC] button so that its indicator is turned off. For more information on recording, see page 34. CLP-370/340/330, CLP-S308/S306 Owner's Manual 33 - Yamaha CLP-S308PE | Owners Manual - Page 34
(F3) • Dual octave shift (F3) • Split mode voices (F4: CLP-370/340) • Split balance (F4: CLP-370/340) • Split octave shift (F4: CLP-370/340) Entire Song • Tempo • Time signature (beat) • [REVERB] type (including OFF) • [EFFECT] type (including OFF) 34 CLP-370/340/330, CLP-S308/S306 Owner's Manual - Yamaha CLP-S308PE | Owners Manual - Page 35
keyboard, either of which will start recording and erase all previously-recorded data on the selected part. 3. Press the [REC] button to exit Record mode. CLP-370/340/330, CLP-S308/S306 Owner's Manual 35 - Yamaha CLP-S308PE | Owners Manual - Page 36
not necessary. For instructions on playing the song MIDI sequence data is provided in SMF Format 0. The SMF format for sequence files allows you to exchange song data between different sequencers. User songs recorded on the Clavinova are SMF Format 0. 36 CLP-370/340/330, CLP-S308/S306 Owner's Manual - Yamaha CLP-S308PE | Owners Manual - Page 37
ENGLISH Saving a Song 1 23 Handling Songs with a USB Storage Device 12 CLP- 370 Procedure 1. Select a User song to save. Select a User song to save by using the [SONG the file type will be changed - from a SMF song (S00 - S99) to an External song. CLP-370/340/330, CLP-S308/S306 Owner's Manual 37 - Yamaha CLP-S308PE | Owners Manual - Page 38
to either devices. Doing so may corrupt the data on either or both devices. CAUTION Do not manually change the file name on the USB storage device by using a computer; doing so will render exit the load operation mode. (The "FILE" indicators turn off.) 38 CLP-370/340/330, CLP-S308/S306 Owner's Manual - Yamaha CLP-S308PE | Owners Manual - Page 39
" (Protected) appears in the display. • Protected songs (extension: Cxx, Exx or SME) • Disklavier Piano Soft songs NOTE For SMF songs (Sxx), the song numbers are fixed and not changed by deleting fi file operation mode. (The FILE indicators turn off.) CLP-370/340/330, CLP-S308/S306 Owner's Manual 39 - Yamaha CLP-S308PE | Owners Manual - Page 40
format it. If you format the device, all the previously saved data will be deleted. 1 3 1 2 CLP- 370 Procedure 1. Engage the format mode. Press the [FILE] button. (The "DEL/ FORMAT" indicator the file operation mode. (The FILE indicators turn off.) 40 CLP-370/340/330, CLP-S308/S306 Owner's Manual - Yamaha CLP-S308PE | Owners Manual - Page 41
manual of the USB device. Compatible USB devices USB storage devices (flash memory, floppy disk drive, hard disk drive, etc.) The instrument does not necessarily support all commercially available USB devices. Yamaha /disconnecting the USB cable. CLP-370/340/330, CLP-S308/S306 Owner's Manual 41 - Yamaha CLP-S308PE | Owners Manual - Page 42
Floppy Disks An optional floppy disk drive can be connected to the USB jack. (CLP-370/340) For instructions on installing a Yamaha UD-FD01 floppy disk drive, see page 91. The floppy disk drive lets tab closed). Write-protect tab open (protect position) 42 CLP-370/340/330, CLP-S308/S306 Owner's Manual - Yamaha CLP-S308PE | Owners Manual - Page 43
to the included "Accessory CD-ROM Installation Guide"). The songs are saved to an area of Yamaha's MIDI devices, including the Clavinova series instruments. This is a common format used with various Yamaha software. Among ESEQ files, Disklavier Piano CLP-370/340/330, CLP-S308/S306 Owner's Manual 43 - Yamaha CLP-S308PE | Owners Manual - Page 44
Stop playback. When playback is complete, the Clavinova automatically stops and locates the top of the a duet or a song for two pianos, then playing the other part while instructions about how to load the songs from the computer (refer on page 76). 44 CLP-370/340/330, CLP-S308/S306 Owner's Manual - Yamaha CLP-S308PE | Owners Manual - Page 45
contain data (one of [RIGHT] [LEFT] or both) are lit in green. While the Clavinova is playing or stopped, pressing these part buttons turns off the indicators, and the data on during playback. TERMINOLOGY Sync: Synchronized; occurring at the same time CLP-370/340/330, CLP-S308/S306 Owner's Manual 45 - Yamaha CLP-S308PE | Owners Manual - Page 46
CLP-370/340, CLP-S308/S306) Internet Direct Connection (CLP-370/ 340, CLP-S308/S306) This feature lets you directly connect your instrument to the Internet. A service in the special Yamaha twisted pair) cable to prevent electromagnetic interference. 46 CLP-370/340/330, CLP-S308/S306 Owner's Manual - Yamaha CLP-S308PE | Owners Manual - Page 47
ENGLISH Internet Direct Connection (CLP-370/340, CLP-S308/S306) Connection example 2: Connecting by cable (using a modem with router) Modem* LAN cable point, this connection requires a router. NOTE This instrument is encrypted in WEP format only. CLP-370/340/330, CLP-S308/S306 Owner's Manual 47 - Yamaha CLP-S308PE | Owners Manual - Page 48
button. You can play back the songs on the Internet using the service. For instructions on playing back songs, see "Listening to the Songs on Internet" . For instructions on making Internet settings, see "About the Internet Settings" on page 49. 48 CLP-370/340/330, CLP-S308/S306 Owner's Manual - Yamaha CLP-S308PE | Owners Manual - Page 49
CLP- 370 NOTE You can create the Internet setting files (named "config.n21") on the special Yamaha webpage. NOTE The Load mode cannot be engaged while voice demo song playback is in use, when the [REC] button is on, or when user song playback is active. CLP-370/340/330, CLP-S308/S306 Owner's Manual - Yamaha CLP-S308PE | Owners Manual - Page 50
select "INTERNET" lamp with the [SONG SELECT] button. For instructions on listening to the songs, see "Listening to the Songs on Yamaha website: http://music.yamaha.com/idc/ NOTE Yamaha recommends that you back up the Internet setting files (page 78). 50 CLP-370/340/330, CLP-S308/S306 Owner's Manual - Yamaha CLP-S308PE | Owners Manual - Page 51
number and enter the desired Submodes Selection mode (refer to steps 1 - 3 for similar instructions on page 49). Procedure NOTE The field strength can be displayed after making the Internet connection Field strength: Strong No wireless LAN is used. CLP-370/340/330, CLP-S308/S306 Owner's Manual 51 - Yamaha CLP-S308PE | Owners Manual - Page 52
(refer to steps 1 - 3 for similar instructions on page 49). NOTE The connection information file does not allow you to manually make Internet settings. The connection information file the error code on the Yamaha website: http://music.yamaha.com/idc/ 52 CLP-370/340/330, CLP-S308/S306 Owner's Manual - Yamaha CLP-S308PE | Owners Manual - Page 53
Submodes Selection mode (refer to steps 1 - 3 for similar instructions on page 49). Procedure 1. Select Function F9.5 (on the CLP-370/340) or F8.5 (on the CLPS308/S306). Use the [TEMPO/FUNCTION [TEMPO/FUNCTION] button to exit from the Function modes. CLP-370/340/330, CLP-S308/S306 Owner's Manual 53 - Yamaha CLP-S308PE | Owners Manual - Page 54
desired Submodes Selection mode (refer to steps 1 - 3 for similar instructions on page 49). Procedure 1. Select Function F9.6 (on the CLP-370/340) or F8.6 (on the CLPS308/S306). Use the [TEMPO/FUNCTION /FUNCTION] button to exit from the Function modes. 54 CLP-370/340/330, CLP-S308/S306 Owner's Manual - Yamaha CLP-S308PE | Owners Manual - Page 55
refer to steps 1 - 3 for similar instructions on page 49). Procedure 1. Select Function F9.7 (on the CLP-370/340) or F8.7 (on the CLPS308/S306 factory-programmed settings for all Internet settings. Yamaha recommends you that you back up the Internet ) CLP-370/340/330, CLP-S308/S306 Owner's Manual 55 - Yamaha CLP-S308PE | Owners Manual - Page 56
Reverb Type will be selected accordingly. NOTE Song data from the Internet is not transmitted via the MIDI connectors. NOTE The Synchro start function, Part settings and A-B Repeat function becomes effective after you play back the song once. 56 CLP-370/340/330, CLP-S308/S306 Owner's Manual - Yamaha CLP-S308PE | Owners Manual - Page 57
a network, providing access to files and services. Site Short for "website," this refers "http://www.yamaha.com/" is referred to as the Yamaha site. SSL digital consumer electronic devices, printers, and game machines, etc. equipped with [LAN] ports. CLP-370/340/330, CLP-S308/S306 Owner's Manual - Yamaha CLP-S308PE | Owners Manual - Page 58
Internet (CLP-370/340, CLP-S308/S306) Initializing the data CAUTION When you initialize the data, all panel settings and song data will be erased and reset to the default settings. Yamaha recommends you so may corrupt the all data on the instrument. 58 CLP-370/340/330, CLP-S308/S306 Owner's Manual - Yamaha CLP-S308PE | Owners Manual - Page 59
Clavinova functions, such as fine tuning the pitch or selecting a scale, etc. The following parameters are available. The CLP-370/340 has nine main functions, and the CLP-330 has seven main functions, and the CLP Voice MIDI Tuning Others - CLP-370/ 340 CLP-370/340/330, CLP-S308/S306 Owner's Manual 59 - Yamaha CLP-S308PE | Owners Manual - Page 60
[TEMPO/FUNCTION ▼, ▲] buttons to select the desired function from F1 - F9 (CLP-370/340), F1 - F7 (CLP-330), F1 - F8 (CLP-S308/S306). NOTE Functions cannot be selected during Demo/Song Select/ file operation mode ] button is pressed for the first time. 60 CLP-370/340/330, CLP-S308/S306 Owner's Manual - Yamaha CLP-S308PE | Owners Manual - Page 61
, the default setting (which is used when you first turn on the power to the Clavinova) is recalled by pressing the [-/NO] and [+/YES] buttons simultaneously. Detailed Settings - [FUNCTION TEMPO/FUNCTION] button so that its [TEMPO] indicator lights. CLP-370/340/330, CLP-S308/S306 Owner's Manual 61 - Yamaha CLP-S308PE | Owners Manual - Page 62
entire instrument. This function is useful when you play the Clavinova along with other instruments or CD music. 1. Engage A3 key in approximately 0.2 Hz increments. The value appears two-digit number and one decimal place. Ex. 440.2Hz is shown as 62 CLP-370/340/330, CLP-S308/S306 Owner's Manual - Yamaha CLP-S308PE | Owners Manual - Page 63
can experience these tunings with the Clavinova. Equal Temperament One octave is divided into twelve equal intervals. Currently the most popular piano tuning scale. Pure Major/Pure Minor ) followed by a high bar if sharp followed by a low bar if flat CLP-370/340/330, CLP-S308/S306 Owner's Manual 63 - Yamaha CLP-S308PE | Owners Manual - Page 64
Dual mode voice buttons. To exit Function mode, you still need to press the [TEMPO/FUNCTION] button so that the TEMPO indicator lights up. 64 CLP-370/340/330, CLP-S308/S306 Owner's Manual - Yamaha CLP-S308PE | Owners Manual - Page 65
ENGLISH F4. (CLP-370/340) Split Mode Functions This menu enables you to make various detailed settings for Split mode. By changing the To exit Function mode, you still need to press the [TEMPO/FUNCTION] button so that the TEMPO indicator lights up. CLP-370/340/330, CLP-S308/S306 Owner's Manual 65 - Yamaha CLP-S308PE | Owners Manual - Page 66
F5.5 (CLP-370/340)/F4.3 (CLP-S308/S306, CLP-330) Song Channel Selection Setting range: ALL, 1&2 Normal setting: ALL The setting here only affects Disklavier Piano Soft songs 2 will be played back, while channels 3 - 16 will be transmitted via MIDI. 66 CLP-370/340/330, CLP-S308/S306 Owner's Manual - Yamaha CLP-S308PE | Owners Manual - Page 67
Song data is not transmitted via the MIDI connections. However, channels 3 - 16 of Disklavier Piano Soft songs, and non-protected External songs will be transmitted via the MIDI connections depending on the Song Channel Selection setting (page 66). CLP-370/340/330, CLP-S308/S306 Owner's Manual 67 - Yamaha CLP-S308PE | Owners Manual - Page 68
web site. http://www.yamaha.co.jp/manual/ Setting range: ON/OFF Normal setting: ON F7.5: (CLP-370/340)/F7.5: (CLP-S308/S306, CLP-330) Control Change ON/OFF Normally the CLP-370/340/330, CLP-S308/S306 will respond to MIDI control change data received from an external MIDI device or keyboard, causing - Yamaha CLP-S308PE | Owners Manual - Page 69
our manual library at the following website. http://www.yamaha.co.jp/manual/ NOTE Receiving the transmitted data: 1. Connect the Clavinova via MIDI to MIDI, refer to the owner's manual for the connected MIDI device. Detailed Settings - [FUNCTION] F7.7: (CLP-370/340)/F7.7: (CLP-S308/S306, CLP-330 - Yamaha CLP-S308PE | Owners Manual - Page 70
< (CLP-370/340)/ (CLP-S308/S306, CLP-330) settings>) F9.2: (CLP-370/340)/F7.2: (CLP-S308/S306, CLP-330) MIDI The MIDI functions ( / settings) (expect for the F7.6 and F7.7 / and ) F9.3: (CLP-370/340)/F7.3: (CLP-S308 - Yamaha CLP-S308PE | Owners Manual - Page 71
below the instrument. CLP-370/340/330 THRU On the left of the panel L/L+R AUX IN 2 R OUT MIDI 5 AUX OUT L/L+R 1 R 4 IN SELECT USB TO DEVICE 3 CLP-370/340 only ENGLISH TO DEVICE TO HOST USB CLP-370/340 only 6 CLP-S308/S306 Left 3 CLP-370/340 only Right 4 5 2 1 6 1 AUX - Yamaha CLP-S308PE | Owners Manual - Page 72
out what MIDI data and commands your devices can transmit or receive. Refer to the MIDI Implementation Chart in the Data Format on the website. For information on how to access and obtain the Data Format list, see page 3. Direct URL: http://www.yamaha.co.jp/manual/ 72 CLP-370/340/330, CLP-S308/S306 - Yamaha CLP-S308PE | Owners Manual - Page 73
not necessarily support all commercially available USB storage devices. Yamaha cannot guarantee supports the USB 1.1 standard, you can connect and use a USB 2.0 storage device with the instrument. However, note that the transfer speed is that of USB 1.1. CLP-370/340/330, CLP-S308/S306 Owner's Manual - Yamaha CLP-S308PE | Owners Manual - Page 74
inserting the media to the instrument. Not only files created on the instrument itself but also Standard MIDI files created on other devices can be copied to a USB storage device from the hard disk [TO DEVICE] terminal Instrument USB storage device 74 CLP-370/340/330, CLP-S308/S306 Owner's Manual - Yamaha CLP-S308PE | Owners Manual - Page 75
via MIDI. To do this, install the USB-MIDI driver and Musicsoft Downloader software (refer to the included "Accessory CD-ROM Installation Guide"). CAUTION When connecting the Clavinova to (2) when alternately connecting/disconnecting the USB cable. CLP-370/340/330, CLP-S308/S306 Owner's Manual 75 - Yamaha CLP-S308PE | Owners Manual - Page 76
The file extension is MID. You can play the SMF format song using music software or a sequencer that supports SMF. This instrument also supports SMF. NOTE Before you use this instrument, close the Musicsoft Downloader window and quit the application. 76 CLP-370/340/330, CLP-S308/S306 Owner's Manual - Yamaha CLP-S308PE | Owners Manual - Page 77
this instrument to a computer • User song : your recorded songs • Back up data : panel settings • Song data (once it has been loaded from the computer) ENGLISH CLP-370/340/330, CLP-S308/S306 Owner's Manual 77 - Yamaha CLP-S308PE | Owners Manual - Page 78
mode. • During song playback. • During Record mode. • During file operation (one of the [FILE] button indicators is lit). NOTE The panel settings and User songs (CLP-xxx.BUP file) remain in the instrument after being saved to the computer. 78 CLP-370/340/330, CLP-S308/S306 Owner's Manual - Yamaha CLP-S308PE | Owners Manual - Page 79
End Displayed when the current operation is completed. Err Displayed when the MIDI/USB cable is disconnected while starting Musicsoft Downloader on a computer con- Direct Connection, refer to the Yamaha web site: http://services.music.yamaha.com/ CLP-370/340/330, CLP-S308/S306 Owner's Manual 79 - Yamaha CLP-S308PE | Owners Manual - Page 80
bench styled to match your Yamaha Clavinova. HPE-160 Stereo Headphones High-performance lightweight dynamic headphones with extra-soft ear pads. UD-FD01 USB-FDD Unit Floppy disk drive for connecting to the instrument and saving/loading data. 80 CLP-370/340/330, CLP-S308/S306 Owner's Manual - Yamaha CLP-S308PE | Owners Manual - Page 81
-370: Keyboard Stand Assembly CLP-370: Keyboard Stand Assembly CAUTION • Assemble the unit on a flat floor surface. • Be screws x 6 Cord holders x 2 4 x 12 mm thin screws x 2 Headphone hanger 4 x 10 mm thin screws x 2 Headphone hanger Power cord CLP-370/340/330, CLP-S308/S306 Owner's Manual 81 - Yamaha CLP-S308PE | Owners Manual - Page 82
to C by tightening four long screws (6 x 25 mm). 2. Attach B. Depending on the model of Clavinova you purchased, the surface color of one side of B may be different from the other side. In this (6 x 16 mm) from the front. 4-1 A Projection of A A 4-2 82 CLP-370/340/330, CLP-S308/S306 Owner's Manual - Yamaha CLP-S308PE | Owners Manual - Page 83
the hanger as shown in the illustration. 110 ENGLISH 127 PEDAL 220 6-2 6-1 240 5-2 5-3 6. Connect the power cord. 6-1 Set the check the following. • Are there any parts left over? Review the assembly procedure and correct any errors. • Is the CLP-370/340/330, CLP-S308/S306 Owner's Manual 83 - Yamaha CLP-S308PE | Owners Manual - Page 84
ENGLISH CLP-340/330: Keyboard Stand Assembly CLP-340/330: Keyboard Stand Assembly CAUTION • Assemble the unit on a flat floor surface. Cord holders x 2 4 x 12 mm thin screws x 2 Headphone hanger 4 x 10 mm thin screws x 2 Headphone hanger Power cord 84 CLP-370/340/330, CLP-S308/S306 Owner's Manual - Yamaha CLP-S308PE | Owners Manual - Page 85
mm). 15 cm or further in A 15 cm or further in 2. Attach B. Depending on the model of Clavinova you purchased, the surface color of one side of B may be different from the other side. In this 4-2 Insert the screw in the front of these two holes. CLP-370/340/330, CLP-S308/S306 Owner's Manual 85 - Yamaha CLP-S308PE | Owners Manual - Page 86
connector. After completing the assembly, please check the following. • Are there any parts left over? Review the assembly procedure and correct any errors. • Is the instrument clear of doors and other movable . Do not hold here. Do not hold here. 86 CLP-370/340/330, CLP-S308/S306 Owner's Manual - Yamaha CLP-S308PE | Owners Manual - Page 87
/S306: Keyboard Stand Assembly CLP-S308/S306: Keyboard Stand Assembly CAUTION • Assemble the unit on a flat floor surface. x 2 4 x 14 mm thin screws x 5 Headphone hanger 4 x 10 mm thin screws x 2 Headphone hanger B Power cord C Pedal cord D E F CLP-370/340/330, CLP-S308/S306 Owner's Manual 87 - Yamaha CLP-S308PE | Owners Manual - Page 88
lightly pushing E and F toward the center. * Be sure to slide the guide pins 1 on each side of A into the guide slots 2 on E and F respectively. 1 2 A 15cm or 3-1 tighten the screws you temporarily fastened on B in steps 2-3 above. 2-3 4-4 88 CLP-370/340/330, CLP-S308/S306 Owner's Manual - Yamaha CLP-S308PE | Owners Manual - Page 89
outlets in your area. WARNING An improper voltage setting can cause serious damage to the Clavinova or result in improper operation. 8-2 Insert the AC power cord plug into the [AC to attach the hanger as shown in the illustration. 7-1 D C C 7-3 CLP-370/340/330, CLP-S308/S306 Owner's Manual 89 - Yamaha CLP-S308PE | Owners Manual - Page 90
ENGLISH CLP-S308/S306: Keyboard Stand Assembly After completing the assembly, please check the following. • Are there any parts left over? Review the assembly procedure and correct any errors. • Is Top portion Key cover Hold here. Do not hold here. 90 CLP-370/340/330, CLP-S308/S306 Owner's Manual - Yamaha CLP-S308PE | Owners Manual - Page 91
(4mm x 10mm). Dual-sided adhesive tape 2. Fold the USB cable inside the case as shown. 4. Connect the USB cable to the USB [TO DEVICE] terminal. CLP-370/340/330, CLP-S308/S306 Owner's Manual 91 - Yamaha CLP-S308PE | Owners Manual - Page 92
piano or electric piano in the DUAL mode. CHOIR A big, spacious choir voice. Perfect for creating rich harmonies in slow pieces. VARIATION A choir voice with a slow attack. Try combining this voice with a piano or electric piano in the DUAL mode. 92 CLP-370/340/330, CLP-S308/S306 Owner's Manual - Yamaha CLP-S308PE | Owners Manual - Page 93
-switched samples to accurately simulate the timbral response of an acoustic instrument. *2. Contains a very subtle sample that is produced when the keys are released. ENGLISH CLP-370/340/330, CLP-S308/S306 Owner's Manual 93 - Yamaha CLP-S308PE | Owners Manual - Page 94
STRINGS 2 Spacious strings ensemble with a slow attack. Try combining this voice with a piano or electric piano in the DUAL mode. CHOIR A big, spacious choir voice. Perfect for creating rich sample that is produced when the keys are released. 94 CLP-370/340/330, CLP-S308/S306 Owner's Manual - Yamaha CLP-S308PE | Owners Manual - Page 95
(CLP-370/340) Voice Name GRAND PIANO1 GRAND PIANO2 E.PIANO1 E.PIANO2 HARPSICHORD E.CLAVICHORD Piano Voice Demo Stereo sampling Monaural sampling With sustain sampling Without sustain sampling With key-off sampling Without key-off sampling CLP-370/340/330, CLP-S308/S306 Owner's Manual 95 - Yamaha CLP-S308PE | Owners Manual - Page 96
ENGLISH Numerics 50 greats for the Piano 17 50 Piano Preset Songs 17 A A-B Repeat 19 Adjust Tempo (50 Piano Preset Songs 17 Tempo (Recorded Songs 44 Volume (50 Piano Preset Songs 17 Volume (Metronome M [MASTER VOLUME] slider 15 Mean Tone 63 96 CLP-370/340/330, CLP-S308/S306 Owner's Manual - Yamaha CLP-S308PE | Owners Manual - Page 97
TRANSPOSE] button 25 Transposition 25 Troubleshooting 80 U USB Storage Device 40, 73 USB [TO DEVICE] terminal 72, 73 USB [TO HOST] terminal 72, 75 USB-LAN Adapter 54 V [VARIATION] button 22 Voice 20 Voice group buttons 20 W Werckmeister 63 CLP-370/340/330, CLP-S308/S306 Owner's Manual 97 - Yamaha CLP-S308PE | Owners Manual - Page 98
Metronome Time Signature Tempo Transpose Default GRAND PIANO 1 OFF OFF OFF WOOD BASS NORMAL Preset for each voice Preset for each voice Preset for each voice Preset for each voice MEDIUM 64 ON 6 OFF 0 (no accent) 120 0 Backup Group CLP-370/ 340 CLP-330, CLP-S308/ S306 F7.1 - F8.1 F7.1 - F8 - Yamaha CLP-S308PE | Owners Manual - Page 99
Local Control Program Change Send & Receive Control Change Send & Receive Backup F8.5 F7.5 Character Code Default 1 ALL ON ON ON Voice: OFF MIDI - Others: ON Int Backup Group CLP-370/ 340 CLP-330, CLP-S308/ S306 F8.2 F7.2 Always backed up CLP-370/340/330, CLP-S308/S306 Owner's Manual 99 - Yamaha CLP-S308PE | Owners Manual - Page 100
with [1019 mm (40-1/8")] [1021 mm (40-3/16")] - polished finish] Depth 511mm (20-1/8") 514mm (20-1/4") 430 mm (16-15/16") Weight [For models with polished finish] 78 kg (171lbs., 15 oz.) 69 kg ( types Chorus Yes Dual Yes Split Yes - 100 CLP-370/340/330, CLP-S308/S306 Owner's Manual - Yamaha CLP-S308PE | Owners Manual - Page 101
Yes - Yes Yes Owner's Manual, Accessory CD-ROM for Windows, Accessory CD-ROM for Windows Installation Guide, "50 greats for the Piano" Score Collection, My Yamaha Product User Registration, Bench (included información a su distribuidor Yamaha. CLP-370/340/330, CLP-S308/S306 Owner's Manual 101 - Yamaha CLP-S308PE | Owners Manual - Page 102
MEMO 102 CLP-370/340/330, CLP-S308/S306 Owner's Manual - Yamaha CLP-S308PE | Owners Manual - Page 103
MEMO CLP-370/340/330, CLP-S308/S306 Owner's Manual 103 - Yamaha CLP-S308PE | Owners Manual - Page 104
MEMO 104 CLP-370/340/330, CLP-S308/S306 Owner's Manual - Yamaha CLP-S308PE | Owners Manual - Page 105
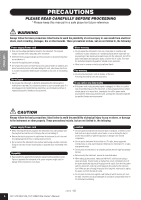
to the presence of important operating and maintenance (servicing) instructions in the literature accompanying the product. IMPORTANT SAFETY INSTRUCTIONS 1 Read these instructions. 2 Keep these instructions. 3 Heed all warnings. 4 Follow all instructions. 5 Do not use this apparatus near water - Yamaha CLP-S308PE | Owners Manual - Page 106
instructions found in the users manual the problem by Yamaha Corporation of America, Electronic Service Yamaha Corporation of America Address : 6600 Orangethorpe Ave., Buena Park, Calif. 90620 Telephone : 714-522-9011 Type of Equipment : Digital Piano Model Name : CLP-370/340/330, CLP-S308PE/ S306PE - Yamaha CLP-S308PE | Owners Manual - Page 107
: 9-634-0099 COUNTRIES AND TRUST TERRITORIES IN PACIFIC OCEAN Yamaha Corporation, Asia-Pacific Music Marketing Group Nakazawa-cho 10-1, Naka-ku, Hamamatsu, Japan 430-8650 Tel: +81-53-460-2312 HEAD OFFICE Yamaha Corporation, Pro Audio & Digital Musical Instrument Division Nakazawa-cho 10-1, Naka-ku - Yamaha CLP-S308PE | Owners Manual - Page 108
Yamaha Home Keyboards Home Page http://music.yamaha.com/homekeyboard/ Yamaha Manual Library http://www.yamaha.co.jp/manual/ U.R.G., Pro Audio & Digital Musical Instrument Division, Yamaha Corporation © 2008 Yamaha Corporation WN75950 109MWAP*.*-**B1 Printed in China
-
 1
1 -
 2
2 -
 3
3 -
 4
4 -
 5
5 -
 6
6 -
 7
7 -
8
-
9
-
10
-
11
-
12
-
13
-
14
-
15
-
16
-
17
-
18
-
19
-
20
-
21
-
22
-
23
-
24
-
25
-
26
-
27
-
28
-
29
-
30
-
31
-
32
-
33
-
34
-
35
-
36
-
37
-
38
-
39
-
40
-
41
-
42
-
43
-
44
-
45
-
46
-
47
-
48
-
49
-
50
-
51
-
52
-
53
-
54
-
55
-
56
-
57
-
58
-
59
-
60
-
61
-
62
-
63
-
64
-
65
-
66
-
67
-
68
-
69
-
70
-
71
-
72
-
73
-
74
-
75
-
76
-
77
-
78
-
79
-
80
-
81
-
82
-
83
-
84
-
85
-
86
-
87
-
88
-
89
-
90
-
91
-
92
-
93
-
94
-
95
-
96
-
97
-
98
-
99
-
100
-
101
-
102
-
103
-
104
-
105
-
106
-
107
-
108
 |
 |

IMPORTANT
—Check your power supply—
Make sure that your local AC
mains voltage matches the
voltage specified on the name
plate on the bottom panel. In
some areas a voltage selector
may be provided on the bottom
panel of the main keyboard unit
near the power cord. Make sure
that the voltage selector is set for
the voltage in your area. The
voltage selector is set at 240V
when the unit is initially shipped.
To change the setting use a
"minus" screwdriver to rotate the
selector dial so that the correct
voltage appears next to the
pointer on the panel.
For information on assembling
the keyboard stand, refer to the
instructions at the end of this
manual.
WICHTIG
—Überprüfen Sie Ihren
Netzanschluss—
Vergewissern Sie sich, dass die
Spannung in Ihrem örtlichen
Stromnetz mit der Spannung
übereinstimmt, die auf dem
Typenschild auf der Unterseite
des Instruments angegeben ist. In
bestimmten Regionen ist auf der
Unterseite des Keyboards in der
Nähe des Netzkabels ein
Spannungswähler angebracht.
Vergewissern Sie sich, dass der
Spannungswähler auf die
Spannung Ihres lokalen
Stromnetzes eingestellt ist. Dieser
Spannungswähler ist bei
Auslieferung auf 240 V
eingestellt. Sie können die
Einstellung mit einem
Schlitzschraubenzieher ändern.
Drehen Sie dazu den
Wählschalter, bis der Pfeil auf
dem Instrument auf die richtige
Spannung zeigt.
Weitere Informationen über die
Montage des Keyboard-Ständers
erhalten Sie in den Anweisungen
am Ende dieses Handbuchs.
IMPORTANT
—Contrôler la source
d'alimentation—
Vérifiez que la tension spécifiée
sur le panneau inférieur
correspond à la tension du
secteur. Dans certaines régions,
l'instrument peut être équipé d'un
sélecteur de tension situé sur le
panneau inférieur du clavier à
proximité du cordon
d'alimentation.
Vérifiez que ce sélecteur est bien
réglé en fonction de la tension
secteur de votre région. Le
sélecteur de tension est réglé sur
240 V au départ d'usine. Pour
modifier ce réglage, utilisez un
tournevis à lame plate pour
tourner le sélecteur afin de mettre
l'indication correspondant à la
tension de votre région vis à vis
du repère triangulaire situé sur le
panneau.
Pour obtenir des informations sur
l'assemblage du support du
clavier, reportez-vous aux
instructions à la fin de ce manuel.
IMPORTANTE
—Verifique la alimentación de
corriente—
Asegúrese de que tensión de
alimentación de CA de su área
corresponde con la tensión
especificada en la placa de
características del panel inferior.
En algunas zonas puede haberse
incorporado un selector de
tensión en el panel inferior de la
unidad del teclado principal,
cerca del cable de alimentación.
Asegúrese de que el selector de
tensión esté ajustado a la tensión
de su área. El selector de tensión
se ajusta a 240V cuando la
unidad sale de fábrica. Para
cambiar el ajuste, emplee un
destornillador de cabeza "recta"
para girar el selector de modo
que aparezca la tensión correcta
al lado del indicador del panel.
Para información sobre el
montaje del soporte del teclado,
consulte las instrucciones al final
de este manual.
CLP-370/340/330
MODE D’EMPLOI
BEDIENUNGSANLEITUNG
MANUAL DE INSTRUCCIONES
OWNER’S MANUAL
CLP-S308/S306
ES
FR
DE
EN
ENGLISH
DEUTSCH
FRANÇAIS
ESPAÑOL