Yamaha DGX-530 Owner's Manual
Yamaha DGX-530 Manual
 |
UPC - 086792880303
View all Yamaha DGX-530 manuals
Add to My Manuals
Save this manual to your list of manuals |
Yamaha DGX-530 manual content summary:
- Yamaha DGX-530 | Owner's Manual - Page 1
Owner's Manual Keyboard Stand Assembly For information on assembling the keyboard stand, refer to the instructions on page 10 of this manual. EN - Yamaha DGX-530 | Owner's Manual - Page 2
located on this plate. You should record the model number, serial number, and the date of purchase in the spaces provided below and retain this manual as a permanent record of your purchase. Model Serial No. Purchase Date 92-BP (bottom) PLEASE KEEP THIS MANUAL 2 DGX-530/YPG-535 Owner's Manual - Yamaha DGX-530 | Owner's Manual - Page 3
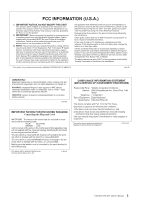
the instructions found in the users manual, may cause interference harmful to the operation of other electronic devices. Yamaha Corporation of America Address : 6600 Orangethorpe Ave., Buena Park, Calif. 90620 Telephone : 714-522-9011 Type of Equipment : Digital Keyboard Model Name : DGX-530/YPG-535 - Yamaha DGX-530 | Owner's Manual - Page 4
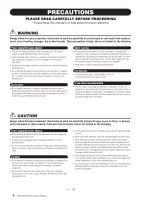
AC outlet. Then have the instrument inspected by qualified Yamaha service personnel. • Never insert or remove an electric plug with outlet you are using is easily accessible. If some trouble or malfunction occurs, immediately turn off the power switch and DGX-530/YPG-535 Owner's Manual (3)-11 1/2 - Yamaha DGX-530 | Owner's Manual - Page 5
Yamaha service personnel. • Do not place vinyl, plastic or rubber objects on the instrument, since this might discolor the panel or keyboard manual are for instructional manual are the trademarks or registered trademarks of their respective companies. (3)-11 2/2 DGX-530/YPG-535 Owner's Manual 5 - Yamaha DGX-530 | Owner's Manual - Page 6
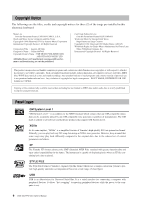
based on a wide range of chord types. USB USB is an abbreviation for Universal Serial Bus. It is a serial interface for connecting a computer with peripheral Devices. It allows "hot swapping" (connecting peripheral devices while the power to the computer is on). 6 DGX-530/YPG-535 Owner's Manual - Yamaha DGX-530 | Owner's Manual - Page 7
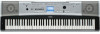
Congratulations and thank you for purchasing the Yamaha DGX-530/YPG-535 Portable Grand! Please read this owner's manual carefully before using the instrument in order to take full advantage of its various features. Make sure to keep this manual in a safe and handy place even after you finish reading, - Yamaha DGX-530 | Owner's Manual - Page 8
Features of the DGX-530/YPG-535 Graded Soft Touch keyboard Just as on an actual piano, the lower keys are heavy in touch and the higher keys are light, with soft touch of digital keyboard for beginners. ■ Performance assistant technology Page 37 Play along with a song on the instrument's keyboard - Yamaha DGX-530 | Owner's Manual - Page 9
Appendix Troubleshooting 114 Messages 116 Scores 118 Voice List 124 Drum Kit List 128 Style List 130 Music Database List 131 Songs Provided On the Supplied CD-ROM 132 Effect Type List 133 MIDI Implementation Chart 134 MIDI Data Format 136 Specifications 139 Index 140 DGX-530/YPG-535 - Yamaha DGX-530 | Owner's Manual - Page 10
their front-to-back orientation. If you have trouble screwing in the screws, use a screwdriver to rotate q 6 x 70 mm roundhead screws the joint connectors to the appropriate position-the → mark on the joint connectors indicates the location of the screw hole. 10 DGX-530/YPG-535 Owner's Manual - Yamaha DGX-530 | Owner's Manual - Page 11
make a rattling noise when you play it or move it? ➔ If so, properly tighten all screws. • Also, if the keyboard makes a creaking noise or seems unsteady when you play it, refer carefully to the assembly instructions and diagrams and retighten all screws. DGX-530/YPG-535 Owner's Manual 11 - Yamaha DGX-530 | Owner's Manual - Page 12
functions as an external output. You can connect the PHONES/OUTPUT jack to a keyboard amplifier, stereo system, mixer, tape recorder, or other line-level audio device footswitch. Plug the Yamaha FC5 footswitch into this jack and use it to switch sustain on and off. 12 DGX-530/YPG-535 Owner's Manual - Yamaha DGX-530 | Owner's Manual - Page 13
making the connections, turn the instrument's power on. • Install the USB-MIDI driver on your computer. Installation of the USB-MIDI driver is described on page 109. Turning the Power On Turn down the Music Rest Insert the music rest into the slots as shown. DGX-530/YPG-535 Owner's Manual 13 - Yamaha DGX-530 | Owner's Manual - Page 14
page 71 #5 Drum Kit page 21 The illustrations next to each key indicate the drum and percussion instruments assigned to the keys when "Standard Kit 1" is selected. !8 [PAUSE]/ [SYNC START] button pages 32, 77 !9 [START/STOP] button ....... pages 25, 32, 65 14 DGX-530/YPG-535 Owner's Manual - Yamaha DGX-530 | Owner's Manual - Page 15
@4 @6 @3 @5 @8 @9 #0 #1 #2 #3 #4 #5 Rear Panel #6 #7 #8 #9 $0 Rear Panel #6 CONTRAST knob page 67 #8 SUSTAIN jack page 12 #7 USB TO DEVICE terminal page 93 #9 PHONES/OUTPUT jack page 12 USB TO HOST terminal page 13, 100 $0 DC IN 12V jack page 12 DGX-530/YPG-535 Owner's Manual 15 - Yamaha DGX-530 | Owner's Manual - Page 16
Quick Guide This instrument allows you to select English or Japanese as the display language. The default display language is English, but if you switch to Japanese the lyrics, file names, demo display, off. 4 Press the [EXIT] button to return to the MAIN display. 16 DGX-530/YPG-535 Owner's Manual - Yamaha DGX-530 | Owner's Manual - Page 17
uick Guid Try Playing a Variety of Instrument Voices In addition to piano, organ, and other "standard" keyboard keyboard. Select 102 Flute Adjusts volume. Try selecting and playing a variety of voices. Press the [EXIT] button to return to the MAIN display. DGX-530/YPG-535 Owner's Manual - Yamaha DGX-530 | Owner's Manual - Page 18
-DUAL You can select a second voice which will play in addition to the main voice when you play the keyboard. The second voice is known as the "dual" voice. 1 Press the [DUAL ON/OFF] button. The . For this example try selecting the "120 Vibraphone" voice. 18 DGX-530/YPG-535 Owner's Manual - Yamaha DGX-530 | Owner's Manual - Page 19
the left of the keyboard split point. Voice Number 2 Press and hold the [SPLIT ON/OFF] button for longer than a second. The split voice selection display will appear. Split voice selection display Hold for longer than a second The currently selected split voice DGX-530/YPG-535 Owner's Manual 19 - Yamaha DGX-530 | Owner's Manual - Page 20
Grand Piano" voice will be selected. NOTE • When you press the [PORTABLE GRAND] button all settings other than touch sensitivity are turned off. The dual and split voices will also be turned off, so only the Grand Piano voice will play over the entire keyboard. 20 DGX-530/YPG-535 Owner's Manual - Yamaha DGX-530 | Owner's Manual - Page 21
of sound effects on the keyboard. ◆ Sound Effect Selection keys do not have assigned sound effects, and will therefore produce no sound. For details on the instruments included in the SFX kit voices, see "SFX Kit 1" and "SFX Kit 2" in the "Drum Kit List" on page 129. DGX-530/YPG-535 Owner's Manual - Yamaha DGX-530 | Owner's Manual - Page 22
Q e uick Guid The Metronome The instrument includes a metronome with adjustable tempo and time signature. Play and set the tempo that is most comfortable the [TEMPO/TAP] button to call up the tempo setting. Tempo 2 Use the dial to select a tempo from 11 to 280. 22 DGX-530/YPG-535 Owner's Manual - Yamaha DGX-530 | Owner's Manual - Page 23
is playing, so these parameters cannot be changed while a style or song is playing. 4 Use the dial to select the beat length. Select the required length for each beat: 2, 4, 8, or 16 (half note, quarter note, eighth note, or 16th note). Select 8 for this example. DGX-530/YPG-535 Owner's Manual 23 - Yamaha DGX-530 | Owner's Manual - Page 24
The Metronome Adjusting the Metronome Volume 1 Press the [FUNCTION] button. 2 Use the CATEGORY [ ] and [ ] buttons to select the Metronome Volume item. f r 3 Use the dial to set the metronome volume as required. Metronome volume 24 DGX-530/YPG-535 Owner's Manual - Yamaha DGX-530 | Owner's Manual - Page 25
or after connecting a USB flash memory device containing the style file to the instrument. File transfer instructions can be found on page 104, and load instructions are provided on page will begin playing when you play a key to the left of the keyboard split point. DGX-530/YPG-535 Owner's Manual 25 - Yamaha DGX-530 | Owner's Manual - Page 26
... The area of the keyboard to the left of the keyboard split point can be changed as required: refer to page 79. Auto accompaniment region 3 Turn sync start on. Press the [SYNC START] button to turn the sync start function on. Flashes when sync start is on. 26 DGX-530/YPG-535 Owner's Manual - Yamaha DGX-530 | Owner's Manual - Page 27
accompaniment included in a style will start playing as soon as you play a note to left of the keyboard split point. Press the button a second time to turn the sync start function off. 4 Play a left accompaniment. Refer to "Pattern Variation (Sections)" on page 76. DGX-530/YPG-535 Owner's Manual 27 - Yamaha DGX-530 | Owner's Manual - Page 28
3 of "Play Along with a Style" on page 26. * The scores provided here are not standard song scores, but rather simplified scores that indicate which notes to play to produce the chord progressions. Split the auto accompaniment function will create a perfect ending. 28 DGX-530/YPG-535 Owner's Manual - Yamaha DGX-530 | Owner's Manual - Page 29
Recommended Style 148 Piano Boogie -3-chord boogie-woogie- Press the [INTRO/ENDING/rit.] button. C F C Playing Styles G F C Press the [INTRO/ENDING/ playing it through several times. When you're ready to stop playing press the [INTRO/ENDING/rit.] button. DGX-530/YPG-535 Owner's Manual 29 - Yamaha DGX-530 | Owner's Manual - Page 30
the corresponding keys ■Easy Chords This method lets you easily play chords in the accompaniment range of the keyboard using only one ) C(7#9) C(7b5) () () () () C7aug C7sus4 Csus2 () 30 DGX-530/YPG-535 Owner's Manual * Notes enclosed in parentheses ( ) are optional; the chords will - Yamaha DGX-530 | Owner's Manual - Page 31
from a computer or stored on a USB flash memory device connected to the instrument can be selected and used in the same way as the internal Song (Song numbers 36-). File transfer instructions are provided on page 104. The song highlighted here can be played DGX-530/YPG-535 Owner's Manual 31 - Yamaha DGX-530 | Owner's Manual - Page 32
deck or CD player, letting you fast forward [FF], rewind [REW] and pause [PAUSE] playback of the song. NOTE • When an A-B repeat range is specified the fast reverse and forward function will only work within . Press the [EXIT] button to return to the MAIN display. 32 DGX-530/YPG-535 Owner's Manual - Yamaha DGX-530 | Owner's Manual - Page 33
is copyrighted, are provided in the Song Book on the CD-ROM. The scores for songs 9-11 are provided in this manual. Some of the classic and/or traditional songs have been edited for length or for ease in learning, and may not be exactly the same as the original. DGX-530/YPG-535 Owner's Manual 33 - Yamaha DGX-530 | Owner's Manual - Page 34
Record (page 58) DGX-530/YPG-535 Song Storage locations Preset Songs (001-030) User Songs (031-035) The 30 songs built into the instrument. Song Computer Song Transfer (page 104) USB flash memory Song Connect (page 100) Flash Memory (036-) USB Song Song SMF conversion Save Play - Yamaha DGX-530 | Owner's Manual - Page 35
Chord Lyrics NOTE • No lyrics are shown in doublestaff. 3 Press the [START/STOP] button. The song will begin playing. The triangular will move across the top of the score to indicate the current location. 4 Press the [EXIT] button to return to the MAIN display. DGX-530/YPG-535 Owner's Manual 35 - Yamaha DGX-530 | Owner's Manual - Page 36
. Lyrics and chord display ■ Preset Songs That Can be Used For Lyrics Display Number 016 020 030 Name Mona Lisa (Jay Livingston and Ray Evans) Against all odds (Collins 0007403) Can't Help Falling In Love (George David Weiss, Hugo Peretti and Luigi Creatore) 36 DGX-530/YPG-535 Owner's Manual - Yamaha DGX-530 | Owner's Manual - Page 37
the selected song with one finger on the right-hand section of the keyboard, and play chords on the left-hand section of the keyboard using the Chord type. Split point Refer to page 46 for more information on using performance assistant technology to help you play. DGX-530/YPG-535 Owner's Manual 37 - Yamaha DGX-530 | Owner's Manual - Page 38
a Song? You know the normal meaning of this word, but in this instrument the term "Song" refers to the data that makes up a complete song. The performance assistant technology features uses the chord and melody data, and should always be used with a song (page 31). 38 DGX-530/YPG-535 Owner's Manual - Yamaha DGX-530 | Owner's Manual - Page 39
assistant technology Chord type. You can stop song playback at any time by pressing the [START/STOP] button. 6 Press the [P.A.T. ON/OFF] button to turn the performance assistant technology feature off. NOTE • The score for Ave Maria is provided on page 120. DGX-530/YPG-535 Owner's Manual 39 - Yamaha DGX-530 | Owner's Manual - Page 40
the dial. 3 Select a song. Press the [SONG] button, and the Song Select display appears. Select a song by using the dial. For this example try selecting the "011 Nocturne". Select Chord/Free NOTE • Using Songs (page 31) The song displayed here will be played. 40 DGX-530/YPG-535 Owner's Manual - Yamaha DGX-530 | Owner's Manual - Page 41
for the right-hand part in the display. You can stop song playback at any time by pressing the [START/STOP] button. NOTE • The score for Nocturne is provided on page 122. 6 Press the [P.A.T. ON/OFF] button to turn the performance assistant technology feature off. DGX-530/YPG-535 Owner's Manual 41 - Yamaha DGX-530 | Owner's Manual - Page 42
technology type appears. Select the Melody type by using the dial. 3 Select a song. Press the [SONG] button, and the Song Select display appears. Select a song by using the dial. Select Melody NOTE • Using Songs (page 31) The song displayed here will be played. 42 DGX-530/YPG-535 Owner's Manual - Yamaha DGX-530 | Owner's Manual - Page 43
the melody using only one finger thanks to the performance assistant technology Melody type! You can stop song playback at any time by pressing the [START/STOP] button. 6 Press the [P.A.T. ON/OFF] button to turn the performance assistant technology feature off. DGX-530/YPG-535 Owner's Manual 43 - Yamaha DGX-530 | Owner's Manual - Page 44
type appears. Select the Chord/Melody type by using the dial. 3 Select a song. Press the [SONG] button, and the Song Select display appears. Select a song by using the dial. Select Chord/Melody NOTE • Using Songs (page 31) The song displayed here will be played. 44 DGX-530/YPG-535 Owner's Manual - Yamaha DGX-530 | Owner's Manual - Page 45
along with the rhythm of the song melody with your right hand. You can play any keys as long as you're playing song playback at any time by pressing the [START/STOP] button. 6 Press the [P.A.T. ON/OFF] button to turn the performance assistant technology feature off. DGX-530/YPG-535 Owner's Manual - Yamaha DGX-530 | Owner's Manual - Page 46
to Play Piano Use the Performance Assistant to Play Like a Pro! Here are a few hints for using the Chord type. If you select Chord/Free or Chord/Melody, the left-hand section of the keyboard becomes other combination. Play 3 notes at once with your right hand. 46 DGX-530/YPG-535 Owner's Manual - Yamaha DGX-530 | Owner's Manual - Page 47
assistant technology. Songs downloaded from the Internet can also be used with the performance assistant technology as long as they include the required chord and/or melody data. See page 105 for instructions on how to transfer the songs to the instrument. DGX-530/YPG-535 Owner's Manual 47 - Yamaha DGX-530 | Owner's Manual - Page 48
uick Guid Select a Song For a Lesson Yamaha Education Suite You can select song you like and use it for a left-hand, right-hand, or both-hands lesson. You can also use songs (only SMF format 0) downloaded the correct notes at the correct timing along with the song. 48 DGX-530/YPG-535 Owner's Manual - Yamaha DGX-530 | Owner's Manual - Page 49
note shown in the display. The song will wait until you play the right note. 1 Select a song for your lesson. Press the [SONG] button, and rotate the dial to select the song you want to use for your Select L for left-hand lesson. Select LR for bothhands lesson. DGX-530/YPG-535 Owner's Manual 49 - Yamaha DGX-530 | Owner's Manual - Page 50
will move to the next key to be played. Playback will pause and wait for you to play the correct note. The triangular marker (▼) above the score indicates playback progress. ▼ Marker Left-hand part Right-hand part ● Marker (In the case of a right-hand lesson) 50 DGX-530/YPG-535 Owner's Manual - Yamaha DGX-530 | Owner's Manual - Page 51
keyboard range (DGX-530/YPG-535 = 88 keys) 61 keys of the keyboard's range are shown on the display. The DGX-530/ YPG-535 actually have 88 keys. In some songs that include very high or low notes, those notes may fall outside the displayed range and may not be shown on the display. In such cases - Yamaha DGX-530 | Owner's Manual - Page 52
move to indicate the current note in the song. Try to play the notes at the case of a right-hand lesson) 3 Stop the Lesson mode. You can stop the Lesson mode at any time by pressing the [START/ STOP] button. Once you've mastered Lesson 2, move on to Lesson 3. 52 DGX-530/YPG-535 Owner's Manual - Yamaha DGX-530 | Owner's Manual - Page 53
and keyboard marker in the display will indicate the notes to play. ▼ Marker Left-hand part Right-hand part ● Marker (In the case of a right-hand lesson) 3 Stop the Lesson mode. You can stop the Lesson mode at any time by pressing the [START/ STOP] button. DGX-530/YPG-535 Owner's Manual 53 - Yamaha DGX-530 | Owner's Manual - Page 54
change the number of measures the Repeat and learn function jumps back by pressing a number button [1]-[9] during repeat playback. e Jump back 4 measures and repeat playback Song playback direction q Oops! A mistake! w Press immediately 54 DGX-530/YPG-535 Owner's Manual - Yamaha DGX-530 | Owner's Manual - Page 55
that matches the image of the song you intend to play. For this example select the "158 Patrol". NOTE • Music Database (MDB) files transferred from a computer or stored on a USB flash memory device connected to style. 4 Press the [START/STOP] button to stop playback. DGX-530/YPG-535 Owner's Manual 55 - Yamaha DGX-530 | Owner's Manual - Page 56
Using the Easy Song Arranger 1 Press the [EASY SONG ARRANGER] button. The Song Select display will appear. The currently selected song name and number will be highlighted. 2 Select a Song. Use the dial to select the song you want to arrange. 56 DGX-530/YPG-535 Owner's Manual The currently selected - Yamaha DGX-530 | Owner's Manual - Page 57
change. When you have selected a suitable style move on to the next step while the song is still playing (if you have stopped the song, start it again by pressing the [START/STOP] button). 6 Select a voice part MELODY L is the melody part played by the left hand. DGX-530/YPG-535 Owner's Manual 57 - Yamaha DGX-530 | Owner's Manual - Page 58
for the five user songs if you record only to the style track. • User songs cannot display a score as is, but they can be converted to SMF (Standard MIDI File) format and stored to USB flash memory (page 96 and MELODY L is the melody part played by the left hand. 58 DGX-530/YPG-535 Owner's Manual - Yamaha DGX-530 | Owner's Manual - Page 59
From the MAIN display press the [SONG] button, then use the dial to select the user song number (031-035) you want to record to. Rotate the dial to select a song number between 031 and 035. 2 Select cannot be turned on or off while recording is in progress. DGX-530/YPG-535 Owner's Manual 59 - Yamaha DGX-530 | Owner's Manual - Page 60
number/name will be highlighted-use the dial to select the user song (031-035) you want to play. 3 Press the [START/STOP] button to start playback. ◆ To Save a User Song to USB flash memory ➔ page 95 ◆ To save a User Song to USB flash memory in SMF format ➔ page 96. 60 DGX-530/YPG-535 Owner's Manual - Yamaha DGX-530 | Owner's Manual - Page 61
the [-] button. 4 Press the [+] button to clear the song. The clear-in-progress message will appear briefly on the display while the song is being cleared. NOTE • To execute the Song Clear function press the [+] button. Press [-] to cancel the Song Clear operation. DGX-530/YPG-535 Owner's Manual 61 - Yamaha DGX-530 | Owner's Manual - Page 62
a User Song This function lets you delete a specified track from a user song. 1 From the MAIN display select the user song (031-035) you want to clear. 2 Press and hold the SONG MEMORY track press the [+] button. Press [-] to cancel the Track Clear operation. 62 DGX-530/YPG-535 Owner's Manual - Yamaha DGX-530 | Owner's Manual - Page 63
Volume, Song Volume, Metronome Volume, Grade, Demo Cancel, key on the keyboard and the three highest black keys. CAUTION • When you execute the Flash Clear operation, data you have purchased will also be cleared. Be sure to save data you want to keep to a computer. DGX-530/YPG-535 Owner's Manual - Yamaha DGX-530 | Owner's Manual - Page 64
lower the volume. Rotate clockwise to increase the volume. 1 Press a button to select a basic function. Select a song you want to listen to or a song you want to use for a lesson. Select an auto-accompaniment style. Select a voice you want to play on the keyboard. 64 DGX-530/YPG-535 Owner's Manual - Yamaha DGX-530 | Owner's Manual - Page 65
used to directly enter a song number or parameter value. Hundreds or tens digits that are "0" can be omitted (see below). Example: Song number "003" can be entered pressing the [SONG] or [STYLE] button to start playback of the selected song or style (rhythm). DGX-530/YPG-535 Owner's Manual 65 - Yamaha DGX-530 | Owner's Manual - Page 66
button can be pressed and held for longer than a second to call up a related function. This provides convenient direct access to a range of functions. 66 DGX-530/YPG-535 Owner's Manual f r - Yamaha DGX-530 | Owner's Manual - Page 67
number. Song Track Status song recording. The track(s) selected for recording are highlighted during user-song recording. Only tracks that contain data are displayed. A border appears around a selected track that contains data. No border appears around a Muted track. DGX-530/YPG-535 Owner's Manual - Yamaha DGX-530 | Owner's Manual - Page 68
type 01 to 05 Press the right-hand keys while playing chords in the auto accompaniment range of the keyboard when the Auto Accompaniment is on (page 26). • Harmony type 06 to 12 (Trill) 68 DGX-530/YPG-535 Owner's Manual Hold down two keys. • Harmony type 13 to 19 (Tremolo) • Harmony type - Yamaha DGX-530 | Owner's Manual - Page 69
Use the dial to select a reverb type. You can check how the selected reverb type sounds by playing on the keyboard. 2 Use the CATEGORY [ ] and [ ] buttons to select the Reverb Type item. Reverb Type item f r to the main, dual, and split voices. (See page 90). DGX-530/YPG-535 Owner's Manual 69 - Yamaha DGX-530 | Owner's Manual - Page 70
keyboard. f r 2 Use the CATEGORY [ ] and [ ] buttons to select the Chorus Type item. Chorus Type item Selected chorus type. ● Adjusting the Chorus Level You can individually adjust the amount of chorus that is applied to the main, dual, and split voices. (See page 90). 70 DGX-530/YPG-535 Owner - Yamaha DGX-530 | Owner's Manual - Page 71
to lower the pitch. If you use this feature with a voice such as the "045 Overdriven" guitar voice (page 17), you can produce remarkably realistic string-bending effects. You can change the amount of pitch bend produced by the wheel, as described on page 90. DGX-530/YPG-535 Owner's Manual 71 - Yamaha DGX-530 | Owner's Manual - Page 72
response to keyboard dynamics -i.e. keys. NOTE • The initial default touch sensitivity setting is "2". 2 Use the CATEGORY [ ] and [ ] buttons to select the Touch Sensitivity item. The currently selected touch sensitivity will be displayed. Touch Sensitivity item 72 DGX-530/YPG-535 Owner's Manual - Yamaha DGX-530 | Owner's Manual - Page 73
keyboard voice than you played in step 3. Watch the display while changing songs and you will see that different voices are selected for each song. If you have stopped playback at some point during this procedure press the [START/STOP] button to start playback again. DGX-530/YPG-535 Owner's Manual - Yamaha DGX-530 | Owner's Manual - Page 74
3 Use the dial to select the desired Master EQ setting. Five settings are available: 1-5. Settings 1 and 2 are best for listening via the instrument's built-in speakers, setting 3 is for headphones, and settings 4 and 5 are ideal for listening via external speakers. 74 DGX-530/YPG-535 Owner's Manual - Yamaha DGX-530 | Owner's Manual - Page 75
Handy Performance Features Pitch Controls ◆ Large Pitch Changes (Transpose) The overall pitch of the instrument can by shifted up or down by a maximum of set the tuning value between -100 and +100 as required. NOTE • The pitch of Drum Kits voices cannot be changed. DGX-530/YPG-535 Owner's Manual 75 - Yamaha DGX-530 | Owner's Manual - Page 76
automatically added before changing to section A or B. ● ENDING section This is used for the ending of the Song. When the ending is finished, the auto accompaniment stops automatically. The length of the ending (in measures) differs depending on the selected Style. 76 DGX-530/YPG-535 Owner's Manual - Yamaha DGX-530 | Owner's Manual - Page 77
Start When the synchro start standby mode is engaged, style playback will begin as soon as you play a chord in the accompaniment range of the keyboard. You can disengage the synchro-start standby mode by pressing the [SYNC START] button again. Accompaniment range DGX-530/YPG-535 Owner's Manual 77 - Yamaha DGX-530 | Owner's Manual - Page 78
● Synchro Stop When this function is selected the accompaniment style will only play while you are playing chords in the accompaniment range of the keyboard. Style playback will stop when you release the keys. To turn the function on, press the [SYNC STOP] button. 78 DGX-530/YPG-535 Owner's Manual - Yamaha DGX-530 | Owner's Manual - Page 79
point to any key from 000 (C-2) through song lesson. • The split voice sounds when the split-point key is played. NOTE • You can also access the Split Point item by pressing the [FUNCTION] button and using the CATEGORY [ ] and [ ] buttons to locate the item (page 89). DGX-530/YPG-535 Owner's Manual - Yamaha DGX-530 | Owner's Manual - Page 80
and Synchro Start is off, you can play chords in the left-hand accompaniment range of the keyboard while the style is stopped and still hear the accompaniment chords. This is "Stop Accompaniment", and f r 3 Use the dial to set the style volume between 000 and 127. 80 DGX-530/YPG-535 Owner's Manual - Yamaha DGX-530 | Owner's Manual - Page 81
lowest note results in "inversions"). The root is the central sound of the chord, which supports and anchors the other chord notes. The distance (interval) between adjacent notes of a triad chord Flatted 5 th Minor 7 th chord Flatted 7 th Suspended 4 th chord DGX-530/YPG-535 Owner's Manual 81 - Yamaha DGX-530 | Owner's Manual - Page 82
shown in the Dictionary function. NOTE • Notes in parentheses can be omitted. • Playing two same root keys in the adjacent octaves produces accompaniment based only on the root. • A perfect fifth (1 + 5) will produce a chord based on the previously played chord. 82 DGX-530/YPG-535 Owner's Manual - Yamaha DGX-530 | Owner's Manual - Page 83
the keyboard, allowing for even more dynamic style performance. In this mode only chords played in the normal way (page 30) can be detected. 1 Press the [CHORD FINGERING] button to select the function "Chord Fingering". 2 Use the dial to select 2 "FullKeyboard". DGX-530/YPG-535 Owner's Manual 83 - Yamaha DGX-530 | Owner's Manual - Page 84
) key in the section of the keyboard labeled keyboard, checking the indications in the display. When you've played the chord properly, a bell sound signals your success and the chord name in the display flash. Press the [EXIT] button to return to the MAIN display. 84 DGX-530/YPG-535 Owner's Manual - Yamaha DGX-530 | Owner's Manual - Page 85
section you want to repeat (the "A" point). 3 The specified A-B section of the song will now play repeatedly. You can stop repeat playback at any time by pressing the [A-B REPEAT of the song press the [A-B REPEAT] button before starting playback of the song. DGX-530/YPG-535 Owner's Manual 85 - Yamaha DGX-530 | Owner's Manual - Page 86
in the display disappears when that track is muted. Refer to page 58 for information about the song track configuration. No track number ... no data. Track number without border ... track contains VOICE SELECT MELODY R and MELODY L. Hold for longer than a second 86 DGX-530/YPG-535 Owner's Manual - Yamaha DGX-530 | Owner's Manual - Page 87
NOTE • Data cannot be saved to the registration memory during song playback. Bank number NOTE • You can also save your panel settings memorized to registration memory button into USB flash memory as the user file or to a , otherwise the data may be damaged or lost. DGX-530/YPG-535 Owner's Manual 87 - Yamaha DGX-530 | Owner's Manual - Page 88
, Pitch Bend Range * Style settings are not available for Registration Memory when using the Song features. You can check whether the panel settings are stored in registration memory 1 or 2 by to recall. The panel controls will be instantly set accordingly. 88 DGX-530/YPG-535 Owner's Manual - Yamaha DGX-530 | Owner's Manual - Page 89
[-] buttons are used to make ON/ OFF type settings: [+] = ON, [-] = OFF. In some cases the [+] button will initiate execution of the selected function, and the [-] will cancel the selection. Direct numeric described in the "Initialization" section on page 63. DGX-530/YPG-535 Owner's Manual 89 - Yamaha DGX-530 | Owner's Manual - Page 90
Determines the highest key for the Split voice and sets the Split "point"-in other words, the key that separates the split point are detected. In the Full Keyboard mode normal chords played anywhere on the keyboard will be detected, and the notes situations. 90 DGX-530/YPG-535 Owner's Manual - Yamaha DGX-530 | Owner's Manual - Page 91
/OFF MIDI Keyboard Out Style Out ON/OFF ON/OFF Song Out guide track number for your left hand lesson. The setting is only effective for songs in SMF format 0 transferred from a computer. Determines whether the Grade function is on or off. Determines whether Demo DGX-530/YPG-535 Owner's Manual 91 - Yamaha DGX-530 | Owner's Manual - Page 92
for an explanation of each message. 92 DGX-530/YPG-535 Owner's Manual You can go to the FILE CONTROL display from which you can access USB flash memory operations by pressing the [MENU] button from this display. (Do not press this button now, but only when instructed to in the sections below.) Menu - Yamaha DGX-530 | Owner's Manual - Page 93
operations) or is mounting the USB storage device (shortly after the connection), do NOT unplug the USB connector, do NOT remove the media from the device, and do NOT turn the power off to either device. Doing so may corrupt the data on either or both devices. DGX-530/YPG-535 Owner's Manual 93 - Yamaha DGX-530 | Owner's Manual - Page 94
the operation has finished. Press the [EXIT] button to return to the MAIN display. NOTE • If the USB flash memory has been write-protected, an appropriate message will appear on the display and you will not be press the [-] button at this point to cancel the operation. 94 DGX-530/YPG-535 Owner's Manual - Yamaha DGX-530 | Owner's Manual - Page 95
, or the [+] button, and the save operation will begin. The user song will be stored to the USER FILE folder in the USB flash memory. CAUTION • Once the save-in-progress message appears on the the save operation will depend on the condition of the USB flash memory. DGX-530/YPG-535 Owner's Manual 95 - Yamaha DGX-530 | Owner's Manual - Page 96
song (song numbers 031-035) to SMF Format 0 and saves the file to USB flash memory. ● What is SMF (Standard MIDI File)? The SMF (Standard MIDI converted song file. 96 DGX-530/YPG-535 Owner's Manual f r ● To Overwrite an Existing File If you want to overwrite a file that already exists on the USB flash - Yamaha DGX-530 | Owner's Manual - Page 97
the display the operation cannot be canceled. Never turn off the power or remove the USB flash memory during this operation. 7 A message will appear on the display to inform you that the operation has finished. Press the [EXIT] button to return to the MAIN display. DGX-530/YPG-535 Owner's Manual 97 - Yamaha DGX-530 | Owner's Manual - Page 98
and [-] buttons simultaneously to select the first song or user file on the USB flash memory. 5 Press the [EXECUTE] button. USB flash memory has been write-protected, an appropriate message will appear on the display and you will not be able to execute the operation. 98 DGX-530/YPG-535 Owner's Manual - Yamaha DGX-530 | Owner's Manual - Page 99
the dial to select the file you want to play: Song numbers 36 and higher, or Music Database numbers 301 and higher. 4 Play the selected file in the same way the internal files are played: press the [START/STOP] button, or play on the keyboard. Using USB Flash Memory DGX-530/YPG-535 Owner's Manual 99 - Yamaha DGX-530 | Owner's Manual - Page 100
USB storage devices. Refer to "Precautions when using the USB TO DEVICE terminal" section on page 93. w USB TO HOST terminal This terminal allows direct connection to a personal computer. Refer to "Connecting a Personal Computer" on page 101 for more information. 100 DGX-530/YPG-535 Owner's Manual - Yamaha DGX-530 | Owner's Manual - Page 101
back a song, etc.) • While a USB device is connected to the instrument, you should wait for six seconds or more between these operations: (1) when turning the power of the instrument off then on again, or (2) when alternately connecting/disconnecting the USB cable. USB cable DGX-530/YPG-535 Owner - Yamaha DGX-530 | Owner's Manual - Page 102
is being received from an external device, the song, style, and metronome functions will not start. 2 Use the CATEGORY [ ] and [ ] buttons to select the item you want to change its value. f r 1 Press the [FUNCTION] button. 3 Use the dial to select ON or OFF. 102 DGX-530/YPG-535 Owner's Manual - Yamaha DGX-530 | Owner's Manual - Page 103
A#-1) and press the appropriate key (shown below). NOTE • Remote control of MIDI devices will function independently of the PC2 mode. A#-1 A-1 C7: Fast forward B6: Start A6: Stop G6: Rewind F6: Top (move to the beginning of the song) E6: Metronome ON/OFF DGX-530/YPG-535 Owner's Manual 103 - Yamaha DGX-530 | Owner's Manual - Page 104
an example. ● Backup file can be transferred from the instrument to a computer and back. ⇒ refer to the procedure described on page 106. Use the Musicsoft Downloader application with Internet Explorer 5.5 or higher. 104 DGX-530/YPG-535 Owner's Manual - Yamaha DGX-530 | Owner's Manual - Page 105
FILES folder on the USB flash memory device- cannot be deleted via the instrument's file control display. Use the Musicsoft Downloader delete button to delete such files. w Double-click "SampleData" Folder → "SongData" Folder, and click a song file. e Click "Open" DGX-530/YPG-535 Owner's Manual 105 - Yamaha DGX-530 | Owner's Manual - Page 106
User Songs stored on the instrument, to a computer. If you click "Electronic Musical Instruments" in the Musicsoft Downloader parts. 1 Press the [SONG] button and select the song (036-) residing in flash memory for which you want to set the guide track. 2 Press the DGX-530/YPG-535 Owner's Manual - Yamaha DGX-530 | Owner's Manual - Page 107
Guide SPECIAL NOTICES • The software and this manual are the exclusive copyrights of Yamaha Corporation. • Use of the software and this manual software. Please refer to page 109 for software installation instructions. CAUTION • Do not attempt to play this CD- DGX-530/YPG-535 Owner's Manual 107 - Yamaha DGX-530 | Owner's Manual - Page 108
101. 5 Install the software. Musicsoft Downloader: See page 111. 6 Launch the software. For further software operation refer to the online help supplied with the software. Refer to the "Troubleshooting" on page 112 when you have trouble with installing the driver. 108 DGX-530/YPG-535 Owner's Manual - Yamaha DGX-530 | Owner's Manual - Page 109
Accessory CD-ROM Installation Guide System Requirements Application/Data Musicsoft Downloader USB Driver for Windows 2000/XP USB Driver for Windows Vista/XP x64 Digital Music Notebook Digital directory of the CDROM drive will be D:\ , E:\ , or Q:\ , respectively. DGX-530/YPG-535 Owner's Manual 109 - Yamaha DGX-530 | Owner's Manual - Page 110
Troubleshooting" in the "Accessory CD-ROM Installation Guide" section of the Owner's Manual. 5 Select the radio button for "Search for a suitable driver Restart the computer. The USB-MIDI driver installation is complete. 110 DGX-530/YPG-535 Owner's Manual Installing the driver in Windows XP 1 Start - Yamaha DGX-530 | Owner's Manual - Page 111
the latest version of the Musicsoft Downloader at the following Internet URL. http://music.yamaha.com/download/ IMPORTANT • Only Musicsoft Downloader can be used to transfer files between this instrument and a computer. No other file transfer application can be used. DGX-530/YPG-535 Owner's Manual 111 - Yamaha DGX-530 | Owner's Manual - Page 112
you using the latest USB-MIDI driver? The latest driver can be downloaded from the following web site. http://music.yamaha.com/download/ Playback response is delayed file and launch "uninstall.exe." file. Follow the on-screen instructions to uninstall the driver. 112 DGX-530/YPG-535 Owner's Manual - Yamaha DGX-530 | Owner's Manual - Page 113
Account Control" window appears, click [Continue]. 6 A message asking you to restart your computer in order to complete the uninstall procedure will appear. Driver removal will be complete when you have restarted your computer. Accessory CD-ROM Installation Guide DGX-530/YPG-535 Owner's Manual 113 - Yamaha DGX-530 | Owner's Manual - Page 114
actual sound of the voice may be slightly different from note to note. The Demo display is shown in Japanese, and/or there are Japanese characters in the display messages. Make sure the Language setting in the FUNCTION display is set to English. (See page 16) 114 DGX-530/YPG-535 Owner's Manual - Yamaha DGX-530 | Owner's Manual - Page 115
upper area of the MAIN display and the USB device does not respond. Communication with the USB device has been shut down because of the overcurrent to the USB device. Disconnect the device from the USB TO DEVICE terminal, then turn on the power of the instrument. DGX-530/YPG-535 Owner's Manual 115 - Yamaha DGX-530 | Owner's Manual - Page 116
turn the power off while writing. Doing so may result in data loss. Communication with the USB device has been shut down because of the overcurrent to the USB device. Disconnect the device from the USB TO DEVICE terminal, then turn on the power of the instrument. 116 DGX-530/YPG-535 Owner's Manual - Yamaha DGX-530 | Owner's Manual - Page 117
." The media is not formatted. "The media is write-protected." "The song data is too large to be converted to notation." There are too many . Displayed while rewriting the file name in the Musicsoft Downloader. Confirms whether saving is executed or not. Displayed DGX-530/YPG-535 Owner's Manual 117 - Yamaha DGX-530 | Owner's Manual - Page 118
Scores This demo is an example of how the Easy Song Arranger can be used to change styles throughout a piece. Song No. 9 q =123 Hallelujah Chorus (Function Demo for Easy Song Arranger) 118 DGX-530/YPG-535 Owner's Manual - Yamaha DGX-530 | Owner's Manual - Page 119
Scores DGX-530/YPG-535 Owner's Manual 119 - Yamaha DGX-530 | Owner's Manual - Page 120
assistant technology feature, the part will be corrected and played so that it matches the backing part. Song No. 10 q =61 Ave Maria (Function Demo for performance assistant technology) P.A.T. Type =CHORD Your Turn. Repeatedly Play the Same Key. 120 DGX-530/YPG-535 Owner's Manual - Yamaha DGX-530 | Owner's Manual - Page 121
Scores DGX-530/YPG-535 Owner's Manual 121 - Yamaha DGX-530 | Owner's Manual - Page 122
These Notes" part using the performance assistant technology feature, the part will be corrected and played so that it matches the backing part. Song No. 11 q =108 Nocturne op.9-2 (Function Demo for performance assistant technology) P.A.T. Type =CHORD/FREE 122 DGX-530/YPG-535 Owner's Manual - Yamaha DGX-530 | Owner's Manual - Page 123
Scores DGX-530/YPG-535 Owner's Manual 123 - Yamaha DGX-530 | Owner's Manual - Page 124
PIANO 001 000 113 001 Live! Grand Piano 002 000 114 001 Live! Warm Grand Piano 003 000 112 001 Grand Piano 004 000 112 002 Bright Piano 005 000 112 007 Harpsichord 006 000 112 004 Honky-tonk Piano 007 000 112 003 MIDI Grand Piano 008 000 113 003 CP 80 E.PIANO DGX-530/YPG-535 Owner's Manual - Yamaha DGX-530 | Owner's Manual - Page 125
127 000 017 Rock Kit 132 127 000 025 Electronic Kit 133 127 000 026 Analog Kit 134 127 MIDI Voice No. MSB (0-127) LSB (0-127) Program Change# (1-128) Voice Name XG PIANO 140 000 000 001 Grand Piano 141 000 001 001 Grand Piano KSP 142 000 040 001 Piano DGX-530/YPG-535 Owner's Manual 125 - Yamaha DGX-530 | Owner's Manual - Page 126
MIDI Voice No. MSB (0-127) LSB (0-127) Program Change# (1-128) Voice Name 228 000 040 029 Funk Guitar 229 000 041 029 Muted Steel Guitar 230 032 053 Mellow Choir 126 DGX-530/YPG-535 Owner's Manual Bank Select MIDI Voice No. MSB (0- Sawtooth 353 000 019 082 Digital Sawtooth 354 000 020 - Yamaha DGX-530 | Owner's Manual - Page 127
398 000 040 100 Nylon Electric Piano 399 000 064 100 Nylon 097 113 Altair Voice List Bank Select MIDI Voice No. MSB (0-127) LSB (0- Analog Tom 450 000 065 119 Electronic Percussion 451 000 000 120 Slap 463 064 000 017 Flute Key Click 464 064 000 033 Shower DGX-530/YPG-535 Owner's Manual 127 - Yamaha DGX-530 | Owner's Manual - Page 128
PC (1-128) 127/000/001 Keyboard MIDI Key Alternate Note# Note Note# Note G 1 Floor Tom H 56 G# 2 44 G# 1 1 Hi-Hat Pedal 57 A 2 45 A 1 Low Tom 58 A# 2 46 A# 1 6 86 D 5 99 D# 6 87 D# 5 100 E 6 88 E 5 101 F 6 89 F 5 102 F# 6 90 F# /025 Electronic Kit 133 DGX-530/YPG-535 Owner's Manual - Yamaha DGX-530 | Owner's Manual - Page 129
127/000/033 Keyboard Note# Note MIDI Note# Note Key Alternate Off assign Standard Tom Jazz 2 56 G# 2 44 G# 1 1 Hi-Hat Pedal Hi-Hat Closed Analog 4 57 A 2 45 A 1 Low 5 98 D 6 86 D 5 99 D# 6 87 D# 5 100 E 6 88 E 5 101 F 6 89 F 5 102 F# 6 90 F# 5 103 G DGX-530/YPG-535 Owner's Manual 129 - Yamaha DGX-530 | Owner's Manual - Page 130
HipHopPop DISCO 70'sDisco1 70'sDisco2 LatinDisco DiscoPhilly SaturdayNight DiscoChocolate DiscoHands 130 DGX-530/YPG-535 Owner's Manual Style No. 59 60 61 62 63 64 65 66 67 68 69 70 71 72 73 74 75 76 77 78 79 80 81 82 83 84 85 86 87 88 89 - Yamaha DGX-530 | Owner's Manual - Page 131
ToLoveMe 83 YouKnow 84 Evrythng 85 EyesOfBl 86 Hello 87 BeThere 88 FlyAway 89 LoveYou 90 NeverLet 91 JustOnce 92 IfYouGo 93 225 Nabucco 226 Standing 227 SummerPl 228 Christms 229 Favorite 230 Tubbie 231 Turkish 232 12OClock WALTZ & TRADITIONAL 233 Blk& 300 ZipperD DGX-530/YPG-535 Owner's Manual 131 - Yamaha DGX-530 | Owner's Manual - Page 132
mid 067Cucko.mid 068Augus.mid 069Londo.mid 070Three.mid Song Name Danse des Mirlitons from "The Nutcracker" " 114 Canon in D Der Vogelfänger Bin Ich Ja "Die Zauberflöte" Piano Sonate No.14 op.27-2 "Mondschein" The "Surprise" Symphony No.94 Traditional Traditional 132 DGX-530/YPG-535 Owner's Manual - Yamaha DGX-530 | Owner's Manual - Page 133
when chords are played in the auto accompaniment range of the keyboard. These Harmony types will also work when playing songs that contain chord data. Types 6-26 are rhythm-based effects and three-phase modulation with a slight metallic sound. No effect. DGX-530/YPG-535 Owner's Manual 133 - Yamaha DGX-530 | Owner's Manual - Page 134
Chart 134 DGX-530/YPG-535 Owner's Manual YAMAHA [ Portable Grand ] Model DGX-530/YPG-535 MIDI Implementation Chart - 127 0 - 127 Velocity Note ON Note OFF o 9nH,v=1-127 x 9nH,v=0 o 9nH,v=1-127 x After Key's x x Touch Ch's x x Pitch Bend o 0-24 semi o 0-24 semi Control Change 0,32 o - Yamaha DGX-530 | Owner's Manual - Page 135
MIDI Implementation Chart DGX-530/YPG-535 Owner's Manual 135 Prog Change : True # o 0 - 127 System Exclusive o : Song Pos. x Common : Song Sel. x : Tune x System : Clock o Real Time: Commands o Aux :All Sound OFF x :Reset All Cntrls x :Local ON/OFF x :All Notes OFF x Mes- :Active - Yamaha DGX-530 | Owner's Manual - Page 136
the panel voices or panel settings. However, the MIDI messages listed below do affect the panel voices, auto accompaniment, and songs. • MIDI Master Tuning • System exclusive messages for changing the Reverb Flanger (03)Flanger1 (04)Flanger2 068...127 No Effect 136 DGX-530/YPG-535 Owner's Manual - Yamaha DGX-530 | Owner's Manual - Page 137
services based on the use of the SOFTWARE without permission by Yamaha Corporation. Copyrighted data, including but not limited to MIDI data for songs the SOFTWARE may not be removed nor may the electronic watermark be modified without permission of the Yamaha. DGX-530/YPG-535 Owner's Manual 137 - Yamaha DGX-530 | Owner's Manual - Page 138
for your own use of any part of the Documentation provided in electronic form. You shall not make or permit any third party to make graphics files and print files, for any purpose, except for creating MIDI files (if permitted by the Software) for private non-commercial use DGX-530/YPG-535 Owner's Manual - Yamaha DGX-530 | Owner's Manual - Page 139
88-key box type (A-1-C7), with Touch Response. Display • 320 x 240 dots LCD display (backlit) Setup • STANDBY/ON • MASTER VOLUME: MIN-MAX • LCD CONTRAST Panel Controls • SONG, VOICE, STYLE, EASY SONG ARRANGER, P.A.T. ON/OFF, LESSON L, LESSON R, LESSON START, METRONOME ON/OFF, PORTABLE GRAND, DEMO - Yamaha DGX-530 | Owner's Manual - Page 140
PORTABLE GRAND 14, 20 REC, 1-5, A 14, 58 REGIST MEMORY 14, 87 REPEAT & LEARN 14, 54 REW 14, 32 SCORE 14, 35 SONG 14, 31 SONG MEMORY 89 Delete (File Control 98 Delete (Song Track 62 Delete (User Song 61 Demo 33 Demo Cancel 91 Display 66-67 Double-Staff DGX-530/YPG-535 Owner's Manual - Yamaha DGX-530 | Owner's Manual - Page 141
Response 72 Touch Sensitivity 72 Track 58 Track Clear 62 Transfer 102, 104 Transpose 75 Troubleshooting 112, 114 Tuning 75 U USB-MIDI Driver 110-111 User file 95, 97 User File Save 95 User Song 34, 58 V Voice 17 Voice List 124 X XF 6, 36 XGlite 6 DGX-530/YPG-535 Owner's Manual 141 - Yamaha DGX-530 | Owner's Manual - Page 142
have purchased in the spaces provided below. Model Serial Sales Slip Purchased from Date Retailer) YAMAHA CORPORATION OF AMERICA Electronic Service Division 6600 Orangethorpe Avenue Buena Park, CA 90620 KEEP THIS DOCUMENT FOR YOUR RECORDS. DO NOT MAIL! 142 DGX-530/YPG-535 Owner's Manual - Yamaha DGX-530 | Owner's Manual - Page 143
CANADA Yamaha Canada Music Ltd. 135 Milner Avenue, Scarborough, Ontario, M1S 3R1, Canada Tel: 416-298-1311 U.S.A. Yamaha Yamaha Musica Italia S.P.A. Viale Italia 88, 20020 Lainate (Milano), Italy Tel: 02-935-771 SPAIN/PORTUGAL Yamaha 'S REPUBLIC OF CHINA Yamaha Music & Electronics (China) Co.,Ltd - Yamaha DGX-530 | Owner's Manual - Page 144
Yamaha Home Keyboards Home Page (English Only) http://music.yamaha.com/homekeyboard Yamaha Manual Library http://www.yamaha.co.jp/manual/ U.R.G., Pro Audio & Digital Musical Instrument Division, Yamaha Corporation © 2007 Yamaha Corporation WM36660 XXXPOXXX.X-01A0 Printed in China
-
 1
1 -
 2
2 -
 3
3 -
 4
4 -
 5
5 -
 6
6 -
 7
7 -
8
-
9
-
10
-
11
-
12
-
13
-
14
-
15
-
16
-
17
-
18
-
19
-
20
-
21
-
22
-
23
-
24
-
25
-
26
-
27
-
28
-
29
-
30
-
31
-
32
-
33
-
34
-
35
-
36
-
37
-
38
-
39
-
40
-
41
-
42
-
43
-
44
-
45
-
46
-
47
-
48
-
49
-
50
-
51
-
52
-
53
-
54
-
55
-
56
-
57
-
58
-
59
-
60
-
61
-
62
-
63
-
64
-
65
-
66
-
67
-
68
-
69
-
70
-
71
-
72
-
73
-
74
-
75
-
76
-
77
-
78
-
79
-
80
-
81
-
82
-
83
-
84
-
85
-
86
-
87
-
88
-
89
-
90
-
91
-
92
-
93
-
94
-
95
-
96
-
97
-
98
-
99
-
100
-
101
-
102
-
103
-
104
-
105
-
106
-
107
-
108
-
109
-
110
-
111
-
112
-
113
-
114
-
115
-
116
-
117
-
118
-
119
-
120
-
121
-
122
-
123
-
124
-
125
-
126
-
127
-
128
-
129
-
130
-
131
-
132
-
133
-
134
-
135
-
136
-
137
-
138
-
139
-
140
-
141
-
142
-
143
-
144
 |
 |

Owner’s Manual
EN
Keyboard Stand Assembly
For information on assembling the
keyboard stand, refer to the instructions
on
page 10
of this manual.