Yamaha SY85 Owner's Manual (getting Started) (image) - Page 58
RECORDING AN ORIGINAL PATTERN - REAL TIME, Select a Pattern Number, Set the Pattern Record
 |
View all Yamaha SY85 manuals
Add to My Manuals
Save this manual to your list of manuals |
Page 58 highlights
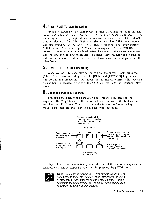
q RECORDING AN ORIGINAL PATTERN - REAL TIME 1. Select a Pattern Number In the PATTERN mode, select the number of the pattern you want to edit or record. Optional Clear the Current Pattern. k l If you want to record a totally new pattern from scratch, clear the existing pattern: press the SUB MODE [JOB] key, use the PAGE [ ] and [ ] keys to locate the "PTN JOB Clear Pattern" screen. PTN`JOB`Clear`Pattern`````ptn PTN]`ALL``KEY``I00w`````````` Press [F1] so that the square brackets appear around "PTN" on the display. This means that you want to clear a single pattern. If necessary, use [CS6]. to select the pattern you want to clear, then press [ENTER/YES]. PTN`JOB`Clear`Pattern`````Are`you`sure`? [PTN]`ALL``KEY``I00w`````````` Respond to this "Are you sure ?" display by pressing [ENTER/YES] again if you want to go ahead and clear the pattern, or press [EXIT/NO] to cancel the operation. 2. Set the Pattern Record Parameters 2-1 Engage the Record Mode. Press the sequencer [RECORD] key to engage the record standby mode. The red [RECORD] indicator will light. PATTERN`RECORD`Meas`Tempo`Time`Qntz`Vel` `REAL``PTN=I00````1``120``4/`4``1/4`norm 2-2 Select a Record Mode. Use [CS1] to select the desired record mode. The different record modes are: q REAL (Real-time Overdub) Material recorded in the overdub mode is recorded "over" any previous material, so you end up with a combination of the previous and newlyrecorded data. 56 5. The Sequencer
-
 1
1 -
2
-
3
-
4
-
5
-
6
-
7
-
8
-
9
-
10
-
11
-
12
-
13
-
14
-
15
-
16
-
17
-
18
-
19
-
20
-
21
-
22
-
23
-
24
-
25
-
26
-
27
-
28
-
29
-
30
-
31
-
32
-
33
-
34
-
35
-
36
-
37
-
38
-
39
-
40
-
41
-
42
-
43
-
44
-
45
-
46
-
47
-
48
-
49
-
50
-
51
-
52
-
 53
53 -
 54
54 -
 55
55 -
 56
56 -
 57
57 -
 58
58 -
 59
59 -
 60
60 -
 61
61 -
 62
62 -
 63
63 -
64
-
65
-
66
-
67
-
68
-
69
-
70
-
71
 |
 |
