Zenith H20H52DT Operating Guide - Page 14
Installer Remote Key Functions
 |
View all Zenith H20H52DT manuals
Add to My Manuals
Save this manual to your list of manuals |
Page 14 highlights
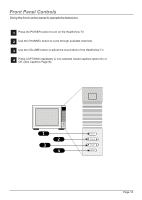
Installer Remote Key Functions A quick list of the keys on the optional HP602 installer's remote and what they do. POWER Turns TV On or Off. CC (CLOSED CAPTIONING) Press to access closed captions. Press ENTER to exit. TV/FM Selects TV or Radio on TVs equipped with FM radio. VOLUME LEFT/RIGHT Adjusts the sound levels. ENTER Press to view the Channel/Time display or to remove any on-screen display or menu. TIMER Press repeatedly to adjust TV turn-off time up to 4-hours. Use to pick AM/PM in Clock menu. MENU/SELECT/ADJ (ADJUST) Press MENU repeatedly to scroll through either the Installer, or User menus. Use SELECT to choose an option and ADJ (adjust) to change the selected option. POWER TV/FM FLSHBK MUTE CC VOLUME + - CHANNEL -+ 1 2 3 4 5 6 7 8 9 0 ENTER BED 1 BED 2 TIMER MENU BANK SELECT CH PREVIEW ADJ ADJ 124-213-06 remote control part number HP602 FLASHBK (FLASHBACK) Return to the last channel viewed. MUTE Turns sound Off and On, while the picture remains. CHANNEL (UP/DOWN) Tunes to next available channel. NUMBER KEYPAD Selects channels directly and enters numeric values for some options. BED 1/BED 2 (*See Note Below) Determines the code set transmitted, Bed 1 or Bed 2. Switch setting must correspond to item 27, HOSPITAL MODE setting in the TV's Installer Menu. BANK Press and repeat to select a Channel Memory Bank - - 1, 2, 3, or 4 (standby). CHANNEL PREVIEW Gives installer access to the patient's menus. Displays the available TV channels and patient's Parental Control menu. *Note: Bed 1 - Bed 2 switch on installer/patient remote. The position of the Bed 1 - Bed 2 switch must correspond to the setting in the Installer's menu. The switch above can be set by sliding it to the Bed 1 or Bed 2 position. On the patients' remote, the Bed 1 or Bed 2 position can be selected by using a paper clip or a ball-point pen to slide the switch to the correct position. Left position = Bed 1. Right Position = Bed 2. Page 14
-
 1
1 -
2
-
3
-
4
-
5
-
6
-
7
-
8
-
 9
9 -
 10
10 -
 11
11 -
 12
12 -
 13
13 -
 14
14 -
 15
15 -
 16
16 -
 17
17 -
 18
18 -
 19
19 -
20
-
21
-
22
-
23
-
24
-
25
-
26
-
27
-
28
-
29
-
30
-
31
-
32
-
33
-
34
-
35
-
36
-
37
-
38
-
39
-
40
-
41
-
42
-
43
-
44
-
45
-
46
-
47
-
48
-
49
-
50
-
51
-
52
 |
 |
