Acer AcerPower Sd Power Sd User Guide - Page 84
assigns resources to the newly-installed devices., When you turn on the computer
 |
View all Acer AcerPower Sd manuals
Add to My Manuals
Save this manual to your list of manuals |
Page 84 highlights
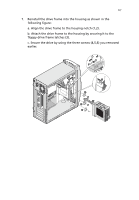
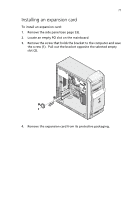
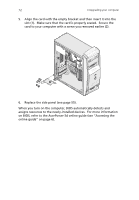
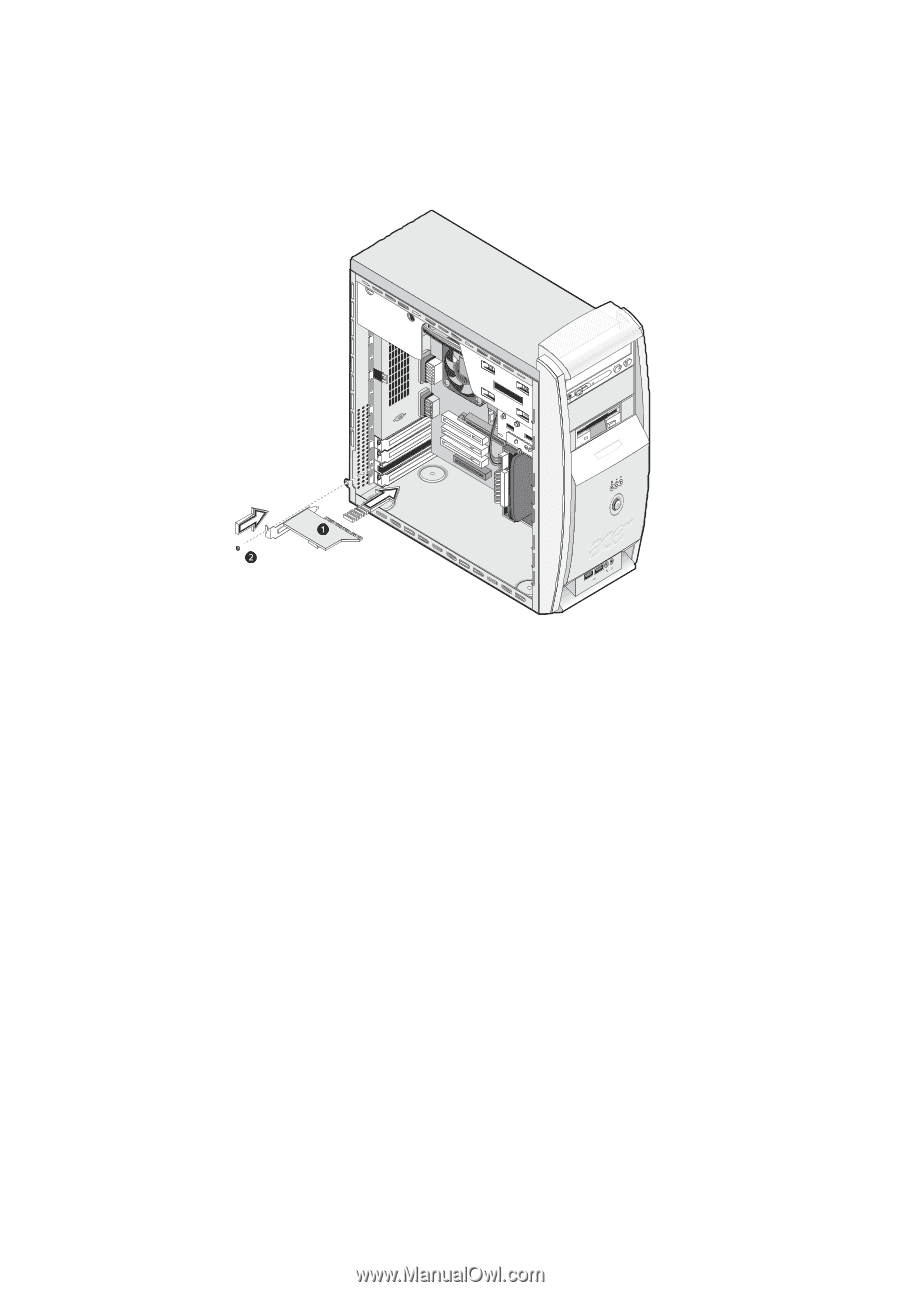
72 4 Upgrading your computer 5. Align the card with the empty bracket and then insert it into the slot (1). Make sure that the card is properly seated. Secure the card to your computer with a screw you removed earlier (2). 6. Replace the side panel (see page 55). When you turn on the computer, BIOS automatically detects and assigns resources to the newly-installed devices. For more information on BIOS, refer to the AcerPower Sd online guide (see "Accessing the online guide" on page 6).
-
 1
1 -
2
-
3
-
4
-
5
-
6
-
7
-
8
-
9
-
10
-
11
-
12
-
13
-
14
-
15
-
16
-
17
-
18
-
19
-
20
-
21
-
22
-
23
-
24
-
25
-
26
-
27
-
28
-
29
-
30
-
31
-
32
-
33
-
34
-
35
-
36
-
37
-
38
-
39
-
40
-
41
-
42
-
43
-
44
-
45
-
46
-
47
-
48
-
49
-
50
-
51
-
52
-
53
-
54
-
55
-
56
-
57
-
58
-
59
-
60
-
61
-
62
-
63
-
64
-
65
-
66
-
67
-
68
-
69
-
70
-
71
-
72
-
73
-
74
-
75
-
76
-
77
-
78
-
 79
79 -
 80
80 -
 81
81 -
 82
82 -
 83
83 -
 84
84 -
 85
85 -
 86
86 -
 87
87 -
 88
88 -
 89
89 -
90
-
91
-
92
-
93
-
94
-
95
-
96
-
97
-
98
-
99
-
100
 |
 |
4 Upgrading your computer
72
5.
Align the card with the empty bracket and then insert it into the
slot (1).
Make sure that the card is properly seated.
Secure the
card to your computer with a screw you removed earlier (2).
6.
Replace the side panel (see page 55).
When you turn on the computer, BIOS automatically detects and
assigns resources to the newly-installed devices.
For more information
on BIOS, refer to the AcerPower Sd online guide (see “Accessing the
online guide” on page 6).